1stwebdesigner |

- How to Create Sleek Sliding Box Effect With jQuery
- jQuery for Complete Beginners: Part 3
- 7 Things Designer Can Learn From Girls
| How to Create Sleek Sliding Box Effect With jQuery Posted: 21 Apr 2010 02:34 PM PDT
If you want to follow along with the source files, you can download them by clicking here (*.zip archive). You can also take a look at the final demo here. Step 1: Preparing our HTML, CSS & JS files
Now we are ready for step 2. Step 2: Preparing the html file structureFirst we need to include the files we created in the previous step, into the header part of our HTML. Let’s begin with the css file : <link rel="stylesheet" type="text/css" href="style.css" /> Now we'll attach the latest version of jQuery from Google's AJAX Libraries repository: <script type="text/javascript" src="http://ajax.googleapis.com/ajax/libs/jquery/1.4.2/jquery.min.js"></script> And now the last thing is our javascript file : <script type="text/javascript" src="script.js"></script> Now our header should look this: <strong> </strong> <head> <script type="text/javascript" src="http://ajax.googleapis.com/ajax/libs/jquery/1.4/jquery.min.js"></script> <script type="text/javascript" src="script.js"></script> <link rel="stylesheet" type="text/css" href="style.css" /> </head> Now we will start with our body elements: We’re going to create 6 div’s because we will apply 6 different animations. <div id="top-left" class="wrap"> <img src="img/back.jpg" /> <img src="img/front.jpg" class="front" /> </div> <div id="top-center" class="wrap"> <img src="img/back.jpg" /> <img src="img/front.jpg" class="front" /> </div> <div id="bottom-center" class="wrap"> <img src="img/back.jpg" /> <img src="img/front.jpg" class="front" /> </div> <div id="left" class="wrap"> <img src="img/back.jpg" /> <img src="img/front.jpg" class="front" /> </div> <div id="right" class="wrap"> <img src="img/back.jpg" /> <img src="img/front.jpg" class="front" /> </div> <div id="top-right" class="wrap"> <img src="img/back.jpg" /> <img src="img/front.jpg" class="front" /> </div> Explanation: I used 6 div’s with different id’s (each id refers to where the animation starts ) and with the same class (wrap class) so we can add some styles to each one with css. Each div contains 2 images : the front and back images. Here is the images I used : Step 3: Let’s add some CSS !Now head over to your css file, we will begin with wrap class : .wrap { float:left; position:relative; width:300px; height:150px; margin:20px; overflow:hidden; } To have our images positioned one next the other we have to use the float left technique. I used the a margin of 20px to have some space between our images, next I set a width of 300px and a height of 150px . Also you have to set the position of this element to relative and a hidden overflow so anything that goes below or higher than the height that we put will be hidden. CSS for Images : img { top:0; left:0; position:absolute; } We set our images to absolute and their top and left positions to 0. Step 4: The essential part : jQueryWe’re going to start with the jQuery's main function: $(document).ready(function(){ // animation code will be written here }); Now we are going to add the animation for the first div ( #top-left ) : $(document).ready(function(){ $('#top-left').hover(function(){ $(this).children('.front').stop().animate({'top' : '150px', 'left' : '300px'}, 500); },function(){ $(this).children('.front').stop().animate({'top' : '0px', 'left' : '0px'}, 500);}); }); Explanation: To obtain the other effects you have to change the left and top positions. Here is all the effects I used : $(document).ready(function(){ $('#top-left').hover(function(){ $(this).children('.front').stop().animate({'top' : '150px', 'left' : '300px'}, 500); }, function(){$(this).children('.front').stop().animate({'top' : '0px', 'left' : '0px'}, 500);}); $('#top-center').hover(function(){ $(this).children('.front').stop().animate({'top' : '150px'}, 500); }, function(){$(this).children('.front').stop().animate({'top' : '0px', 'left' : '0px'}, 500);}); $('#bottom-center').hover(function(){ $(this).children('.front').stop().animate({'top' : '-150px'}, 500); }, function(){$(this).children('.front').stop().animate({'top' : '0px', 'left' : '0px'}, 500);}); $('#left').hover(function(){ $(this).children('.front').stop().animate({'left' : '300px'}, 500); }, function(){$(this).children('.front').stop().animate({'top' : '0px', 'left' : '0px'}, 500);}); $('#right').hover(function(){ $(this).children('.front').stop().animate({'left' : '-300px'}, 500); }, function(){$(this).children('.front').stop().animate({'top' : '0px', 'left' : '0px'}, 500);}); $('#top-right').hover(function(){ $(this).children('.front').stop().animate({'top' : '150px','left' : '-300px'}, 500); }, function(){$(this).children('.front').stop().animate({'top' : '0px', 'left' : '0px'}, 500);}); }); That's it !Thanks for following this tutorial. I hope you liked it and could follow it step by step. If you've done everything correctly, you should have ended up with something like this. If you have any problem or you need some help feel free to write your question or request into the comments section. |
| jQuery for Complete Beginners: Part 3 Posted: 21 Apr 2010 07:09 AM PDT
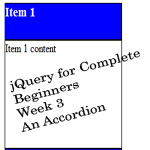
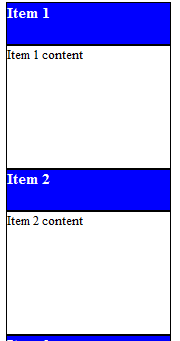
An accordion is a very good way of showing lots of content in a small area. You might have five headers, each with a paragraph below it. Showing all that at once is going to go down for a long way. With the accordion, only one paragraph is shown at a time, and users can click on the headers to view the content they wish. First we will build a simple one and then we will animate it. You’ll see just how many built-in functions jQuery includes that makes our lives much easier. You can see the online demo here. Firstly I set up the accordion itself: <h3>Item 1 <p>Item 1 content</p> <h3>Item 2 <p>Item 2 content</p> <h3>Item 3 <p>Item 3 content</p> <h3>Item 4</h3> <p>Item 4 content</p> And then just some very basic CSS to make it look a bit clearer: p,h3 {margin: 0; padding: 0;} p {height: 150px; width: 200px; border: 1px solid black;} h3 {height: 50px; width: 200px; background-color: blue; color: white; border: 1px solid black;} This leaves us with something similar to this. I’ve only taken a picture of the first two items to save space, and besides, the next two are identical.
Now we can get onto the JavaScript. Include jQuery from the google CDN, add your script tags to the bottom of your page and away we go: var headings = $('h3'), paras = $('p'); All I am doing here is selecting all the heading 3 elements and all the paragraphs, and saving them to two arrays. Note the syntax, I could have done this: var headings = $('h3'); var paras = $('p'); However I find it quicker to just put a comma between them and emit one of the ‘var’s. It’s also more commonly done that way. Once we’ve done that we now need to hide all but the first paragraph. This is done like so, using a function eq(): paras.hide().eq(0).show(); First I hide all the paragraphs and then use eq(0) to select the ‘0th’ element of the ‘paras’ array. In JavaScript (and most languages) arrays start from 0, so 0 will select the first element. Using eq(1) would select the second element. I then use jQuery’s show() function show the first one. This leave us with something like this:
And now we can write the code for hiding and showing. Firstly, we need to add a click event to our headers: headings.click(function() { }); And we can write the code to go in it: var cur = $(this); //save the element that has been clicked for easy referal cur.siblings('p').hide(); //hide all the paragraphs cur.next('p').show(); //get the next paragraph after the clicked header and show it Lets go through this line by line: var cur = $(this); Here we take the value of ‘this’ and wrap it in the jQuery object before saving it to a variable ‘cur’. ‘this’ refers to the current element being interacted with. In this case, it’s the heading element that has been clicked. cur.siblings('p').hide(); The jQuery siblings() function finds all elements on the same level as the current element. Here we find all the siblings of the current element that are paragraphs and hide them. So now we know that there are no paragraphs being shown. cur.next('p').show(); Finally we use jQuery’s next() function. This finds the next element from the one we have selected. In this case it finds the next paragraph and shows it. And we’re done! If you try that in your browser, it works fine. However, seeing as jQuery gives us loads of animation functions, lets put a couple of those to use. The two functions we will use are slideUp() and slideDown(). These do exactly what you would imagine, they animate an element sliding up until it’s gone, and then sliding it back down. In our click function that we wrote: headings.click(function() { var cur = $(this); //save the element that has been clicked for easy referal cur.siblings('p').hide(); //hide all the paragraphs cur.next('p').show(); //get the next paragraph after the clicked header and show it }) Replace the hide() function with slideUp() and the show() function with slideDown(): headings.click(function() { var cur = $(this); //save the element that has been clicked for easy referal cur.siblings('p').slideUp(); //hide all the paragraphs cur.next('p').slideDown(); //get the next paragraph after the clicked header and show it }) And try now. Is it not beautiful? That just about sums it up for this week. We’ve taken things discussed in the previous two weeks and put them together. We’ve also met another couple of functions to add to your jQuery repertoire. |
| 7 Things Designer Can Learn From Girls Posted: 20 Apr 2010 11:14 PM PDT
So I had chat with some girls from which I came to know following points that designer can always follow & learn from girls. 1. Time Management
Photo By Chris Gilbert In comparison to guys, gals are very scheduled in everything they do, they have fix time for various task they perform whole day. Designer can learn time management from girls as whenever designer get involved in any project they don’t track time and end up giving more time than usual in their work, which make them less efficient & unproductive. On other hand girls plan their day in advance, they have their own to-do list which they follow very strictly.Many designer face similar problem of spending huge amount of time on recreational web surfing as searching for inspiration for their work, they should limit this time & should remain focus with their work rather than getting distracted. 2. Experimentation
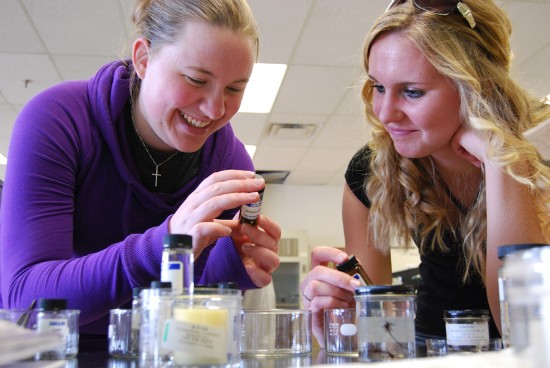
Photo By Redeemer University Girls are always experimenting with their look, closet, hair & many other things. In one way or the other they try out things in different ways. By experimenting they keep themselves look fabulous always. Lady Gaga is a good example of getting success with experimenting different looks. In the same way designers also need to experiment with their design rather than just sticking with same methods. Experimentation is very important as people are now open to new ideas & concepts. 3. Color Theory
Photo By Katie scrapbook lady Girls are particular about their clothes, make-up, accessories, shoes, etc. When you see a girl perfectly dressed, you can easily notice different colors they are wearing, being a designer you can easily find out that they are really good at color combination & patterns. They perfectly wear different colors all around them & carry them off with style. So as a designer you can always look upon girls for inspiration, where you will get lots of idea about color schemes, color palettes & patterns, which you can implement in your next design project. 4. Socializing
Photo By Sagar Patil Girls easily adjust themselves in new environment, it’s all because they are very talkative in nature & are great social animals. As they make new friends easily & quickly, it all start with a “hi” which ends up creating friends. In design community socializing is really important & designer can always learn a thing or two from girls about socializing. 5. Organization
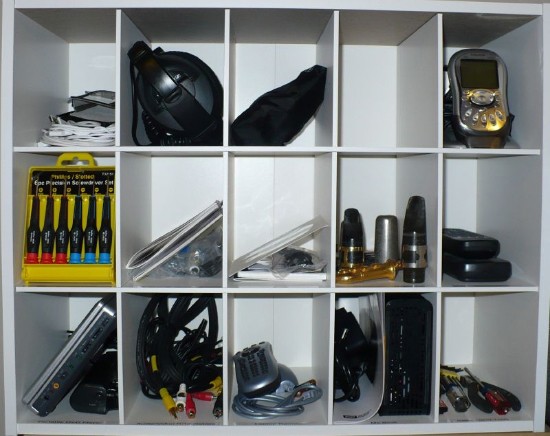
Photo By David Reber If you have seen a girls wardrobe you would definitely understand what I mean by learning organization from girls. There are tonnes of things in their room like 100’s of handbags, 1000s of shoes & the list never ends. But whenever they want anything they have quick access to it without loosing anytime. In the same way designer always have huge digital data in their computer which needs to be organized all the time. 6. Bargaining
Photo By Rave Master Bargaining does not always involve money, but its a kind of negotiation. Girls are really good at negotiating in every kind of situations like shopping, winning in conversation with guys, etc. On other hand designer can use this technique of bargaining with their clients or boss about their design where they can save lots of effort without compromising on creativity. 7. Creativity
Photo By Raja R I am not wrong if I say Girls are most creative creature on the planet, most of the people will agree with this. Girls don't like things to be simple they always want something to be added & do things different so they can get noticed. Even designers need to be creative with their work, which will give them an edge over others that will give them a good recognition. Whenever as a designer you feel low on inspiration & ideas I suggest have a good look at girls & ask them for suggestion, you will definitely get lots of good ideas that will help you get a boost in your creativity. Please Comment & Share your thoughts. Thumbnail Photo By Harthill South |


| You are subscribed to email updates from Graphic and Web Design Blog To stop receiving these emails, you may unsubscribe now. | Email delivery powered by Google |
| Google Inc., 20 West Kinzie, Chicago IL USA 60610 | |
0 comments:
Post a Comment