Line25 |

| Build a Simple Image Slideshow with jQuery Cycle Posted: 19 Apr 2010 12:00 AM PDT Image slideshows are a popular method of displaying numerous sequential photographs in web design. By making use of the handy Cycle plugin for jQuery, we can easily create a slideshow of our own, complete with previous and next navigation controls. Not a master of Javascript? Don’t worry, the Cycle plugin makes it a breeze to add slideshow functionality to your site, with only a few lines of code required to get things up and running.
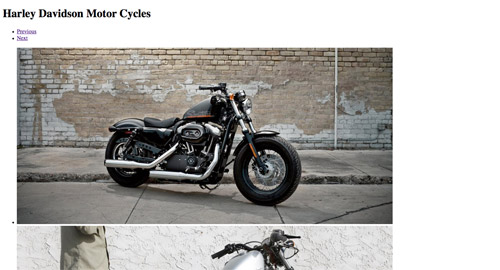
It’s my goal to one day own a Harley Davidson Sportster, but until that dream day comes, I’ll have to settle with drooling over a bunch of photos. To make my dreaming easier, let’s build a simple slideshow that automatically fades through a small collection of Sportster shots. Previous and next controls would also be handy, to give me the control to navigate between shots are my own pace. Here’s the final slideshow we’ll be building in the following steps.
The PSD concept
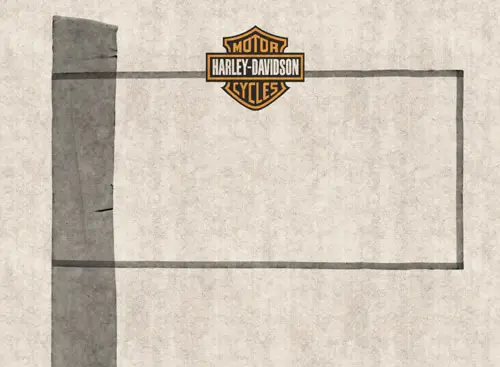
Create a new Photoshop document and fill the background with a rough and grungey texture. This one I’m using is from the great collection from the Circlebox Blog. Place in a copy of the Harley Davidson logo and change the blending mode to Multiply to allow the graphic to interact with the texture.
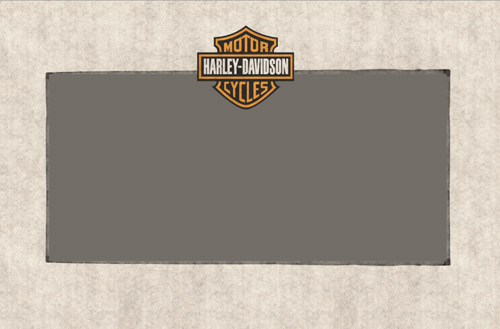
Use a series of tape brushes to create a rough border to house the photography. Paint the brush mark, then use a Layer Mask to thin the border down. Draw a path around any excess and delete.
Draw a rectangle and fill with a temporary colour. Move this into place to simulate where the photography will sit in relation to the overall design.
Switch over to Adobe Illustrator to quickly draw a navigation arrow. Begin with a square and rotate it by 45 degrees, then delete out one of the side points. Add a thick stroke to the shape, selecting the round cap and corner options.
Draw a black circle back in Photoshop, then paste the arrow from Illustrator. CMD-Click the arrow layer’s thumbnail to load the selection, then delete this selection from the circle background. Reduce the opacity of the button to 50% to allow the underlying photos to show through.
Next, find a bunch of shots to fill the slides of your slideshow. Open them up in Photoshop and crop them to size according to the slideshow dimensions. Use the temporary shape to load the required selection.
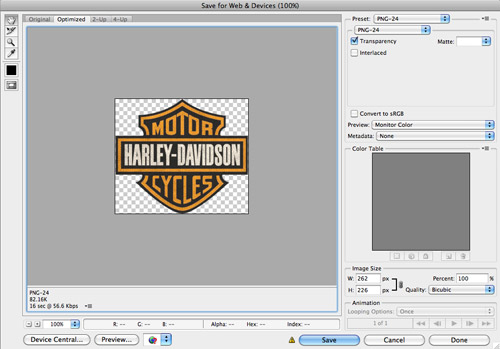
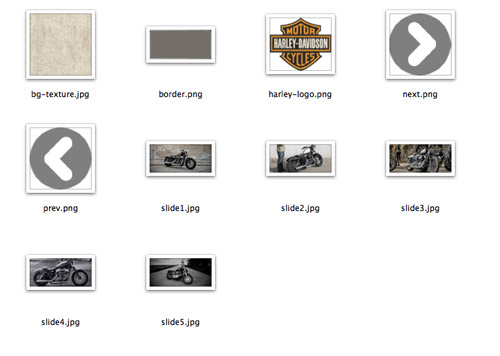
Begin exporting all the image files from the concept. Elements such as the logo, border and buttons can make use of the PNG-24 transparency option.
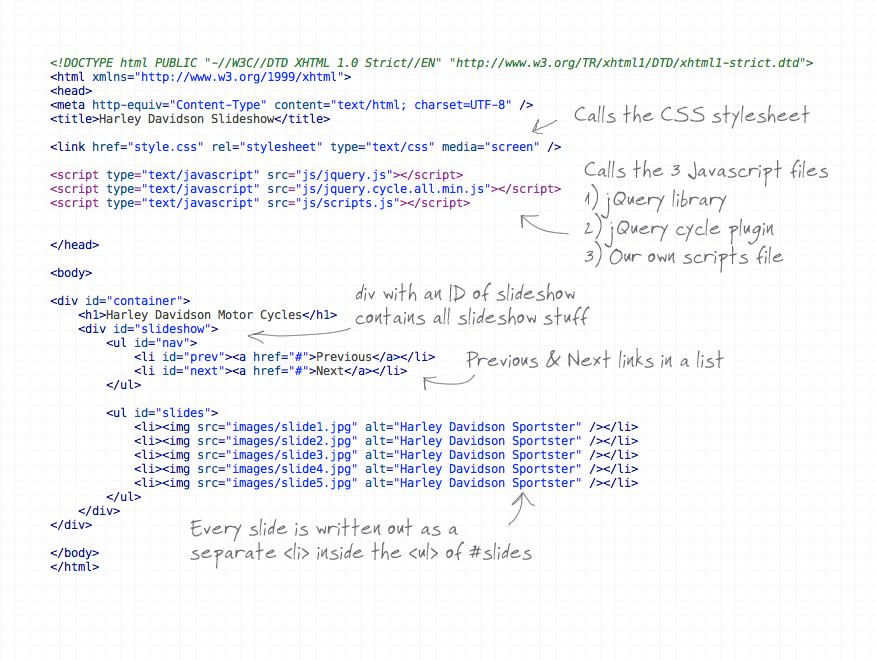
The final image collection consists of the background texture, the slideshow border, Harley logo, navigation buttons and five image slides. The HTML structure<!DOCTYPE html PUBLIC "-//W3C//DTD XHTML 1.0 Strict//EN" "http://www.w3.org/TR/xhtml1/DTD/xhtml1-strict.dtd"> <html xmlns="http://www.w3.org/1999/xhtml"> <head> <meta http-equiv="Content-Type" content="text/html; charset=UTF-8" /> <title>Harley Davidson Slideshow</title> <link href="style.css" rel="stylesheet" type="text/css" media="screen" /> </head> <body> <div id="container"> </div> </body> </html> Create a new HTML document in your coding application of choice. We’ll need the usual framework of Doctype, referenced CSS file and a container div to get things started. <h1>Harley Davidson Motor Cycles</h1> <div id="slideshow"> <ul id="nav"> <li id="prev"><a href="#">Previous</a></li> <li id="next"><a href="#">Next</a></li> </ul> <ul id="slides"> <li><img src="images/slide1.jpg" alt="Harley Davidson Sportster" /></li> <li><img src="images/slide2.jpg" alt="Harley Davidson Sportster" /></li> <li><img src="images/slide3.jpg" alt="Harley Davidson Sportster" /></li> <li><img src="images/slide4.jpg" alt="Harley Davidson Sportster" /></li> <li><img src="images/slide5.jpg" alt="Harley Davidson Sportster" /></li> </ul> </div>
Next, the main HTML markup for the slideshow can be written out. First up, the logo would fit well as a header 1, seeing as there’s no other title on the page. Then the slideshow elements are contained in a Style the CSS body, h1, ul, li { margin: 0; padding: 0; border: 0; } body { background: #e8dbcb url(images/bg-texture.jpg); } #container { width: 1095px; margin: -40px auto; position: relative; } h1 { width: 262px; height: 226px; margin: 0 auto; position: relative; top: 100px; background: url(images/harley-logo.png); text-indent: -9999px; z-index: 10; }
With the HTML structure in place, we can now add some visual styling with CSS. Begin with some general formatting such as a browser reset, then we can add the background texture to the body and centralise the container div. Because we’ll be using relative positioning and z-index on the child elements, the container will also need declaring as div#slideshow { width: 1083px; height: 518px; padding: 15px 0 0 12px; background: url(images/border.png); overflow: scroll; /* Allows the slides to be viewed using scrollbar if Javascript isn't available */ position: relative; z-index: 5; }
We can now add the bulk of our CSS styling to the slideshow If the user doesn’t have Javascript enabled, the long list of image slides could easily break the layout of any website design, so adding div#slideshow ul#nav { display: none; list-style: none; position: relative; top: 210px; z-index: 15; } div#slideshow ul#nav li#prev { float: left; margin: 0 0 0 40px; } div#slideshow ul#nav li#next { float: right; margin: 0 50px 0 0; } div#slideshow ul#nav li a { display: block; width: 80px; height: 80px; text-indent: -9999px; } div#slideshow ul#nav li#prev a { background: url(images/prev.png); } div#slideshow ul#nav li#next a { background: url(images/next.png); } div#slideshow ul#slides { list-style: none; } div#slideshow ul#slides li { margin: 0 0 20px 0; }
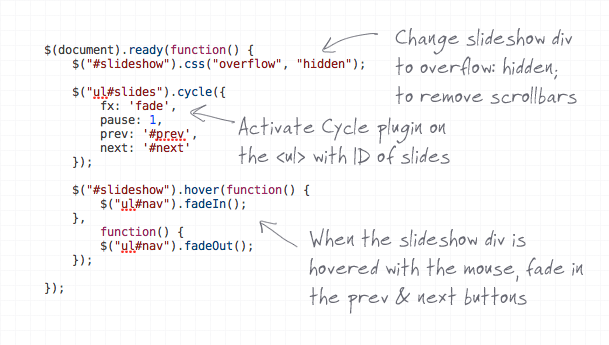
The Both the previous and next buttons are then moved into place and either floated to the left or right, and the child anchors are converted to buttons with the image replacement technique. Once the Finish off with jQuery<script type="text/javascript" src="js/jquery.js"></script> <script type="text/javascript" src="js/jquery.cycle.all.min.js"></script> <script type="text/javascript" src="js/scripts.js"></script> Once the basic structure and styling are in place, we can begin adding extra functionality and effects with Javascript. The jQuery library is my personal favourite, as it’s pretty simple to get the hang of with it having a similar syntax to CSS. Before writing any Javascript ourselves, we’ll need to reference some files back in the HTML. Download the jQuery library and the Cycle plugin, then create a blank Javascripts file named scripts.js, where we’ll add a few lines of our own code. $(document).ready(function() { }); In the $("#slideshow").css("overflow", "hidden"); Before getting to the slideshow functionality, we need to take care of some CSS. Remember the slideshow div that was set to $("ul#slides").cycle({ fx: 'fade', pause: 1, prev: '#prev', next: '#next' }); The syntax for activating the Cycle plugin is as simple as can be, just add $("#slideshow").hover(function() { $("ul#nav").fadeIn(); }, function() { $("ul#nav").fadeOut(); }); Finally, the navigation buttons can be given one extra fancy touch by configuring them to fade in and out whenever the user mouses over the slideshow area. This allows them to become visible when needed, but not distract away from the gorgeous Harley Sportsters! These few lines of jQuery simply say, when the slideshow div is hovered on and off by the user’s mouse, fade in and out the In summaryGet all that? When everything is combined together, there’s not much to it at all. Here’s the complete HTML, CSS and Javascript codes for reference.
|


| You are subscribed to email updates from Line25 To stop receiving these emails, you may unsubscribe now. | Email delivery powered by Google |
| Google Inc., 20 West Kinzie, Chicago IL USA 60610 | |
0 comments:
Post a Comment