In the right hands, Photoshop’s pen tool can be a very powerful tool for creating incredible; even photo realistic images. In today’s tutorial we will demonstrate how to draw a photo realistic USB cable in Photoshop.
Step 1
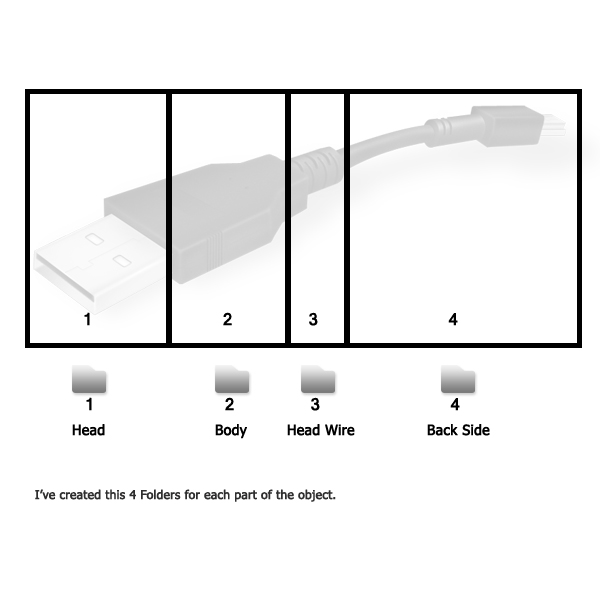
Open a New Document 1000 x 1000 pixels, Resolution: 72 dpi. This document will be created using approximately 60 layers. Organization is key. I have created 4 folders to organize my layers. See the image below.
Step 2
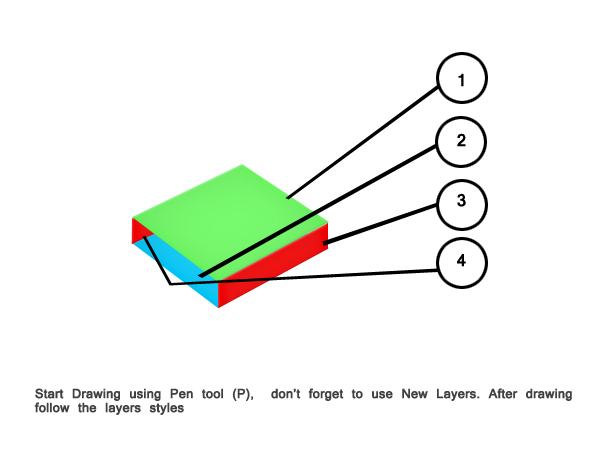
Take the Pen tool (P), draw the shapes below. Create New Layers for each part of the drawing.
Step 3
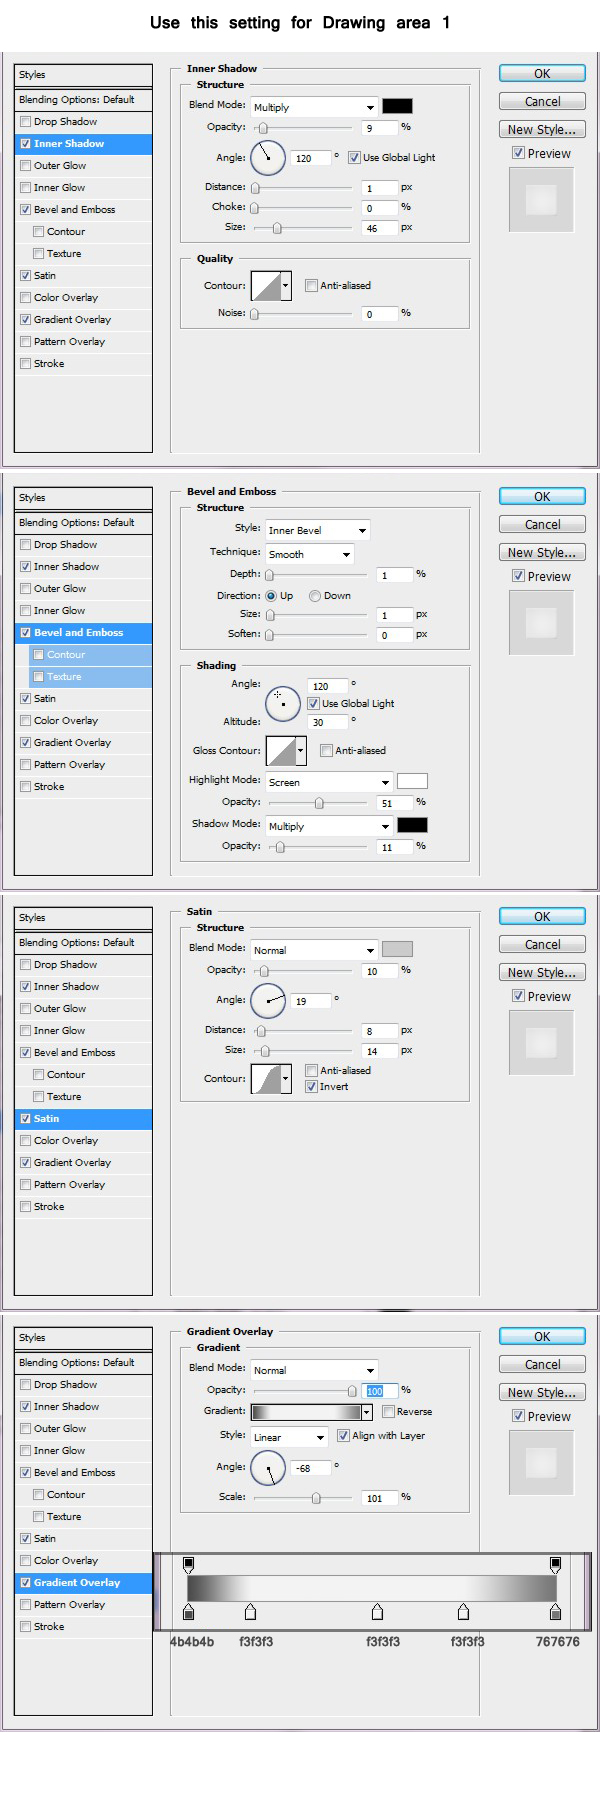
Use following Layer Styles for parts listed numerically.
Step 4
Copy this Layer Style & apply it to the other 3 drawing layers. For each layer you will need to change the angle of the Gradient Overlay, For Shape 2, use an angle of -59 degrees, for shape 3 & 4, use an angle of -51 degree. See the completed effect below.
Step 5
Now create the inner side of the Head. Again, use Pen tool. See the image below.
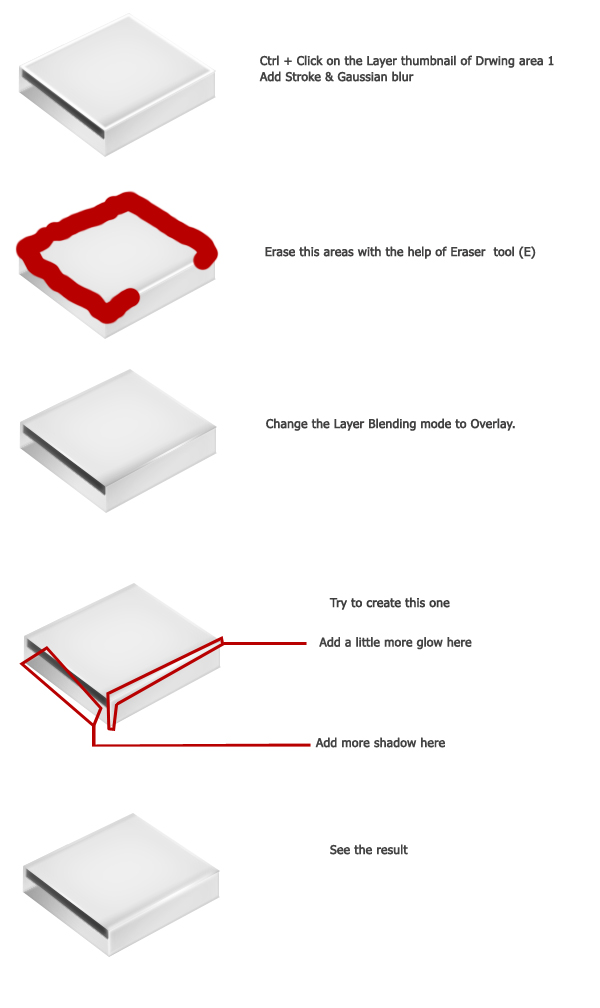
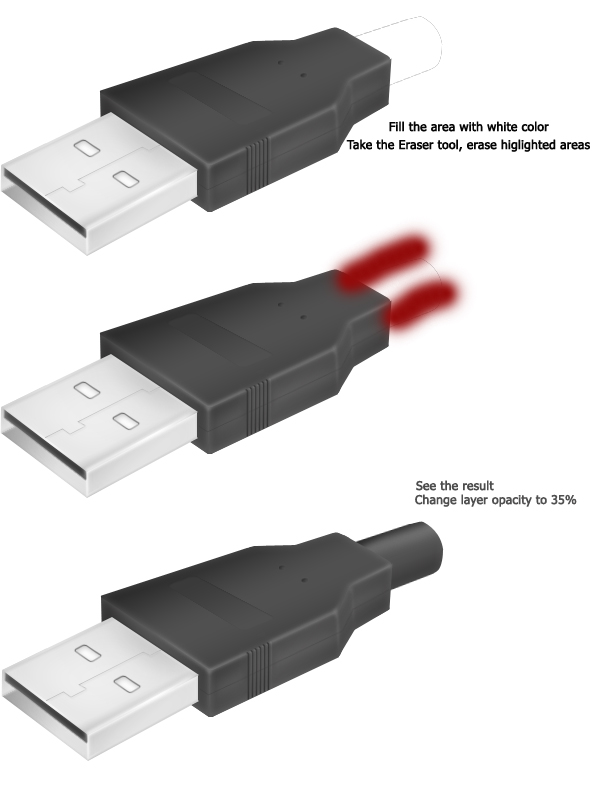
Step 6
Add detail to the Head of the USB Cable. Cmd + Click on the Layer thumbnail of Drawing area 1 (see step 2), go to Edit > Stroke, Width – 3px, Color – white, Location- center. Now go to Filter > Blur > Gaussian Blur, Radius- 0.6px. Take the Eraser tool (E), Brush Size- 100, Opacity- 50%, Flow- 100%. See the image below.
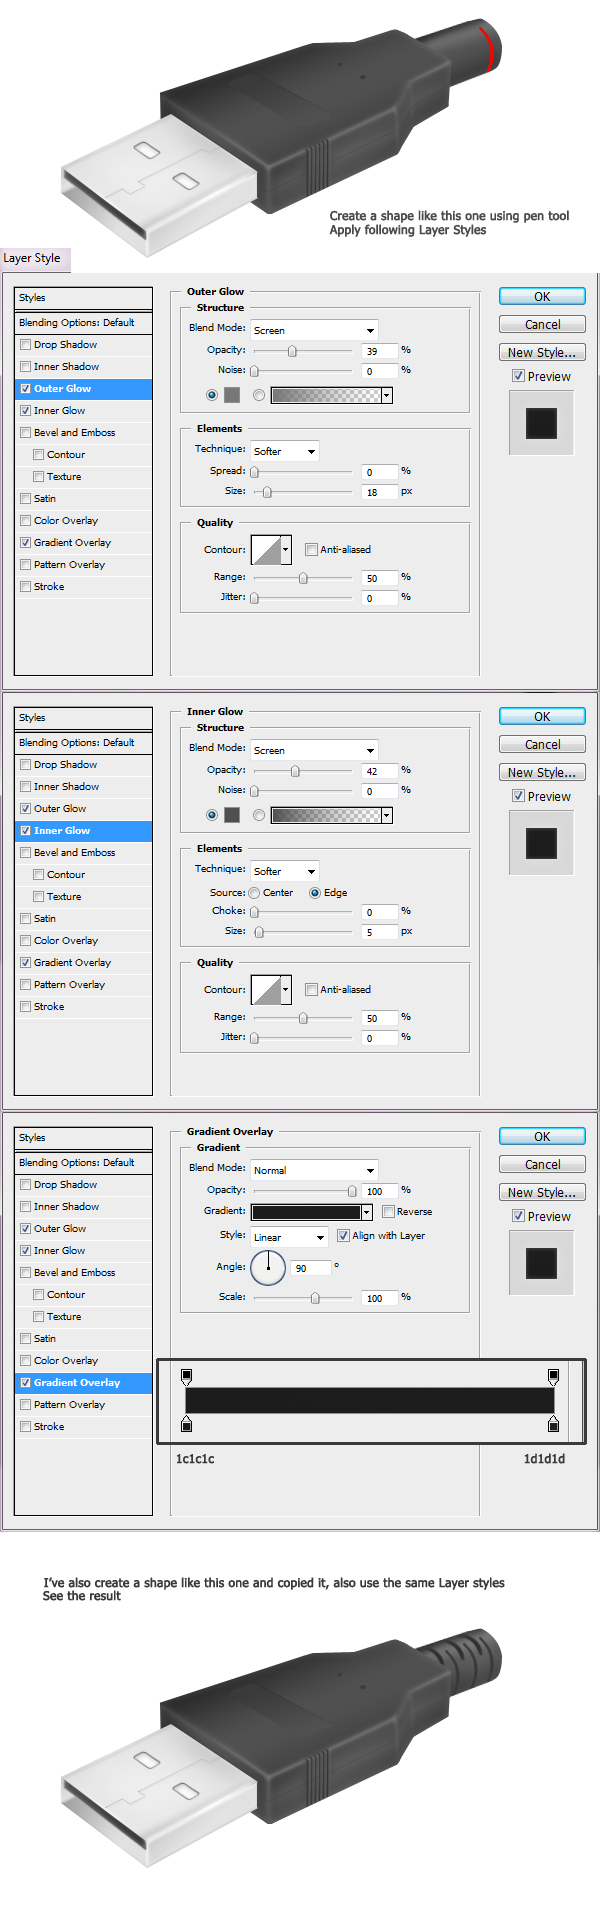
Step 7
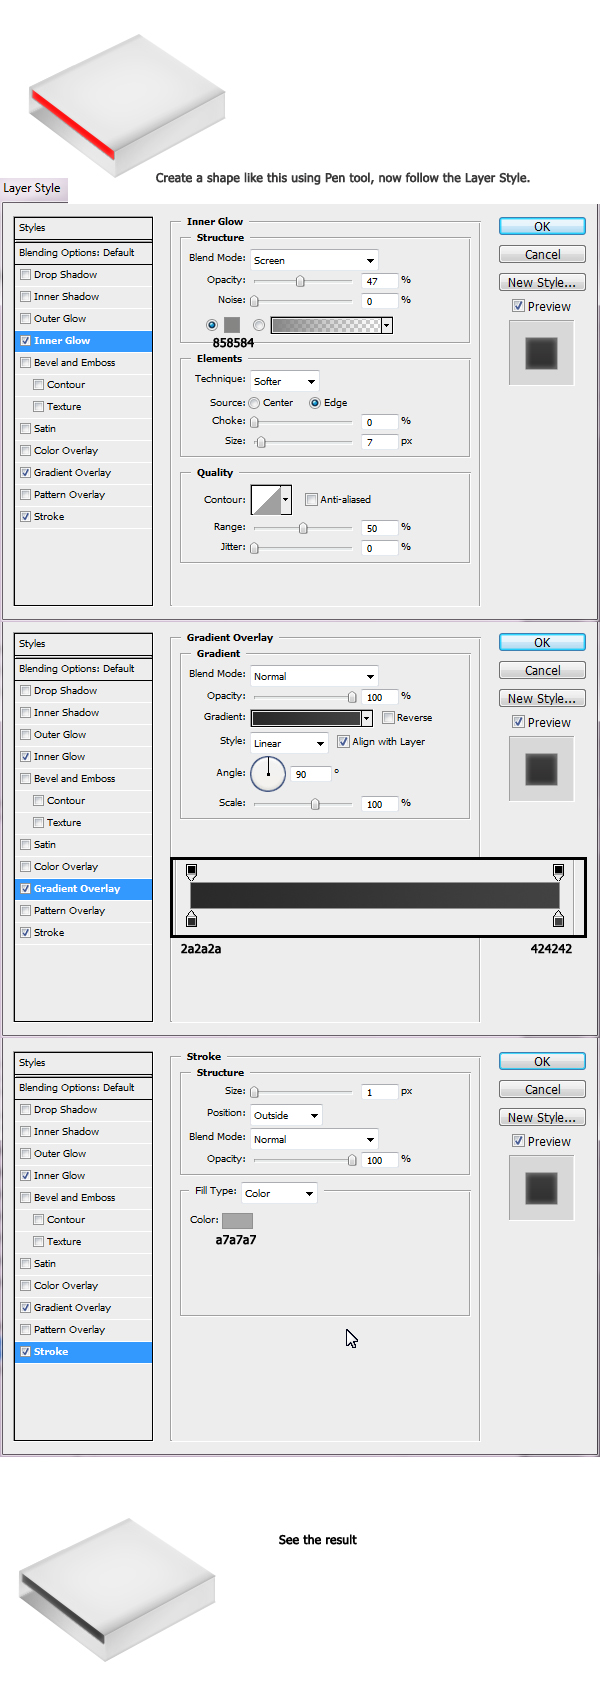
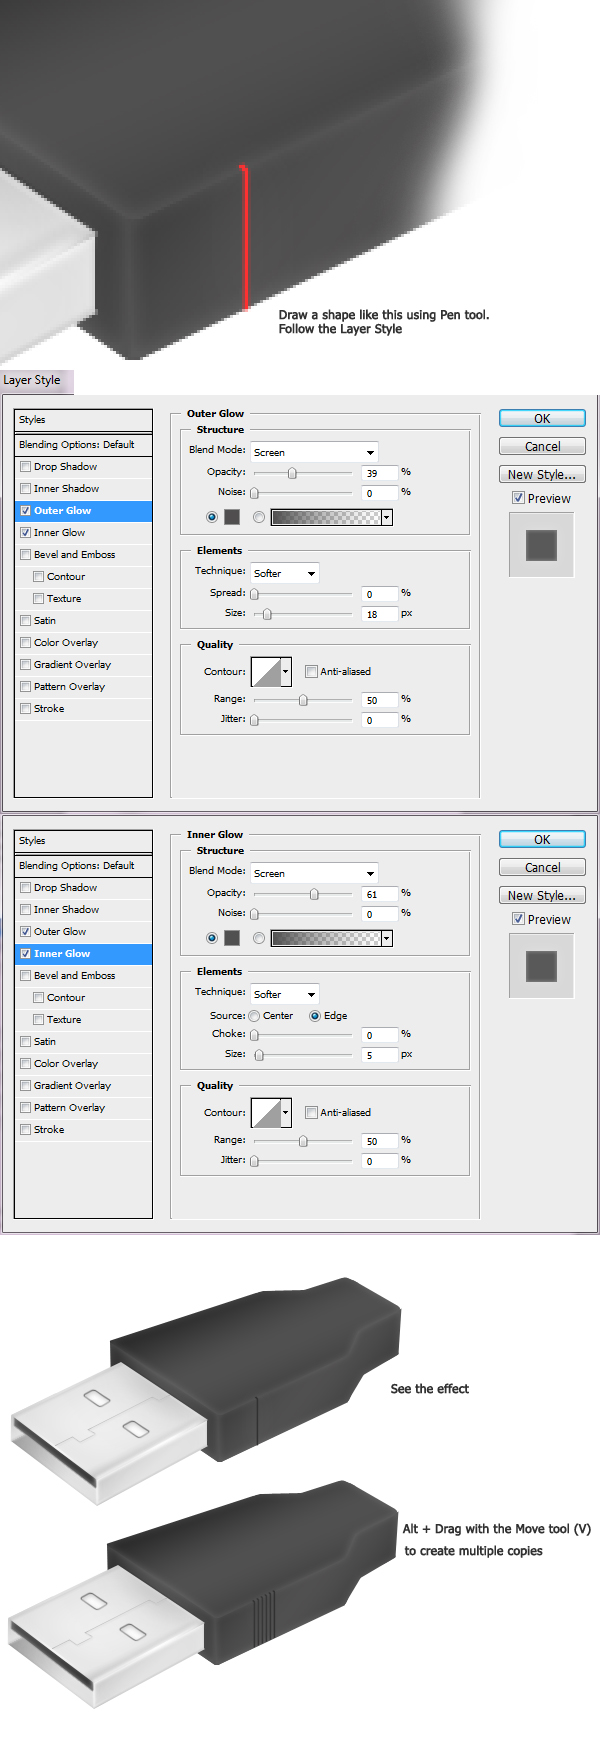
Again take the Pen tool and draw a shape like the one below. Then apply the following layer styles.
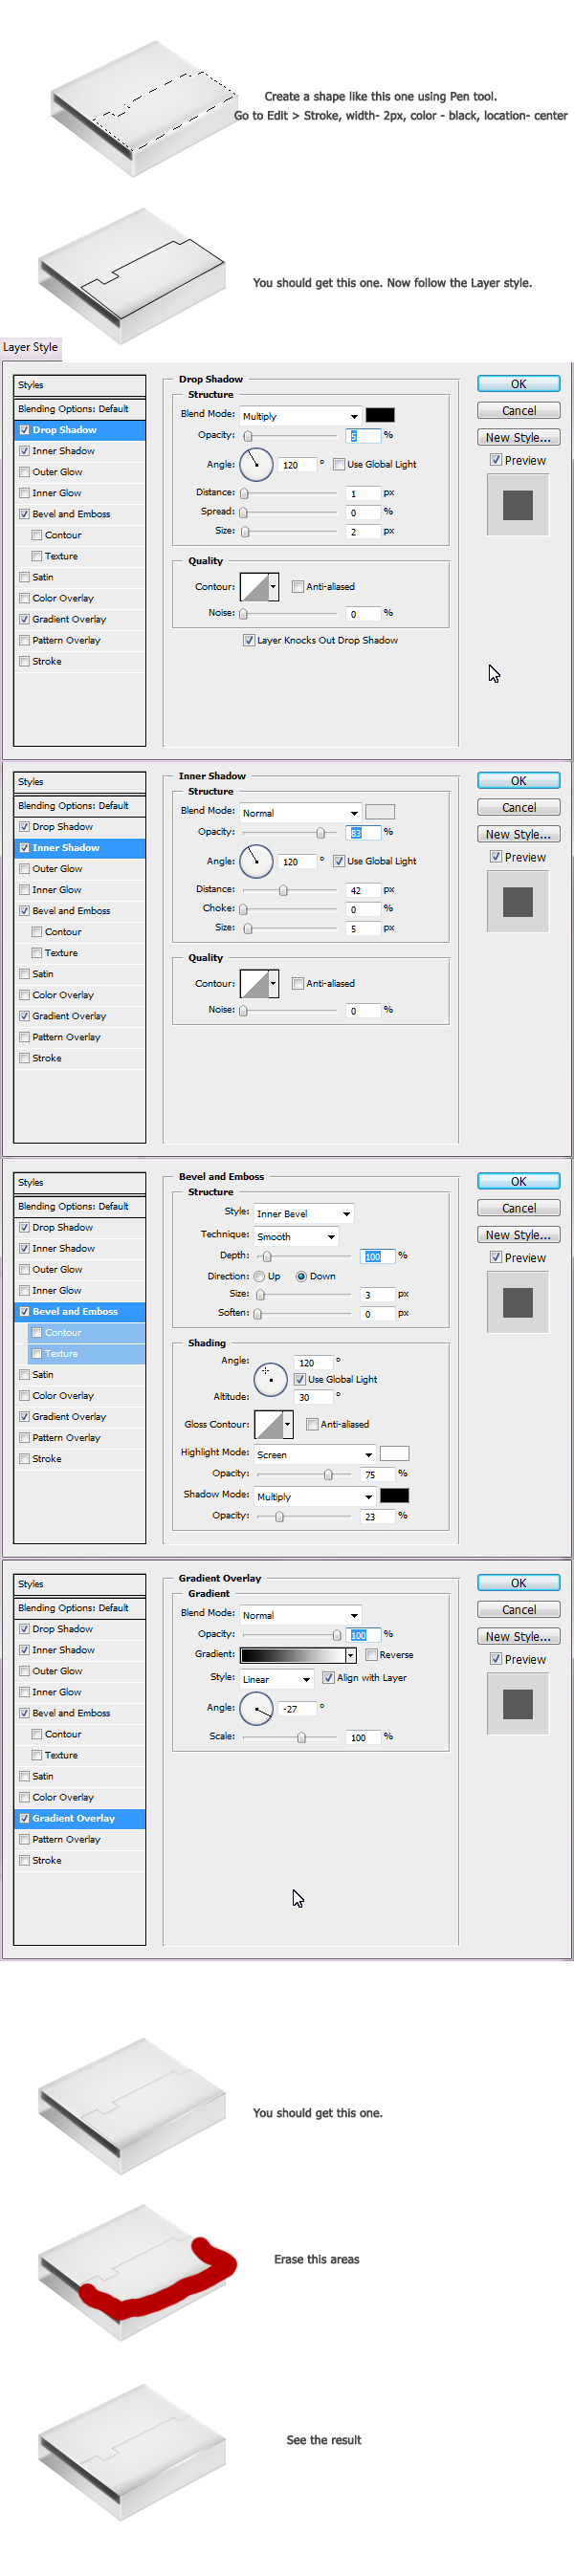
Step 8
Take the Pen tool and create a shape like this one, if you facing problems in creating the right shape you could also use the Add Anchor Point tool and the Direct selection tool for adjustment. You could also use Rounded Rectangle tool (U) for this one, after you create the shape hit Cmd + T to transform it. Once this is done apply the following layer styles.
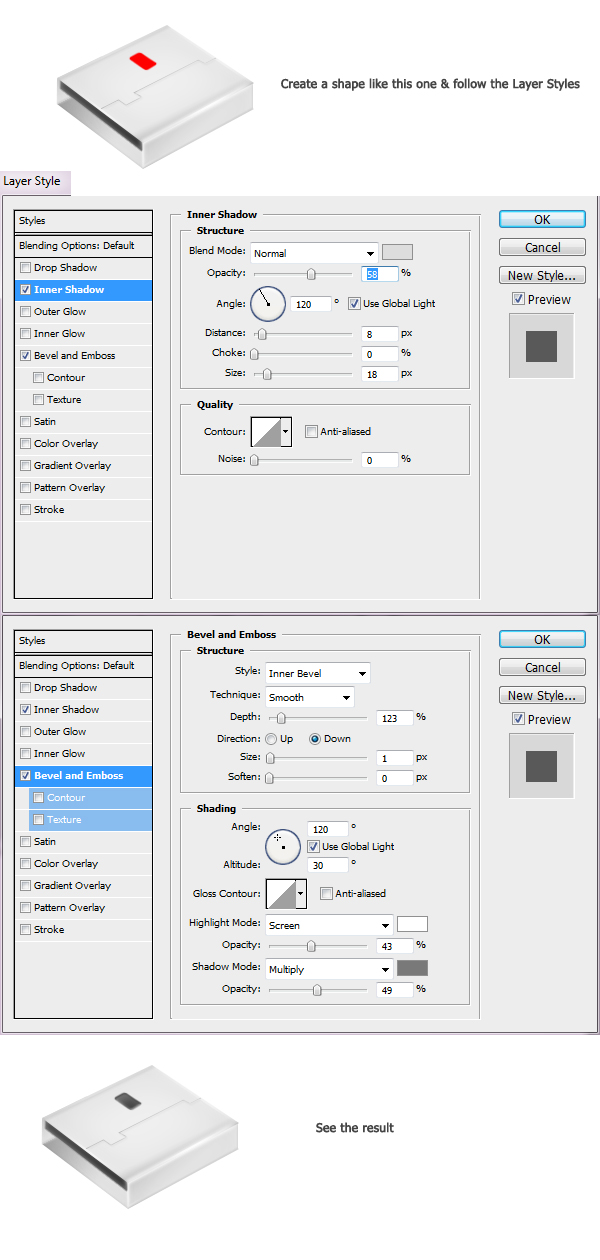
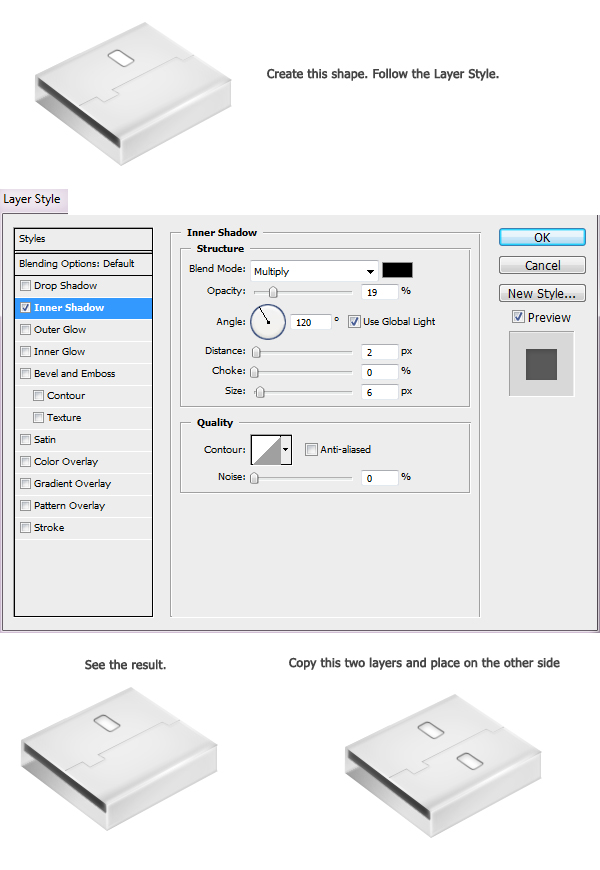
Step 9
Cmd + Click on the Layer thumbnail that we just created. Create a New layer, go to Select > Modify > Contract, Contract by 1px. Fill it with white color. Now follow the Layer styles. See the image below.
Step 10
Create a New Folder, name it "Head" as I described before in step 1 & place all of the layers into this. Now create a New layer below the "Head" folder. Take the Pen tool and create 3 the shapes shown below. Create a new layer for each part of the drawing.
Step 11
Copy this Layer Style & paste it onto the other 2 portions, change the Gradient Overlay Angle. For ‘Part 2′ use change the Angle to -35 degrees and for ‘Part 3′ use an Angle of 13 degrees.
Step 12
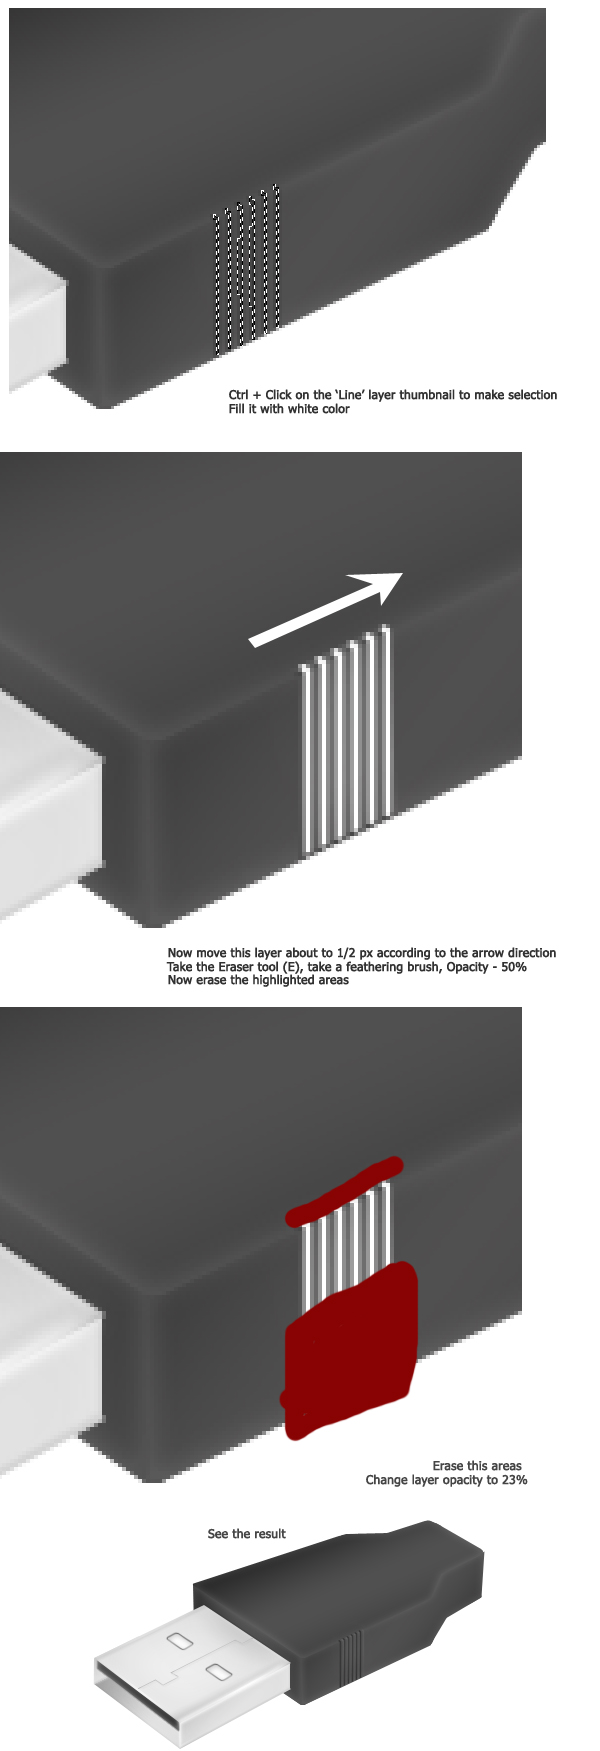
Now it is time to add some lines to the side of the ‘Body’. Create a New Layer and name it ‘Line’. Then create multiple copies as shown below.
Step 13
After creating the copies of the lines, select all of ‘Line’ layers and press Cmd + E to Merge the layers. Cmd + Click on the layer thumbnail of ‘Line’ to make selection. Create a new layer, fill the selection with white.
Step 14
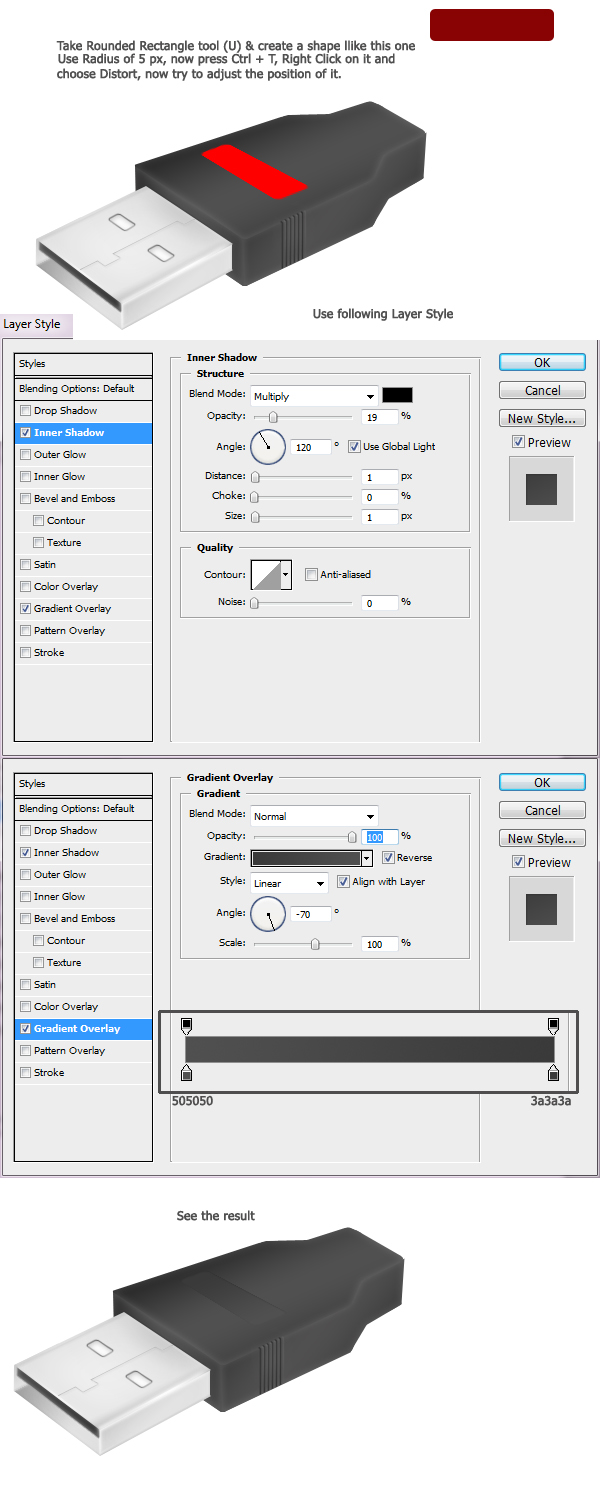
Use Rounded Rectangle tool to create a shape like the one described below & follow the instructions.
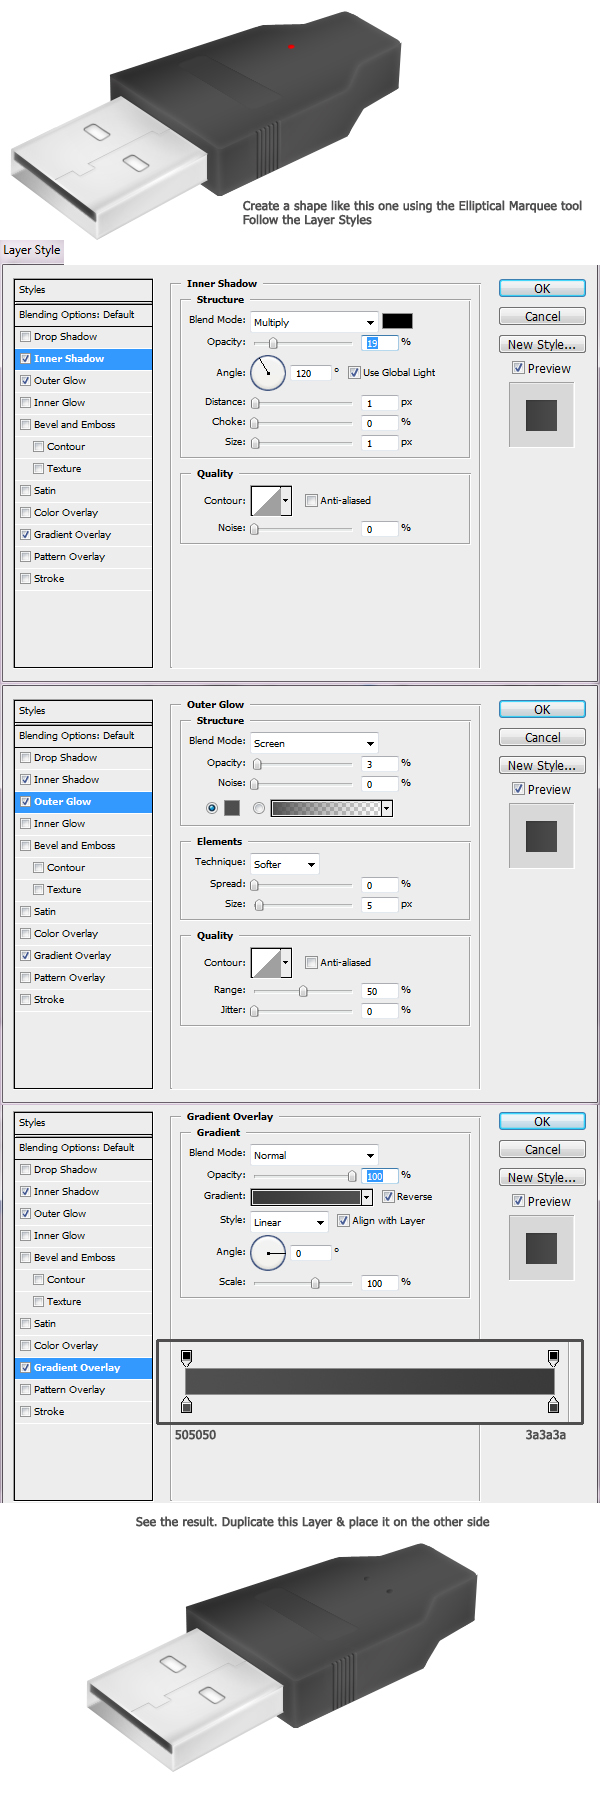
Step 15
Add more details to the ‘Body’. Take the Elliptical Marquee tool (M) and create a shape like the one described below, then apply layer styles.
Step 16
Take the Pen tool, create a shape as described below and then follow instructions.
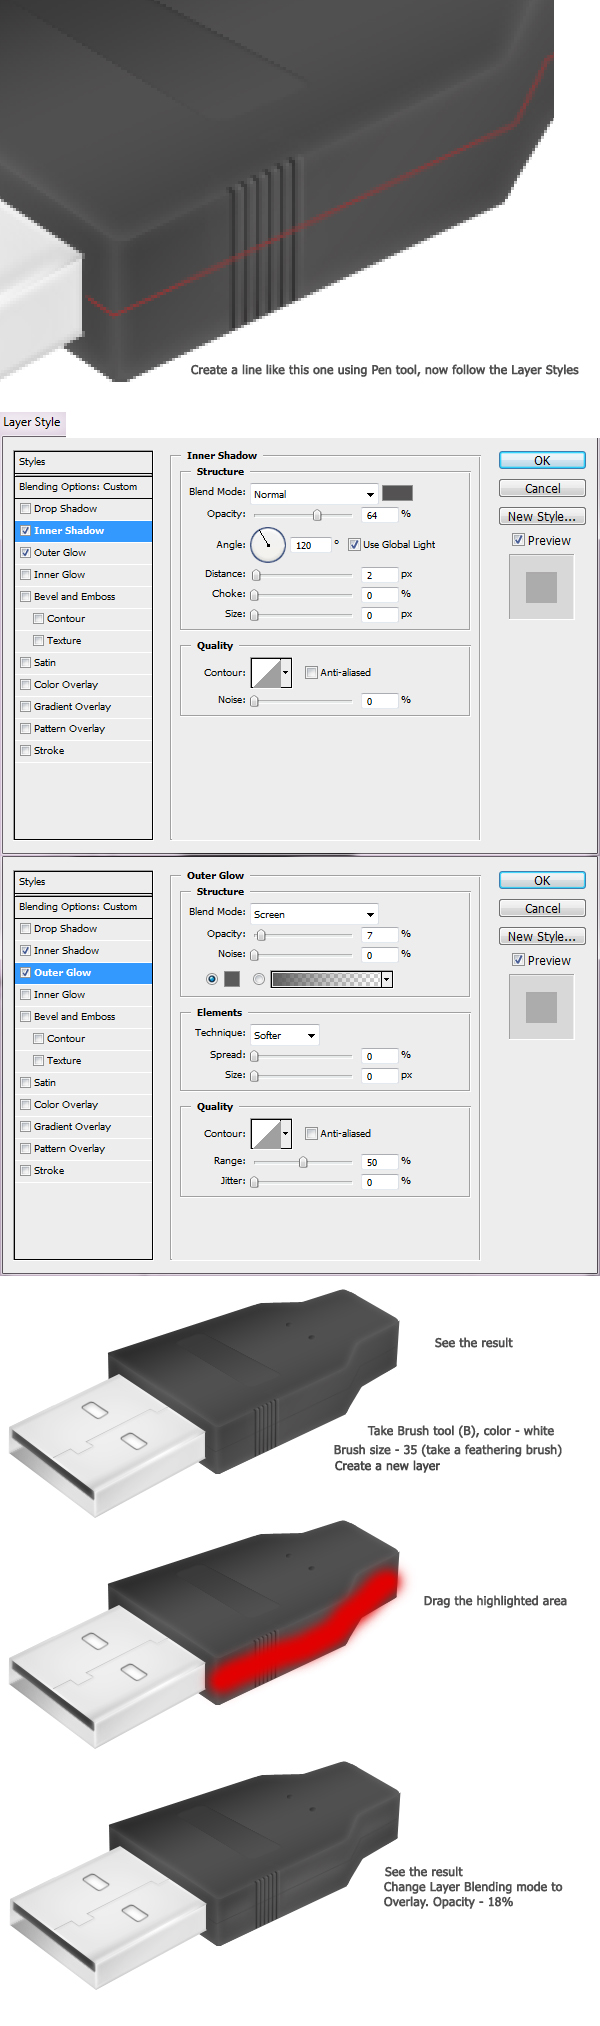
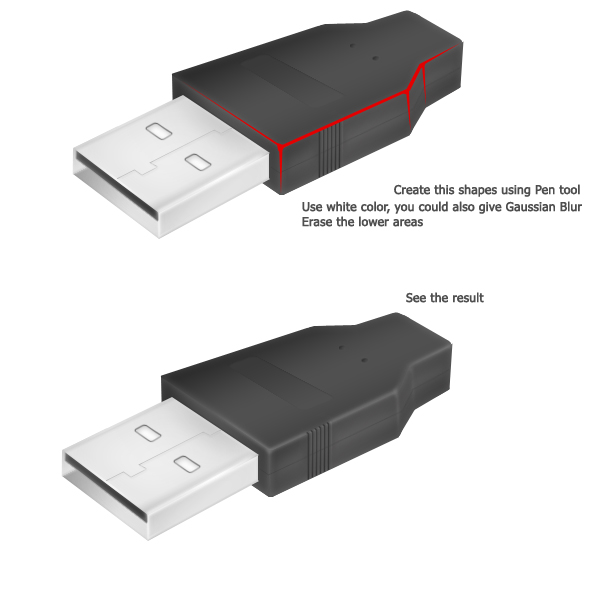
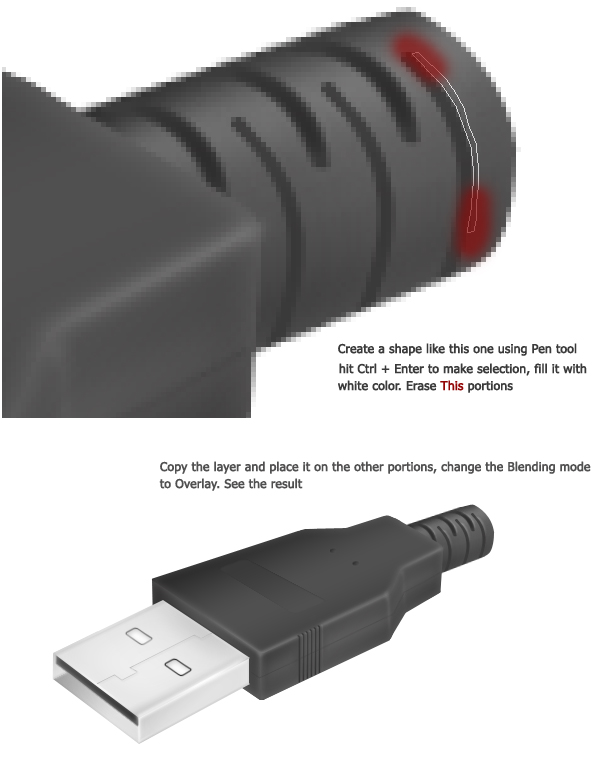
Step 17
Add some highlights to the ‘Body’ area. You can do this by drawing the shapes with the pen tool and by adding a Gaussian Blur.
Step 18
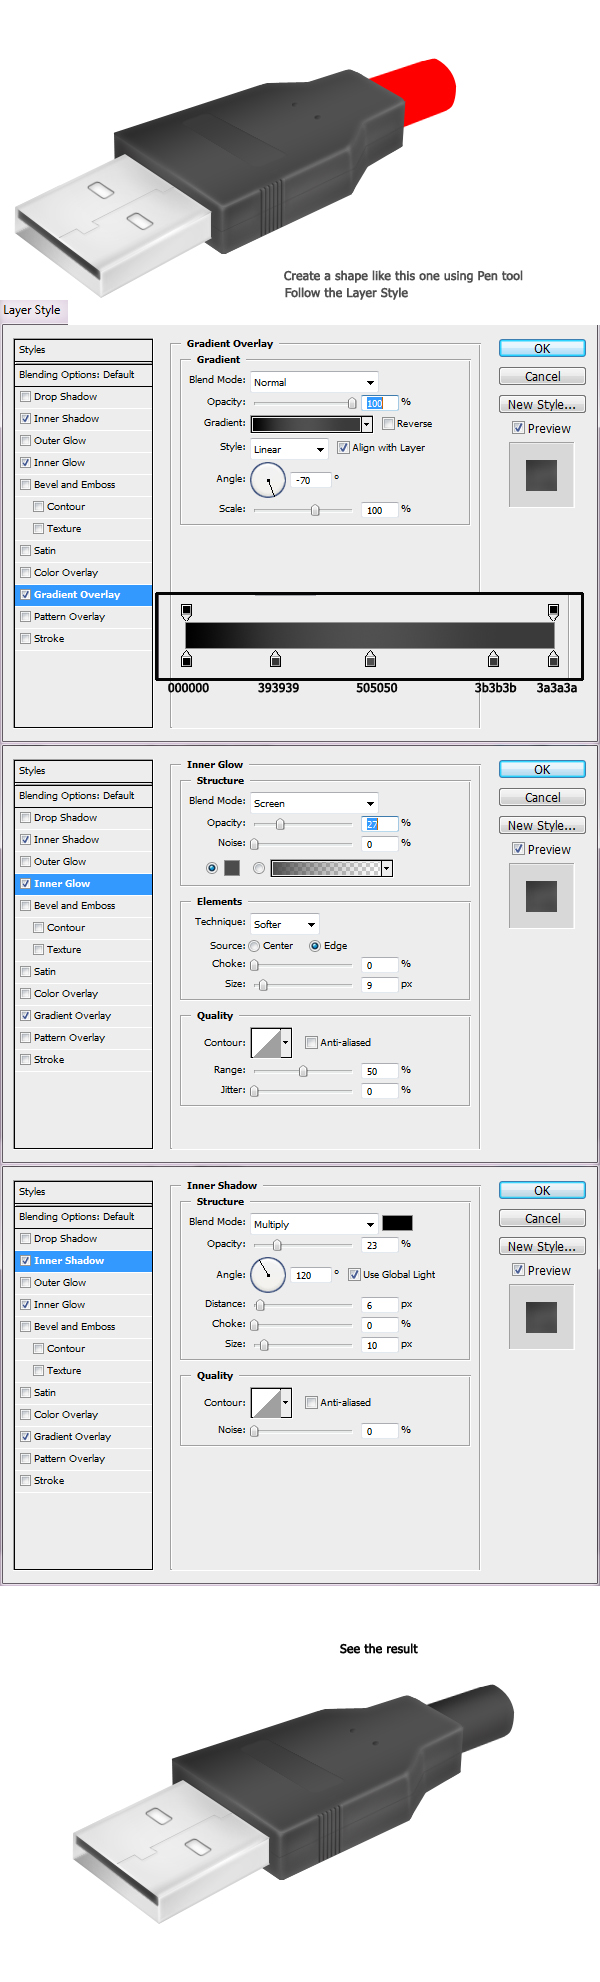
Now let’s create the ‘Head Wire’, the wire that connects the head to the wire. For this, use the pen tool and follow the instructions below.
Step 19
To add a bit of detail to this ‘Wire’ layer, create a New layer, Cmd + Click on the Layer thumbnail of ‘Wire’, fill the selection with white color, take the Eraser tool, brush size 35px (use soft brush), Opacity 50%, and follow instructions below.
Step 20
Again take the Pen tool and create the shape as shown below.
Step 21
Add some highlights to this portion.
Step 22
Use the methods that we have shown previously to create the ‘Back Side’ of the object.
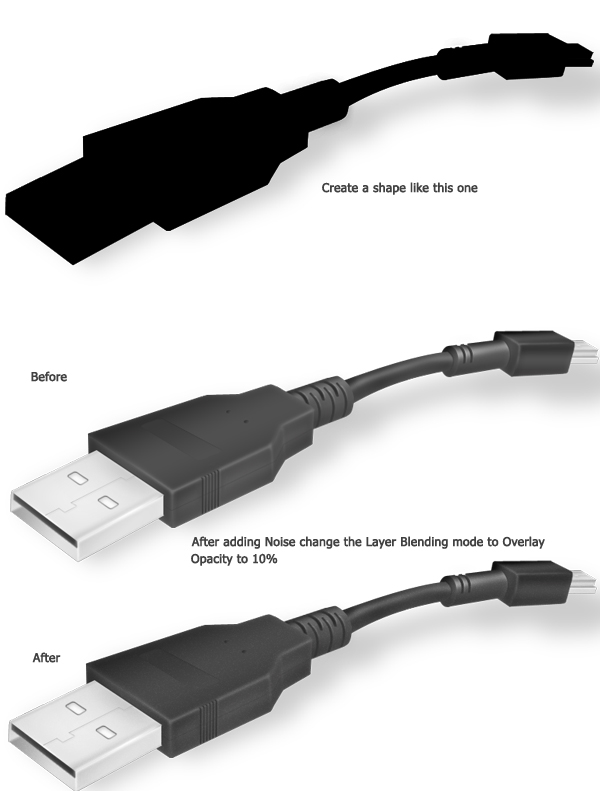
Step 23
Let’s add some finishing touches. Select all the Layers of the USB cable except the Background layer, Right click > Duplicate. Now Merge all of the duplicated layers. Drag this layer to top, Cmd + Click on the layer thumbnail to make selection, Fill it with black, go to Filter > Noise > Add Noise, Amount 23.62% on Gaussian and Monochromatic. Change the Layer Blending mode to Overlay & Opacity to 10%.
Additionally, you can create a shadow of the object at the bottom.
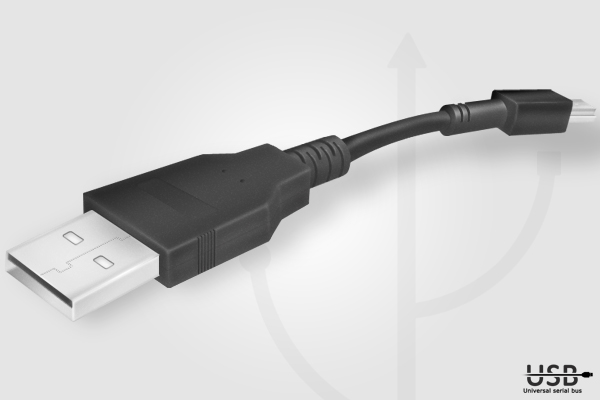
Conclusion
When used properly, the pen tool can be a powerful tool for creating objects in Photoshop. Hopefully, this tutorial has given you some insight into how you can use the pen tool combined with layer styles to create amazing designs in Photoshop.


0 comments:
Post a Comment