web 2.0

Monday, May 3, 2010

1stwebdesigner

1stwebdesigner


5 Unusual Yet Great Ways To Make Money With Your Blog

Posted: 03 May 2010 01:28 PM PDT

Blogging has been growing in popularity since a couple of years. It started out as a way for people to publish their thoughts online, and for others to comment on them. What started as a few sentences of thought and personal opinion has evolved into thousands and thousands of articles and posts about anything. As blogging continues to become more advanced, the advertising and marketing world has tapped into its potential.

Most Internet Marketers suggest you to put up adverts on your site to make money, but such solution needs a good blog traffic, and frankly in my experience there are many better ways to make money. So in this article I will be talking about the best ways a blog can make money.

1. Selling eBooks:

This is something that has been increasingly more popular over the last couple years. The main reason is generating a respectable source of income for those with relevant and useful content to share.

How Can I Sell My Ebooks ?

There is several ways to sell your ebooks online :

  • You can make a section on your blog where you can sell your ebooks.
  • You can create a little website where buyers can have a look at your ebook.
  • Have an affiliate program like E-junkie.
  • Offer a sample page or chapter so potential buyers can get a good feel for who you are and what you have to offer.

2. Premium Membership:

Recently, I have seen a lot of bloggers adding membership areas to their blogs. To do this you can add a new membership area where you can publish content for members only. And this is a good source for money but the content you offer must be original to your readers.In such sections you can also offer some freebies. You can take a look at the links above showing some famous blogs with membership areas:

3. Web Directories :

Web Directories are places where job seekers can pay monthly to have themselves listed in a directory so people who are looking for them, can browse such place and pick their favorite.

4. Job Boards :

All the popular blogs are trying to leverage job boards to make some extra income.Needless to say that in order to create an active and profitable job board you need first to have a blog focused on a specific niche, and a decent amount traffic.The advantage of this method is that it is passive. Once you have the structure in place, the job listings will come naturally, and you can charge anywhere from $10 up to $100 for each.

There is a lot of job board softwares such as Webjobs, SimplyHired Job-o-matic … But there are two main Wordpress plugins that I recommend : WPJobBoard and JobPress. These plugins will allow you to add a Job Board to your blog.

5. Advertising :

Advertising is a famous technique every blogger use to make money with his blog. And there is many ways to advertise on your blog, but the famous one for bloggers is direct banner advertising. Selling your own advertising space is one of the most lucrative monetization methods. First and foremost because it enables you to cut out the middleman commissions and to determine your own rates. The most popular banner formats on the web are the 728×90 leaderboard, the 120×600 skyscraper, the 300×250 rectangle and the 125×125 button.

The downside of direct banner advertising is that you need to have a big audience to get qualified advertisers, and you will need to spend time managing the sales process, the banners and the payments. But there is websites that manage these functionalities and buy sell ads is one of the best.

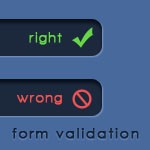
Building Real-Time Form Validation Using jQuery

Posted: 03 May 2010 03:00 AM PDT

Building Real-Time Form Validation Using jQueryClient-side validation is something every web form should have, no doubts about that. While server-side validation does its job, it certainly lacks good user experience. What is so great about client-side validation then?

Not only is it useful to the user because it makes the process of filling out the form a lot quicker and a lot less painful, but it also shows that you actually care about them. For the user there’s nothing better than knowing right away if they’re doing it correctly.

In this tutorial we’re going to learn how to build real-time form validation using jQuery. If you’d like to see what you’ll be building, you can watch the short video intro or hit the “Live Demo” button and check it out.


Check out Live Demo for Real-Time jQuery Form Validation

Table of Contents

  1. How Will We Achieve That?
  2. Project Structure
  3. Coding the HTML
  4. Spicing It Up With CSS
  5. All The Fun: jQuery Magic
  6. Final Product
  7. After Word

How Will We Achieve That?

Now, there are actually many ways to do that; here are the most common:

  1. We could put </span> (which will be holding validation info) next to our form field and give it an ID so we can easily access its content later
  2. We could wrap every field in </p> with applied ID, and put </span> (which will be holding validation info) inside it, so we can easily access its content, through that </p>’s child-span
  3. We could wrap every field in </p> with applied ID, and inject </span> with validation info to it

It will all work, but neither is the optimal way. Why? Because there’s too much messing with your HTML code and you’ll end up with bunch of needless tags that are required by your validation script, but which your form doesn’t really need.

It’s clearly not the way to go, so instead we’re going to do this the way I do it myself. In my opinion it’s the best solution, although it’s not very common; I honestly have never came across this method, I’ve never seen it used by someone. But if you have, please let me know in the comments.

OK, so what are we going to do?

  1. We’re going to write simplest form possible, nice and clean, no unnecessary tags whatsoever
  2. As the user fills out particular field, we’re goinng to validate it on the fly and:
    • grab its position in the window (top and left)
    • grab its width
    • add width and the left offset (from the field’s position) together so we know where the field ends
    • put validation info into </div> with applied ID, inject it to the document, position it absolutely on the spot where the field ends, and manipulate its class as needed (for example .correct or .incorrect)

That way we keep our HTML code nice and clean.

Note: It’s vital to always provide server-side validation as well (for users with turned off JavaScript).

Project Structure

We are going to need three files:

  • index.html
  • style.css
  • validation.js

I’m gonna go roughly through the HTML coding, provide you with all needed CSS – and then focus mostly on our jQuery script, which is the most important thing and what we’re hoping to learn today.

Coding the HTML

Step 1: Some Basic HTML and Importing jQuery + Validation Script

First, make index.html file and put some basic code there; you can see that we imported jQuery at the bottom, along with our validation.js file, which will contain our validation script:

 <!DOCTYPE html PUBLIC "-//W3C//DTD XHTML 1.0 Strict//EN" "http://www.w3.org/TR/xhtml1/DTD/xhtml1-strict.dtd"> <html xmlns="http://www.w3.org/1999/xhtml"> <head> <title>Real-Time Form Validation Using jQuery</title> <meta http-equiv="Content-Type" content="text/html; charset=utf-8" /> <link rel="stylesheet" href="style.css" type="text/css" media="screen" /> </head> <body>  <div id="content">  </div><!-- content -->  <script type="text/javascript" src="http://ajax.googleapis.com/ajax/libs/jquery/1.4.2/jquery.min.js" charset="utf-8"></script> <script type="text/javascript" src="validate.js" charset="utf-8"></script> </body> </html> 

Step 2: The Form, Splitted Into Three Sections

We’re going to split the form into three sections using </fieldset>, and </label> for each section headline:

  1. Personal Info (user name, date of birth, gender, vehicles)
  2. Email (user’s email adress)
  3. About (little info about the user)
 <!DOCTYPE html PUBLIC "-//W3C//DTD XHTML 1.0 Strict//EN" "http://www.w3.org/TR/xhtml1/DTD/xhtml1-strict.dtd"> <html xmlns="http://www.w3.org/1999/xhtml"> <head> <title>Real-Time Form Validation Using jQuery</title> <meta http-equiv="Content-Type" content="text/html; charset=utf-8" /> <link rel="stylesheet" href="style.css" type="text/css" media="screen" /> </head> <body>  <div id="content"> <form id="jform" action="http://1stwebdesigner.com" method="post"> 	<fieldset> 		<legend>Personal Info</legend> 	</fieldset>  	<fieldset> 		<legend>Email</legend> 	</fieldset>  	<fieldset> 		<legend>About You</legend> 	</fieldset> </form> </div><!-- content -->  <script type="text/javascript" src="http://ajax.googleapis.com/ajax/libs/jquery/1.4.2/jquery.min.js" charset="utf-8"></script> <script type="text/javascript" src="validate.js" charset="utf-8"></script> </body> </html> 

Step 3: Adding Fields + Submit Button

Great, now it’s time to finally add some fields to our form. For this tutorial we’re going to use several different fields:

  • three text inputs: for user’s full name, date of birth and email adress
  • radio buttons for user’s gender
  • checkboxes for vehicles owned by the user
  • textarea for little info about the user
  • button for submit button

We’re going to wrap every set (label + field) in </p> to keep them separated and display them as blocks.

Your final index.html file should look like this:

 <!DOCTYPE html PUBLIC "-//W3C//DTD XHTML 1.0 Strict//EN" "http://www.w3.org/TR/xhtml1/DTD/xhtml1-strict.dtd"> <html xmlns="http://www.w3.org/1999/xhtml"> <head> <title>Real-Time Form Validation Using jQuery</title> <meta http-equiv="Content-Type" content="text/html; charset=utf-8" /> <link rel="stylesheet" href="style.css" type="text/css" media="screen" /> </head> <body>  <div id="content"> 	<form id="jform" action="http://1stwebdesigner.com" method="post"> 		<fieldset> 			<legend>Personal Info</legend> 			<p> 				<label for="fullname" class="block">Full name:</label> 				<input type="text" name="fullname" id="fullname" /> 			</p> 			<p> 				<label for="birthday" class="block">Day of birth <small>(dd-mm-yyyy)</small>:</label> 				<input type="text" name="birthday" id="birthday" /> 			</p> 			<p> 				<label class="block">I am:</label> 				<input type="radio" name="gender" id="man" value="man" /> <label for="man">Man</label> 				<input type="radio" name="gender" id="woman" value="woman" /> <label for="woman">Woman</label> 			</p> 			<p> 				<label class="block">I own:</label> 				<input type="checkbox" name="vehicle" id="car" /> <label for="car">car</label> 				<input type="checkbox" name="vehicle" id="airplane" /> <label for="airplane">airplane</label> 				<input type="checkbox" name="vehicle" id="bicycle" /> <label for="bicycle">bicycle</label> 				<input type="checkbox" name="vehicle" id="ship" /> <label for="ship">ship</label> 			</p> 		</fieldset>  		<fieldset> 			<legend>Email</legend> 			<p> 				<label for="email" class="block">Email <small>(mickey@mou.se)</small>:</label> 				<input type="text" name="email" id="email" /> 			</p> 		</fieldset>  		<fieldset> 			<legend>About You</legend> 			<p> 				<label for="about" class="block">Tell us a little bit about yourself:</label> 				<textarea id="about" cols="50" rows="10"></textarea> 			</p> 		</fieldset> 		<p> 			<button type="submit" id="send">submit</button> 		</p> 	</form> </div><!-- content -->  <script type="text/javascript" src="http://ajax.googleapis.com/ajax/libs/jquery/1.4.2/jquery.min.js" charset="utf-8"></script> <script type="text/javascript" src="validate.js" charset="utf-8"></script> </body> </html> 

It may look a bit messy, but it’s because of the WP’s syntax highlighting plugin. It’s actually really clean, and that’s what we wanted to achieve afterall. Check it: save the above code as your index.html file, open it in your browser and look at the source code. Now it looks clean, isn’t it?

Spicing It Up With CSS

Since CSS styling is not our main focus in this tutorial, I’m not gonna go over this, but simply provide you with the CSS you’re going to need for this to work.

Create style.css file, put inside all the code from below and that’s it! Now everything should look sweet.

 body { 	background: #efefef; 	margin: 0; 	padding: 0; 	border: none; 	text-align: center; 	font: normal 13px Georgia, "Times New Roman", Times, serif; 	color: #222; }  #content { 	width: 500px; 	margin: 0 auto; 	margin-bottom: 25px; 	padding: 0; 	text-align: left; }  fieldset { 	margin-top: 25px; 	padding: 15px; 	border: 1px solid #d1d1d1; 	-webkit-border-radius: 7px; 	-moz-border-radius: 7px; 	border-radius: 7px;  }  fieldset legend { 	font: normal 30px Verdana, Arial, Helvetica, sans-serif; 	text-shadow: 0 1px 1px #fff; 	letter-spacing: -1px; 	color: #273953; }  input, textarea { 	padding: 3px; }  label { 	cursor: pointer; }  .block { 	display: block; }  small { 	letter-spacing: 1px; 	font-size: 11px; 	font-style: italic; 	color: #9e9e9e; }  .info { 	text-align: left; 	padding: 5px; 	font-size: 11px; 	color: #fff; 	position: absolute; 	display: none; 	-webkit-border-radius: 5px; 	-moz-border-radius: 5px; 	border-radius: 5px; 	-webkit-box-shadow: -1px 1px 2px #a9a9a9; 	-moz-box-shadow: -1px 1px 2px #a9a9a9; 	box-shadow: -1px 1px 2px #a9a9a9; }  .error { 	background: #f60000; 	border: 3px solid #d50000;  }  .correct { 	background: #56d800; 	border: 3px solid #008000; }  .wrong { 	font-weight: bold; 	color: #e90000; }  .normal { 	font-weight: normal; 	color: #222; }  #send { 	background: #3f5a81; 	width: 100%; 	border: 5px solid #0F1620; 	font: bold 30px Verdana, sans-serif; 	color: #fafafa; 	text-shadow: 1px 1px 1px #0F1620; 	-webkit-border-radius: 7px; 	-moz-border-radius: 7px; 	border-radius: 7px; }  #send:hover { 	background: #4d76b1; 	border: 5px solid #253750; 	color: #fff; }  #send:active { 	text-indent: -10px; } 

All The Fun: jQuery Magic

This is the most interesting and engaging part. First we need to do some thinking and describe our key points.

Step 1: Planning

We have to ask ourselves three questions before we can go on:

  1. What do we need the script to do?
  2. How do we want it to do this?
  3. How do we achieve that?

It’s obvious we want the script to validate our form. But how?

  • we want to be able to validate it both in real-time (when user is filling it out) and on the form submit
  • therefore we need to make a “pack” of functions responsible for each of its fields, so we can call them:
    • individually, when the user is filling out particular field
    • all at once, on the form submit

To reduce our global footpring, we’re going to use JavaScript object for that.

Step: 2: What Do We Need?

JS object, in our case it will be:

  • jVal

Methods of that object for each of the form fields, validating that particular field:

  • jVal.fullName
  • jVal.birthDate
  • jVal.gender
  • jVal.vehicle
  • jVal.email
  • jVal.about

Variable which will hold the status of error occuring:

  • jVal.errors

And method that will be called as the last one; it will check if there were any errors and submit the form if not. If some errors occurred, it will take the user to the beginning of the form, so they can fill it out again.

  • jVal.sendIt

Now we can finally start building our validation script. When finish our first validation method, then it will be much easier and faster, as we can reuse it for other methods, only applying some changes. Let’s crack into it!

Step 3: Our Script “Packaging”

The start is really simple, almost everything will go inside this code:

 $(document).ready(function(){ 	jVal = {  	}; }); 

Step 4: Validating User’s Name

Our first method will handle user’s name. Put it inside our jVal object, like this:

 var jVal = { 	'fullName' : function() {  	} }; 

Now let’s put some first lines of code inside our method. Just paste it, and then I will explain what the code “says”:

 $('body').append('<div id="nameInfo" class="info"></div>');  var nameInfo = $('#nameInfo'); var ele = $('#fullname'); var pos = ele.offset(); 
  • Line 1: We’re injecting </div> to the document. Class “info” gives it some styling (defined in our CSS file) and also make it invisible by setting display to “none” – so it’s there, but we don’t see it yet. As for the ID, it’s for easy “grabbing” and manipulating, since it will be positioned absolutely in the document. This </div> will contain our validation info that will be showed to the user, so they know if they filled out the field correctly.
  • Line 3: We’re assigning our </div> to the variable nameInfo, because we’ll be using it couple times more.
  • Line 4: We’re assigning our form field with ID “fullname” to the variable ele. The same reason as above, we will use it several times later.
  • jQuery function offset() returns current position of an element relative to the document. It returns an object containing the properties top and left. We used this function on our ele (which is actually form input with ID “fullname”), so it will return position of that element, which we assign to the variable pos.

Great, so far so good. It’s time to add some few more lines:

 nameInfo.css({ 	top: pos.top-3, 	left: pos.left+ele.width()+15 }); 
  • Line 2: We start to operate on nameInfo’s CSS top property. Remember, our variable pos holds now the position of our form input with ID “fullname” in the document. We access its top value by simply joining pos with the word top using period . . Then we decrement that by 3 and assign it to the CSS top property of our nameInfo element.
  • Line 3: We start to operate on nameInfo’s CSS left property. We access left value of our “Full name” input’s position, increase it by its width (we grab that from calling jQuery function width() on our ele element) and increase it by 15. The result is assigned to the CSS left property of our nameInfo element.

We’re doing really great, we just acomplished 50% of fullName, our first validating method. It’s time to actually check if the user filled our “Full name” field correctly or not, and take appropriate action:

 if(ele.val().length < 6) { 	jVal.errors = true; 		nameInfo.removeClass('correct').addClass('error').html('&larr; at least 6 characters').show(); 		ele.removeClass('normal').addClass('wrong'); } else { 		nameInfo.removeClass('error').addClass('correct').html('&radic;').show(); 		ele.removeClass('wrong').addClass('normal'); } 

Lot of weird crap, huh? Don’t worry, it’s not so scary as it may look:

  • Line 1: We’re checking if the name that user typed in is shorter than 6 characters.
  • Line 2: We set our object’s variable jVal.errors to true, as we just got our first error (user’s name is too short). We’re going to use it later.
  • Line 3: We start to operate on our nameInfo element (which is the </div> we’re gonna display validation info in). First we remove the class “correct”; it may be applied to our nameInfo element from previous validation (if it was performed). Then we apply the class “error” to it. Next, we put content to our nameInfo element, it’s the information that the name should be at least 6 characters long. And finally we our alert-box visible to the user.
  • Line 4: We start to operate on our ele element (which is our form “Full name” input). First we remove class “normal”, which may be there from previous validation, then we apply class “wrong” to it.
  • Line 5: If the name user typed in was long enough, then…
  • Line 6: We start to operate on our nameInfo element. We remove class “error” if it’s there, and apply class “correct”. We put inside to let the user know it’s all good. We show the alert-box (if it wasn’t visible before).
  • Line 7: We start to operate on our ele element. We remove class “wrong” if it’s there, and apply class “normal”.

Well done! This is our first validation method. Now it’s time to test it, but before we can do that, we need to write few more lines of code.

We need to make sure, that our fullName method will be called when the user finished filling out the “Full name” field. To achieve that, we need to bind our method to certain user action. There are two great jQuery functions that would serve that purpose well: blur() and change(). We are going to use change().

Paste this code below the whole jVal object:

 $('#fullname').change(jVal.fullName); 

What it does in human words: if the user changes value of the “Full name” field and then leaves (e.g. to fill out another field), our fullName method is fired up, to validate “Full name” field.

Right now you should have one fully working validation method, so test it. Your whole validate.js file should like like this:

 $(document).ready(function(){  	var jVal = { 		'fullName' : function() {  			$('body').append('<div id="nameInfo" class="info"></div>');  			var nameInfo = $('#nameInfo'); 			var ele = $('#fullname'); 			var pos = ele.offset();  			nameInfo.css({ 				top: pos.top-3, 				left: pos.left+ele.width()+15 			});  			if(ele.val().length < 6) { 				jVal.errors = true; 					nameInfo.removeClass('correct').addClass('error').html('&larr; at least 6 characters').show(); 					ele.removeClass('normal').addClass('wrong'); 			} else { 					nameInfo.removeClass('error').addClass('correct').html('&radic;').show(); 					ele.removeClass('wrong').addClass('normal'); 			} 		} 	};  	// bind jVal.fullName function to "Full name" form field 	$('#fullname').change(jVal.fullName);  }); 

Step 5: Validating User’s Date of Birth

Starting from now, it will all get easier. Our validation methods are in 90% the same, so all you have to do is copy our fullName method, and only apply some changes

Great, so now just copy whole fullName method, paste it below and rename it to birthDate. The changes we need to make are:

  • all nameInfo occurences have to become birthInfo
  • instead of #fullname, assign #birthday element to variable ele
  • add this regular expression pattern below the whole birthInfo.css() declaration:
     var patt = /^[0-9]{2}\-[0-9]{2}\-[0-9]{4}$/i; 
  • our previous if() statement has to become:
     if(!patt.test(ele.val())) 
  • validation message has to become ← type in date in correct format

This is how birthDate method should look like after these changes:

 	'birthDate' : function (){  		$('body').append('<div id="birthInfo" class="info"></div>');  		var birthInfo = $('#birthInfo'); 		var ele = $('#birthday'); 		var pos = ele.offset();  		birthInfo.css({ 			top: pos.top-3, 			left: pos.left+ele.width()+15 		});  		var patt = /^[0-9]{2}\-[0-9]{2}\-[0-9]{4}$/i;  		if(!patt.test(ele.val())) { 			jVal.errors = true; 				birthInfo.removeClass('correct').addClass('error').html('&larr; type in date in correct format').show(); 				ele.removeClass('normal').addClass('wrong'); 		} else { 				birthInfo.removeClass('error').addClass('correct').html('&radic;').show(); 				ele.removeClass('wrong').addClass('normal'); 		} 	} 
  • Line 14: It’s a regular expression pattern. It’s not our main focus in this tut, so let me just explain it very roughly. This pattern decides how the date format should look like, in this case it’s: two digits followed by hyphen then again two digits followed by hyphen and finally four digits at the end. So, the pattern applies for example to this date: 28-03-1987.
  • Line 16: We’re checking if date that user typed in conforms to our pattern from above.

And of course, we need to bind this birthDate method to the “Date of birth” form field. It’s the same thing we did with fullName before, only with different names. Paste it at the bottom (outside of the jVal object), below our fullName binding declaration:

 $('#birthday').change(jVal.birthDate); 

And we have another fully working validation method. Great job!

Step 6: Validating User’s Gender

Again, simply copy the whole fullName method, rename it to gender and apply these changes:

  • all nameInfo occurences have to become genderInfo
  • instead of #fullname, assign #woman element to variable ele
  • in genderInfo.css() declaration, the top value has to become top: pos.top-10 and the left value has to become left: pos.left+ele.width()+60
  • our previous if() statement has to become:
     if($('input[name="gender"]:checked').length === 0) 
  • validation message has to become ← are you a man or a woman?

This is how gender method should look like after these changes:

 'gender' : function (){  	$('body').append('<div id="genderInfo" class="info"></div>');  	var genderInfo = $('#genderInfo'); 	var ele = $('#woman'); 	var pos = ele.offset();  	genderInfo.css({ 		top: pos.top-10, 		left: pos.left+ele.width()+60 	});  	if($('input[name="gender"]:checked').length === 0) { 		jVal.errors = true; 			genderInfo.removeClass('correct').addClass('error').html('&larr; are you a man or a woman?').show(); 			ele.removeClass('normal').addClass('wrong'); 	} else { 			genderInfo..removeClass('error').addClass('correct').html('&radic;').show(); 			ele.removeClass('wrong').addClass('normal'); 	} } 
  • Line 14: We’re checking if user selected one of two radio buttons. $('input[name="gender"]:checked') selects all inputs with name “gender” (in this case all radio buttons) that are checked. Than we check if the number of selected radios (.length) equals 0, which would mean that user didn’t select any.

As always, we have to bind this gender method to our “Gender” radio buttons:

 $('input[name="gender"]').change(jVal.gender); 

There, another validation method completed. Three more to go :).

Step 7: Validating Vehicles Owned by User

This time copy gender method, rename it to vehicle and apply following changes:

  • all genderInfo occurences have to become vehicleInfo
  • instead of #woman, assign #ship element to variable ele
  • in vehicleInfo.css() declaration, the left value has to become left: pos.left+ele.width()+40
  • our previous if() statement has to become:
     if($('input[name="vehicle"]:checked').length <= 1) 
  • validation message has to become ← I am sure you have at least two!

This is how vehicle method should look like after these changes:

 'vehicle' : function (){  	$('body').append('<div id="vehicleInfo" class="info"></div>');  	var vehicleInfo = $('#vehicleInfo'); 	var ele = $('#ship'); 	var pos = ele.offset();  	vehicleInfo.css({ 		top: pos.top-10, 		left: pos.left+ele.width()+40 	});  	if($('input[name="vehicle"]:checked').length <= 1) { 		jVal.errors = true; 			vehicleInfo.removeClass('correct').addClass('error').html('&larr; I am sure you have at least two!').show(); 			ele.removeClass('normal').addClass('wrong'); 	} else { 			vehicleInfo.removeClass('error').addClass('correct').html('&radic;').show(); 			ele.removeClass('wrong').addClass('normal'); 	} } 
  • Line 14: Weíre checking if user selected two or more checkboxes. $('input[name="vehicle"]:checked') selects all inputs with name ìvehicleî (in this case all checkbox buttons) that are checked. Than we check if the number of selected checkboxes (.length method) equals or is less than 1, which would mean that user didnít select any checkboxes or selected only one.

Again, we have to bind this vehicle method to our “Vehicle” checkboxes:

 $('input[name="vehicle"]').change(jVal.vehicle); 

Tired? We have couple more methods to cover :). Time for email validation.

Step 8: Validating User’s Email Adress

This time, copy our birthDate method, rename it to email and apply these changes:

  • all birthInfo occurences have to become emailInfo
  • instead of #birthday, assign #email element to variable ele
  • our previous regular expression pattern has to become:
     var patt = /^.+@.+[.].{2,}$/i; 
  • validation message has to become ← give me a valid email adress, ok?

This is how email method should look like after these changes:

 	'email' : function() {  		$('body').append('<div id="emailInfo" class="info"></div>');  		var emailInfo = $('#emailInfo'); 		var ele = $('#email'); 		var pos = ele.offset();  		emailInfo.css({ 			top: pos.top-3, 			left: pos.left+ele.width()+15 		});  		var patt = /^.+@.+[.].{2,}$/i;  		if(!patt.test(ele.val())) { 			jVal.errors = true; 				emailInfo.removeClass('correct').addClass('error').html('&larr; give me a valid email adress, ok?').show(); 				ele.removeClass('normal').addClass('wrong'); 		} else { 				emailInfo.removeClass('error').addClass('correct').html('&radic;').show(); 				ele.removeClass('wrong').addClass('normal'); 		} 	} 
  • Line 14:For this tutorial I decided to go with very simple, almost basic regular expression pattern for email adress: one or more characters followed by @ smbol, then again one or more characters followed by . period, and at the end there should be two or more characters. So, the pattern applies to this email adress example: mickey@mou.se

Of course, bind this .email method to our “Email” form field:

 $('#email').change(jVal.email); 

Time for the last of our validation methods: about.

Step 9: Validating User’s About Info

For this last method, copy fullName, rename it to about and apply following changes:

  • all nameInfo occurences have to become aboutInfo
  • instead of #fullname, assign #about element to variable ele
  • our previous if() statement has to become:
     if(ele.val().length < 75) 
  • validation message has to become ← come on, tell me a little bit more!

This is how our about method should look like after these changes:

 	'about' : function() {  		$('body').append('<div id="aboutInfo" class="info"></div>');  		var aboutInfo = $('#aboutInfo'); 		var ele = $('#about'); 		var pos = ele.offset();  		aboutInfo.css({ 			top: pos.top-3, 			left: pos.left+ele.width()+15 		});  		if(ele.val().length < 75) { 			jVal.errors = true; 				aboutInfo.removeClass('correct').addClass('error').html('&larr; come on, tell me a little bit more!').show(); 				ele.removeClass('normal').addClass('wrong').css({'font-weight': 'normal'}); 		} else { 				aboutInfo.removeClass('error').addClass('correct').html('&radic;').show(); 				ele.removeClass('wrong').addClass('normal'); 		} 	} 

And of course we need to bind it to our “About” form field:

 $('#about').change(jVal.about); 

This is it! We just completed all our validation methods. It’s almost like they say: the end is nigh! There’s only two things left to do:

  • build our last sendIt method
  • manage properly the submit action of the submit button

Step 10: Final sendIt Method

This method will be called after all our validation methods, as the last one, after clicking on the “submit” button. It will check if no errors occurred during validation (while performing any of our validation methods) up until the moment it’s called. The good news is, it couldn’t be more simple:

 'sendIt' : function (){ 	if(!jVal.errors) { 		$('#jform').submit(); 	} 
  • Line 2: Remember that errors variable I told you we’re going to use later? Well, this “later” is right now :). If even one little error occurred during the validation, this errors variable was set to true. In human words it actually means something like: “yes, it’s true that we got some errors during validation”. So here we’re checking if it’s actually NOT true, which equals to no errors from validation.
  • Line 3: If there were no errors, just finally submit the whole form.

Step 11: Managing User’s Submit Action

The only thing left now, is to manage what happens when the user clicks on our “submit” button. And it goes like this:

 $('#send').click(function (){ 	var obj = $.browser.webkit ? $('body') : $('html'); 	obj.animate({ scrollTop: $('#jform').offset().top }, 750, function (){ 		jVal.errors = false; 		jVal.fullName(); 		jVal.birthDate(); 		jVal.gender(); 		jVal.vehicle(); 		jVal.email(); 		jVal.about(); 		jVal.sendIt(); 	}); 	return false; }); 
  • Line 1: We grab the send element, which is the “submit” button in our form, and if someone clicks on it we perform all code below.
  • Line 2: The thing is: when you want to apply scrolling to browser window, different browsers will work with different elements. And so: Chrome and Safari will work with body. Internet Explorer and Firefox will work with html. Opera will work with both. Unfortunately in our case we can’t just use $('html, body') to target both these elements (I’ll talk about that another time). So we need to somehow decide which of these elements we should apply scrolling to. And this is where jQuery comes with help. It provides us with $.browser property – it allows us to detect which browser we are working in. By using $.browser.webkit we’re just checking if our browser is running on webkit engine; if so then we assign body element to the obj variable we just created, if not we assign html element to it. Important note: It should be avoided and it’s considered bad practice to perform any kind of “browser detection”, you should use “feature detection” instead. But we can get away with that for our learning purposes.
  • Line 3:We apply scrollTop animation to our obj element. The point that scrolling should stop is the beginning of the form, which is determined by accessing top value of its position in the document, which we get thanks to jQueryoffset() function. Next we say that this scrolling animation should last 750 milliseconds, and when it’s done we…
  • Line 4: Set variable jVal.errors to false, to clear errors that might occurred in previous validation, and then we…
  • Lines 5-11: Call all our validation methods one by one, with sendIt method at the end, which will check if there were no errors and submit the whole form if so.
  • Line 13:We return false to that click event of the “submit” button in our form, which means that the form won’t be submitted right away, the script will perform actions planned by us first.

Final Product

Right now our validation script is fully completed and should look like this:

 $(document).ready(function(){  	var jVal = { 		'fullName' : function() {  			$('body').append('<div id="nameInfo" class="info"></div>');  			var nameInfo = $('#nameInfo'); 			var ele = $('#fullname'); 			var pos = ele.offset();  			nameInfo.css({ 				top: pos.top-3, 				left: pos.left+ele.width()+15 			});  			if(ele.val().length < 6) { 				jVal.errors = true; 					nameInfo.removeClass('correct').addClass('error').html('&larr; at least 6 characters').show(); 					ele.removeClass('normal').addClass('wrong'); 			} else { 					nameInfo.removeClass('error').addClass('correct').html('&radic;').show(); 					ele.removeClass('wrong').addClass('normal'); 			} 		},  		'birthDate' : function (){  			$('body').append('<div id="birthInfo" class="info"></div>');  			var birthInfo = $('#birthInfo'); 			var ele = $('#birthday'); 			var pos = ele.offset();  			birthInfo.css({ 				top: pos.top-3, 				left: pos.left+ele.width()+15 			});  			var patt = /^[0-9]{2}\-[0-9]{2}\-[0-9]{4}$/i;  			if(!patt.test(ele.val())) { 				jVal.errors = true; 					birthInfo.removeClass('correct').addClass('error').html('&larr; type in date in correct format').show(); 					ele.removeClass('normal').addClass('wrong'); 			} else { 					birthInfo.removeClass('error').addClass('correct').html('&radic;').show(); 					ele.removeClass('wrong').addClass('normal'); 			} 		},  		'gender' : function (){  			$('body').append('<div id="genderInfo" class="info"></div>');  			var genderInfo = $('#genderInfo'); 			var ele = $('#woman'); 			var pos = ele.offset();  			genderInfo.css({ 				top: pos.top-10, 				left: pos.left+ele.width()+60 			});  			if($('input[name="gender"]:checked').length === 0) { 				jVal.errors = true; 					genderInfo.removeClass('correct').addClass('error').html('&larr; are you a man or a woman?').show(); 					ele.removeClass('normal').addClass('wrong'); 			} else { 					genderInfo.removeClass('error').addClass('correct').html('&radic;').show(); 					ele.removeClass('wrong').addClass('normal'); 			} 		},  		'vehicle' : function (){  			$('body').append('<div id="vehicleInfo" class="info"></div>');  			var vehicleInfo = $('#vehicleInfo'); 			var ele = $('#ship'); 			var pos = ele.offset();  			vehicleInfo.css({ 				top: pos.top-10, 				left: pos.left+ele.width()+40 			});  			if($('input[name="vehicle"]:checked').length <= 1) { 				jVal.errors = true; 					vehicleInfo.removeClass('correct').addClass('error').html('&larr; I\'m sure you have at least two!').show(); 					ele.removeClass('normal').addClass('wrong'); 			} else { 					vehicleInfo.removeClass('error').addClass('correct').html('&radic;').show(); 					ele.removeClass('wrong').addClass('normal'); 			} 		},  		'email' : function() {  			$('body').append('<div id="emailInfo" class="info"></div>');  			var emailInfo = $('#emailInfo'); 			var ele = $('#email'); 			var pos = ele.offset();  			emailInfo.css({ 				top: pos.top-3, 				left: pos.left+ele.width()+15 			});  			var patt = /^.+@.+[.].{2,}$/i;  			if(!patt.test(ele.val())) { 				jVal.errors = true; 					emailInfo.removeClass('correct').addClass('error').html('&larr; give me a valid email adress, ok?').show(); 					ele.removeClass('normal').addClass('wrong'); 			} else { 					emailInfo.removeClass('error').addClass('correct').html('&radic;').show(); 					ele.removeClass('wrong').addClass('normal'); 			} 		},  		'about' : function() {  			$('body').append('<div id="aboutInfo" class="info"></div>');  			var aboutInfo = $('#aboutInfo'); 			var ele = $('#about'); 			var pos = ele.offset();  			aboutInfo.css({ 				top: pos.top-3, 				left: pos.left+ele.width()+15 			});  			if(ele.val().length < 75) { 				jVal.errors = true; 					aboutInfo.removeClass('correct').addClass('error').html('&larr; come on, tell me a little bit more!').show(); 					ele.removeClass('normal').addClass('wrong').css({'font-weight': 'normal'}); 			} else { 					aboutInfo.removeClass('error').addClass('correct').html('&radic;').show(); 					ele.removeClass('wrong').addClass('normal'); 			} 		},  		'sendIt' : function (){ 			if(!jVal.errors) { 				$('#jform').submit(); 			} 		} 	};  // ====================================================== //  	$('#send').click(function (){ 		var obj = $.browser.webkit ? $('body') : $('html'); 		obj.animate({ scrollTop: $('#jform').offset().top }, 750, function (){ 			jVal.errors = false; 			jVal.fullName(); 			jVal.birthDate(); 			jVal.gender(); 			jVal.vehicle(); 			jVal.email(); 			jVal.about(); 			jVal.sendIt(); 		}); 		return false; 	});  	$('#fullname').change(jVal.fullName); 	$('#birthday').change(jVal.birthDate); 	$('input[name="gender"]').change(jVal.gender); 	$('input[name="vehicle"]').change(jVal.vehicle); 	$('#email').change(jVal.email); 	$('#about').change(jVal.about);  }); 
Check out Live Demo for Real-Time jQuery Form Validation

After Word

We’ve done it. Well, you have done it! I hope you enjoyed this tutorial and learned something. If you have any questions feel free to ask; I will be glad to talk more in the comments. Thanks for your time!

0 comments:

Post a Comment

Apture