1stwebdesigner |

| 30+ Things You Have to Know about being a Freelancer Posted: 07 May 2010 02:00 PM PDT
It’s hard work
Picture by Zsuzsanna Kilian If anyone tell you otherwise, they’re wrong. It’s that simple. So if you’re looking for an easy option to a normal day job, freelancing is not for you. You won’t be rich in a day or twoYou can be 100% sure that going over to freelancing wont make you rich overnight. There are possibilities of making a decent living, yes, but it will take hard work over time. Most people can’t make a living from freelancing right awayIf you start freelancing thinking that it will give you a good paycheck from week one, that’s very unlikely. Because of this, my tip is to consider combining it with either a part-time job to begin with, a loan of some kind or the best option – that you have savings you can live from for a while. If you are able to live from the first paycheck you get, then good for you – but it’s very rare. Working harder than a regular employee to receive the same results
When you freelance you will have to consider many different aspects of everything you do. This means extra work and extra hours to output the same amount of work that you’d do at a normal job. You have to be your own bossAs wonderful as it may sound to work alone, it means you will have to do the job your boss did before, and more. You will have to be a bit hard on yourself at times to make sure that things get done the right ways and to the right times. No one will kick you out of bed in the mornings
Picture by Diego Jaimovich As mentioned, you will have to be your own boss. This also means that no one will kick you out of bed in the morning. You will need discipline and still continue to get up early to start doing your daily tasks – just as you would have done when you had to go to your normal workplace. This is a point that quickly will show if you have the required backbone to deal with it. Many wannabe freelancer fall out of it already here. You have to stay on top of every financial matterEven if you haven’t had to deal with any financial stuff before, you will have to now. Obviously you could hire someone to help out with this, but that costs money. So at least in the beginning you should aim to do as much as possible of this yourself. Not only should you do this to save money, but also to keep on top of things. You want to know what everything costs to make good calculations of how much you have to earn to be able to pay your bills and also make a profit that you can live from. It takes hard work to gain a reputationBeing a freelancer, and a new freelancer, your name won’t immediately have the same ring to it as a company name. This means that it’s not likely clients will come running to you. You will have to gain a good reputation through hard work in order for them to choose you in the future. Every single client counts more
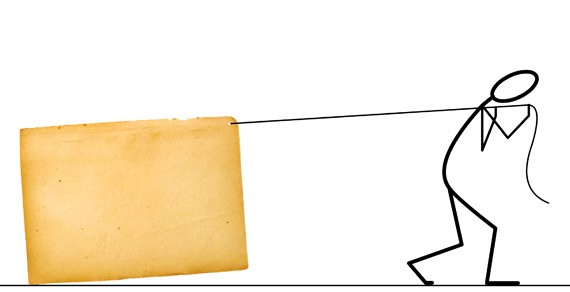
Picture by Barunpatro For a multimillion dollar company, you could say that a single client doesn’t necessarily mean everything. For you as a freelancer though, every client counts. Remember this when you take on new projects and treat them thereafter. One client more or less can mean the difference between failure and success – every single month. You have to save for rainy days
Picture by Jakub Krechowicz To save for slow times means a lot. When you’re a regular employee you know that your paycheck comes at given dates and how much you will get paid. Being a freelancer is completely different. If you don’t have any money in the bank in month with few paid projects, this could mean the end of your freelancing career. You won’t automatically be insured (for injuries, sickness and so on)Depending on your region/country you will have to check out what kinds of insurance you can/should have. When you’re an employee, the company you work for have to have some sort of insurance that makes sure you get paid almost no matter what happens. Being a freelancer this responsibility falls on yourself. Different countries have different options, so make sure to check this out BEFORE you start-up. You need somewhere to work from
When you’re employed somewhere, you know where to go to work. You don’t have to pay for electricity, phone bills or furniture. Now though, you will have to consider these things. Before you start-up you need to think through where you will be working from to make sure you can actually afford it. A home office or some sort of office collaboration can many times be the cheaper solutions to begin with. It can be hard to set the limit between work and hobbyIf you’re going for working freelance, one of the reasons for doing this will quite likely be that you will be able to do what you love. This means that you sometimes will be doing work-related things very many hours of each day. This can mean many challenges, remember to try not to get burned out.. YOU have to pay for repairsWhen something gets broken, you can’t go to your boss to get it fixed. You will have to do whatever it takes to get it fixed, and most importantly be able to pay for it. YOU have to pay for new equipment
Picture by Zebra31 Just like with repairs, you will also have to be able to pay for new equipment when it’s needed. In some cases insurances could cover things that can’t be properly repaired but don’t count on it. The first 3-6 months will be REALLY hardAt least the 3-6 first months will be extra hard. Not only do you have to adjust to a completely new way of working and thinking – but you need to get a base of clients that have work for you to do. You have to be prepared, both mentally and financially. At times you’ll be at work 24/7
When you are a freelancer YOU ar your business. This means that if something doesn’t get finished within the regular work hours you’ve set, YOU will be the one that needs to step in and get it done in time. Sometimes this could mean that you for days can be working almost 24/7. You have to always think aheadWhen you’re a regular employee, someone else usually does the planning. Freelancing you have to make plans ahead all the time to make sure to get enough time for reaching deadlines. You will have to do things you don’t like
You probably choose your freelance career to be doing something you love. This doesn’t mean that you will always be doing only fun things. Every now and then you will have to do projects you find extra challenging, or sometimes even static and boring to make ends meet. You will have to deal with difficult clientsWe are all different. When you freelance you are always the one being in touch with every single client and they are also very different in personalities and in how they prefer to get things done. Not everyone will like you and vice versa, that’s just the way it is. Try to deal with that as smoothly as possible.
You have to think through what you say (and don’t)
Picture by Arte_Ram You are your own business’ face outwards. This means that you will more than ever before be having to think through things before you say them. Remember that a single sentence said without being thought of can possibly ruin contracts and have you lose valuable income. Prepare to work longer hours for less pay…for a long time
When you work for yourself you will see that you many times get less paid for every actual hour worked. This is because clients pay for what you do for them and not for your own accounting and planning. Thankfully though, you will be able to adjust your rates to fit this over time. But in the beginning it will be hard. So don’t give up right away. All markets have ups and downsDepending on your niche/market you will experience some ups and downs due to changes in the market. This isn’t anything you can do much about other than actually being prepared as good as possible. Not all people understand that freelancing actually is hard workDon’t expect everyone to understand what it’s like to do your work. Many new freelancers experience communication problems with family and friends who think freelancing is easy money and little work. It can also many times be hard for them to understand when you’re working and not. Make sure to do all you can to be prepared for this. There are many laws/rules you have to read up on
Picture by Kristian Risager Larsen It’s rarely as easy as just deciding what you want to do with your business and starting to do it. In most countries there are rules and regulations on many aspects of various businesses. You have to figure out what will apply to you so that you can do things they way they’re supposed to be done. Taxes and VAT can have special rules in your country, make sure you know them!Just as with all other rules and regulations there are rules for how to pay taxes and more. If you don’t know these you could be in for a very expensive surprise. This could eventually cost you your business. You always need to have a plan B
|
| How to Create Your first WordPress Theme: Part 1 Posted: 07 May 2010 03:00 AM PDT
What we needWAMP/XAMPP Server (or similar software) - Download WordPress 2.9.2 (latest version, recommended) – Download Getting started – creating the working environmentFirst thing first, you need to install WAMP Server. After installing WAMP, download and copy the WordPress files in the www directory from your WAMP folder. Start WAMP Server, click on the icon in the task bar, and a pop-up list show appear, then select phpMyAdmin. Now, create a new database. Give it any name, but you need to keep it in mind as we need it at the WP installation. As for now, we are done with WAMP Server, just leave it running. WordPress InstallationAfter copying all the files, you need to install WordPress. Enter on the address where you have put the WP files. The address would be exactly, without any www or http, localhost or localhost/WordPress. After accessing the address, the installation may start. Click “Create a Configuration File”. After this, you will see some listing of things you need to know. I’ll just tell you what you need:
Now, just fill in the fields with the required information, and go further! After filling up the fields, next give any name to your blog, and write your e-mail address. Now, copy the auto generated password, and paste it in the password field at the site login. Now, because you cannot keep that weird password in mind, go the upper right corner of the site and click on “admin”. You should see a page where you have your account info. You can modify anything there, but for now we are setting a new and easier password. Go to the bottom where it says “New password” and set your new password. Good, now you have WP installed, but we have a lot more things to do. 1. Planning the theme layoutWhen I’m starting a new project on developing a WordPress theme, as everyone should do, I first build my HTML/CSS template. This is easier because you also learn how to convert a simple HTML template into a fully functional WordPress theme. So i won’t go through building the template, considering you already know how to build your own. I’ll just use a simple layout from Free-CSS.com in this tutorial. Go here and download the #7 template. 2. Starting the conversionWhen I’m making a theme, I’m always copying code snippets from a default WordPress theme (because i cannot remember all of them). I use the WordPress Classic theme, but you can also use a cheat sheet. The best one i’ve found is the one created by Ekinertac. After it opens in the PDF format, save it in your computer (you may need it when you do not have access to the internet). All the contents from the sheet are the most used functions from WordPress, and the ones that you need to create a basic WP theme. A thing that you have to notice is that WordPress is using PHP. Even if you aren’t a PHP master, or you have absolutely no idea what PHP is, you are still able to create a basic theme. When creating a theme, you need to know just tags and what they are doing, so do not worry about PHP. 2.1 Making the theme recognizable by WordPressA very important part of a WordPress theme is the CSS file. In the CSS file are written some lines that WordPress is using to g a theme. First, you need to rename the styles.css to style.css as WordPress is search for style not styles. Copy and paste these lines at the start of your CSS file: /* Theme Name: Free-CSS template WP version Theme URI: <a href="http://free-css.com/">http://free-css.com</a> Description: A very basic WP theme based on a simple CSS layout from Free-CSS.com Version: 1 Author: >your name< Author URI: >your site url< Tags: free, css, tutorial, simple, basic */ You can change everything that is located after the “:” dots. Save your CSS file as we won’t need it because we are just trying to give to the HTML template functionality. 2.2 Converting the HTML fileAfter you set up your CSS file, we need to go and change some things in the index.html file. First of all, clear all the sample text. Now, we need to make some declarations for the WP theme. We need to make the title dynamic and to set the stylesheet path. These lines will help you: <meta http-equiv="Content-Type" content="<?php bloginfo('html_type'); ?>; charset=<?php bloginfo('charset'); ?>" /> <title><?php wp_title('«', true, 'right'); ?> <?php bloginfo('name'); ?></title> <style type="text/css" media="screen">@import url( <?php bloginfo('stylesheet_url'); ?> );</style> Now, we will start with the header of the design. For adding your blog’s name with a link to your homepage in the header, we will use this line of code: <h1><a href="<?php bloginfo('url'); ?>"><?php bloginfo('name'); ?></a></h1> The first PHP tag is used for retrieving the blog’s homepage link and the second is for the blog’s name (the one you set in the installation). Now we’re going further for the loop. The loop is a block of code that will repeat for each post from WordPress. We will use the loop to construct the article. I’ll cover more about the loop in the second part, where we will use it for other things too. Now, all your code is wrapper by some loop specific tags. Here they are: <?php if (have_posts()) : while (have_posts()) : the_post(); ?> <!--Code to be repeated here--> <?php endwhile; else: ?> <?php endif; ?> Next, we will start constructing the article structure. We will need a title, some info about the dat when the article was published and it’s author. The following line makes the article title: <p><strong><a href="<?php the_permalink(); ?>"><?php the_title(); ?></a></strong></p> The first PHP tag is for the article’s link and the second is for the article title. These tags are kinda self-explanatory. We’re moving further for the meta data (date, author). Copy and paste the following code under the article title code: <p>Published on <?php the_time('F d, y'); ?> by <?php the_author(); ?> in <?php the_category(','); ?></p> First tag is for retrieving the date. The date tag have some parameters. These parameters are setting the date format (month, day, year). You can add characters like “-” or “.” or making something like “Month 02 Day 15 Year 1990″, it’s up to you! The second one, is for echoing the author of the post and the third, is for category or categories that the post is filed under. Now, we will be placing the content tag. The content tag will output everything you write in a WordPress post: <?php the_content(); ?> The tag doesn’t need paragraphs because WordPress auto generates them for you. We’re finished with the loop. You can see the code pieces at the party: <?php if (have_posts()) : while (have_posts()) : the_post(); ?> <p><strong><a href="<?php the_permalink(); ?>"><?php the_title(); ?></a></strong></p> <p>Published on <?php the_time('m d Y'); ?> by <?php the_author(); ?></p> <p><?php the_content(); ?></p> <?php endwhile; else: ?> <p><?php _e('Sorry, no posts matched your criteria.'); ?></p> <?php endif; ?> Next, we will be going to code the sidebar. We will start with the navigation. As you see in the CSS layout, the navigation is located in the sidebar. It doesn’t matter because the technique is the same. For creating a basic navigation you need these lines of code, which will placed between the <strong>ul </strong>tags: <li><a href="<?php bloginfo('url'); ?>">Home</a></li> <?php wp_list_pages('title_li='); ?> You already know what the first PHP tag does. The second one, is listing the pages that WordPress generates. The parameter is for list title. Try removing it and see what’s happening. This is all you need to do for getting a nice working navigation menu. Now, we will create the categories list. All the blogs have categories and we don’t want our theme to lack categories. We will just add this code between the div #extra tags: <p><strong>Categories</strong></p> <ul> <?php wp_list_categories('title_li='); ?> </ul> There is another listing tag but this one is listing the blog’s categories. I’ll cover more things relating the sidebar in part 2, where i will teach you how to make a theme widget-ready. That means you will introduce new blocks inside of WordPress, without coding anything. But what about the footer? Shouldn’t it have some text in it? Well, we will write the copyright: <p>Copyright © 2010 <a href="<?php bloginfo('url'); ?>"><?php bloginfo('name'); ?></a>. All rights reserved.</p> As you see, we have introduced some tags, just like in the header, to output the blog’s title. The theme is functional, but we will need to make some page templates for single post (where the comments will appear) and the page (where you could write some info about your blog). If you use the same code for the header footer and sidebar, your template would get messy. Let’s say that you want to add one more thing to your sidebar. You will have to modify 3 times for each page template. Well, for avoiding this, we will chop the markup. For each section of the index.php file we will have a separate file. So we will have header.php, footer.php and sidebar.php. Now, we will be starting to chop! Copy and then replace the following lines: <!DOCTYPE HTML PUBLIC "-//W3C//DTD HTML 4.01//EN" "http://www.w3.org/TR/html4/strict.dtd"> <html> <head> <meta http-equiv="Content-Type" content="<?php bloginfo('html_type'); ?>; charset=<?php bloginfo('charset'); ?>" /> <title><?php wp_title('«', true, 'right'); ?> <?php bloginfo('name'); ?></title> <style type="text/css" media="screen"> @import url( <?php bloginfo('stylesheet_url'); ?> ); </style> </head> <body> <div id="container"> <div id="header"><h1><a href="<?php bloginfo('url'); ?>"><?php bloginfo('name'); ?></a> </h1></div> With the following line: <?php get_header(); ?> Your copied code needs to be placed in the header.php file. The same thing we will do with the footer and sidebar Copy the following: <div id="navigation"> <p><strong>Navigation Here</strong></p> <ul> <li><a href="<?php bloginfo('url'); ?>">Home</a></li> <?php wp_list_pages('title_li='); ?> </ul> </div> <div id="extra"> <p><strong>Categories</strong></p> <ul> <?php wp_list_categories('title_li='); ?> </ul> </div> Paste them to sidebar.php then in the index.php file replace it with: <?php get_sidebar(); ?> Now, do the same thing with the footer. Copy the footer div and it’s contents, paste it in footer.php file, and then remove it in index.php with: <?php get_footer(); ?> You should have something like this: <?php get_header(); ?> <div id="wrapper"> <div id="content"> <?php if (have_posts()) : while (have_posts()) : the_post(); ?> <p><strong><a href="<?php the_permalink(); ?>"><?php the_title(); ?></a></strong></p> <p>Published on <?php the_time('m d Y'); ?> by <?php the_author(); ?></p> <p><?php the_content(); ?></p> <?php endwhile; else: ?> <p><?php _e('Sorry, no posts matched your criteria.'); ?></p> <?php endif; ?> </div> </div> <?php get_sidebar(); ?> <?php get_footer(); ?> </div> </body> </html> Now you’re done with chopping the markup. We are going to create the page templates. We will create firstly the single template. Just save your index.php file as single.php. We won’t modify anything in this page yet. We will do it in part 2 where I will learn you how to create a comment form and how to list comments and other things like custom fields. Now, for the static page, page template, delete the line where you have placed the meta data (the line with date, author and category tags). Then save the file as page.php. Being a page, we won’t need any info about the creation date or the author. We won’t even use comments on page because there is no point in it. The last move we need to do is to print screen our template and save it in a canvas of 300 x 225 px and save it as screenshot.png in the root directory of your theme. This will be used in WordPress theme menu. Well, we’re done with the first part. Go ahead and test your theme. If there is something you want to ask, do it via comments. Don’t forget that you can download the source files too. To be continuedThere are a lot of things to cover about WordPress. Making a theme isn’t so difficult, you just need to be patient. There are a lot of things that are needed to make a fully functional WordPress theme. That’s why, this tutorial will have a Part 2. Maybe there will be more parts, but i will let you know what I will be covering in the next part:
Stay Tuned. |

 Picture by


 Picture by
 Picture by
  Picture by
 Picture by

 Picture by
  Picture by
  Picture by

| You are subscribed to email updates from Graphic and Web Design Blog To stop receiving these emails, you may unsubscribe now. | Email delivery powered by Google |
| Google Inc., 20 West Kinzie, Chicago IL USA 60610 | |
0 comments:
Post a Comment