1stwebdesigner |

| Customize your WordPress Backend for Personal Branding Posted: 29 May 2010 03:45 AM PDT
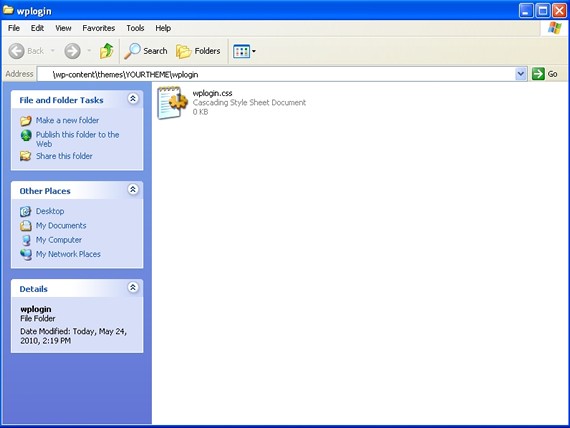
We will then take it a step further and create a custom admin panel footer, and also a custom admin header image for our WordPress site. Let’s Get StartedSetting it UpFor this example we are going to modify our functions.php file. If your theme does not have this file you can create a blank file and name it functions.php – Make sure this file is placed in the theme directory of the current activated theme you are using. Add the following to your functions.php file: functions.php php function custom_login() { echo 'wplogin/wplogin.css" />'; } add_action('login_head', 'custom_login'); ?> Explanation of the CodeWe are using the functions.php file to tell WordPress to override the default settings for the .css file used to make up the login screen. By doing this we are directing WordPress to use a specified .css file that we are going to create for our custom login screen. This .css file will be what we modify to design the login page. Please make note that there are some very specific styles within the .css file that MUST be present, and changed accordingly for this to properly work. I have created the folder and placed the .css file in it to keep it separated from our regular theme files. If you want to the path can be altered as long as it points to the direct location of the CSS file within your theme. The SetupNext we will need to do two things. First, we will need to create a new folder in our theme directory. For this example we are going to use the folder name wplogin. This folder will be placed within our WordPress theme file folder. In this folder we will make a new blank file and name it wplogin.css Taking a look at the setupThis is now what you should have. Remember that the location can be changed using the code we placed in our functions.php file – but for this example you should now have the following:
The file structure will be: wp-content\themes\YOUR_THEME_NAME\wplogin The new folder we named wplogin will go into your theme folder, and the new .css file we created will be held within the new folder. Now let’s view what we will be adding to our .css file:wplogin.css /* Page Background */ html { background: #eae2d5 url(bgimage-path); margin: auto; font-weight:bold; } /* Wordpress Logo - MAKE SURE TO MATCH THE WIDTH AND HEIGHT */ h1 a { background:url(logo-path) 0 0 no-repeat; width:290px; height:150px; margin-left: 10px; margin-bottom: 0px; padding-bottom: 0px; } /* Top Bar Background Color */ body.login { border-top-color:#dac6ad; } .message { margin-bottom: 0px; } /* Login Button */ #wp-submit { background: #bc3d1d; border: #f24643; } /* Lost Password Link */ .login #nav a, .login #nav a:hover { color: #443030!important;; } /* Top Bar Link */ .login p#backtoblog a:link, .login p#backtoblog a:visited { color:#443030; font-weight: bold; } .login p#backtoblog a:hover, .login p#backtoblog a:active { color:#443030; text-decoration:underline; } Explanation of the .cssNow that we have both the functions.php code in place telling WordPress to use our custom .css file, and our .css file in place, we can start to modify it a bit. The comments within the .css example should explain most everything but we will break it down to further understand it. Make a note that when changing the logo image you MUST match it with the width and height in the CSS file. That is noted up above in the comments within the CSS file but it is VERY important or it will not always work correctly. Full BreakdownI know the .css is commented well but I still want to cover each editable item. Let’s see below to take a look at it: The Page Background will be the entire page background color and image. The example .css file above shoes a link to the image but there is not one set. You can modify this to create a full-page background image, or change it to a color of your choice. The WordPress Logo: This is where you will need to be sure to change the width and height to match your image. As long as the dimensions fit your logo you are using it will work correctly. Top Bar Background Color: This is the bar located at the very top of the page. This can be changed to any color you like. Message: This is the bottom bar that can be changed to any color you wish as well. Login Button: This is the submit button on your login page. Lost Password Link: This is the a:link button to retrieve your password if lost. Top Bar Link: This is the a:link’s at the very top of the page within the Top Bar area. Login: This is the writing on the login form of your page. Take a look at the image below for a diagram of items within the CSS file we can change:
Taking it a step furtherNow to continue making our WordPress install more custom and personal, we will change the footer link on our admin screen. This can personalize our website just a little bit more. Again using the functions.php file we can force WordPress to change something. We will be telling WordPress what we want in our footer area of our admin screen instead of the generic text that comes standard with a regular install of WordPress. Here is the code we will be adding, but this can be modified to your needs: function remove_footer_admin () { echo 'Anything you want can go right here | Copyright © 2010 My Website name'; } add_filter('admin_footer_text', 'remove_footer_admin'); Changing the Admin LogoThis can also be really useful when trying to personalize your WordPress powered site. Even if you are creating the site for a client they will always enjoy seeing their logo on the admin screen. This is easy to do, and can be done by editing the functions.php file. Add the following code and be sure it points to your image that you will be using: // Custom Admin Top Logo add_action('admin_head', 'my_custom_logo'); function my_custom_logo() { echo '<style type="text/css"> #header-logo { background-image: url('.get_bloginfo('template_directory').'/images/custom_logo.gif) !important; }'; } What we have nowNow we have created a custom WordPress login screen, as well as a custom footer within our admin screen, and a custom image in the header of our admin screen. This should be a good start in personalizing our WordPress powered site. There are still things that can be done to take all of this even further. Using these methods is good for personal sites, multi-user sites, and even sites created for clients that want to see their WordPress site personalized. Playing with the above provided code will allow you many options to customize your WordPress site. |


| You are subscribed to email updates from Graphic and Web Design Blog To stop receiving these emails, you may unsubscribe now. | Email delivery powered by Google |
| Google Inc., 20 West Kinzie, Chicago IL USA 60610 | |
0 comments:
Post a Comment