PSDTUTS Updates |  |

| Create a Retro Urban Gig Poster in Photoshop – Screencast Posted: 14 May 2010 09:30 AM PDT Digital graphics are largely dependent on the software used to create them. Given the clean, pixel-perfect nature of Photoshop, artworks always risk looking too perfect therefore it's important to learn how to bring nature's random variations into our digital creations. Today’s tutorial is a video version of a tutorial by Andrea Austoni that will create an atmospheric poster for a dance party using the textured, retro look that's so popular nowadays.
View the written version of this tutorial Create a Retro Urban Gig Poster in Photoshop
|
| How to Create a Nuclear Disaster Landscape – Basix Posted: 14 May 2010 06:15 AM PDT As designers we are often asked to create fictitious landscapes for whatever project we are working on. Creating an image such as this usually takes a combination of careful image selection and knowledge of Photoshop’s tools and techniques. In today’s tutorial we will demonstrate how to create a nuclear disaster landscape using a dozen or stock photos.
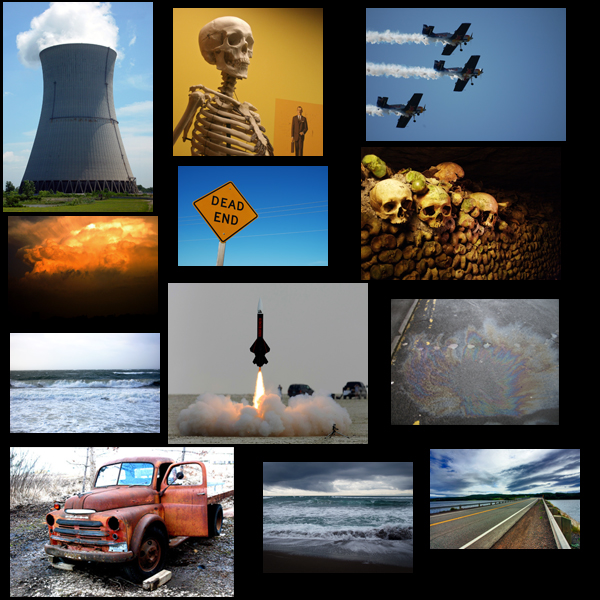
ResourcesThe following images and resources were used in this tutorial. They can be seen in the image below.
 Step 1 – Adjust the BackgroundFirst, Open of the Road image. 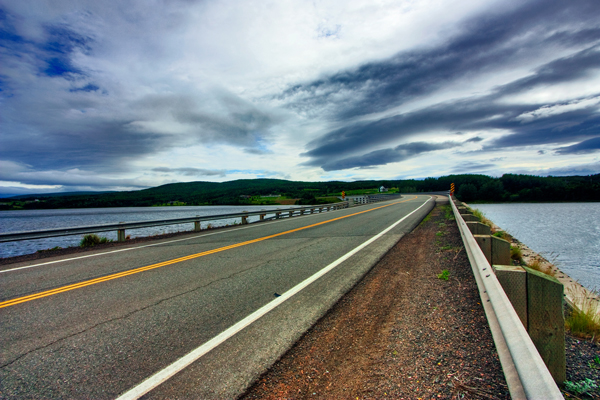 Use a gradient map by going to Layer > Adjustement Layer > Gradient Map to darken this photo a bit. Use the settings below: 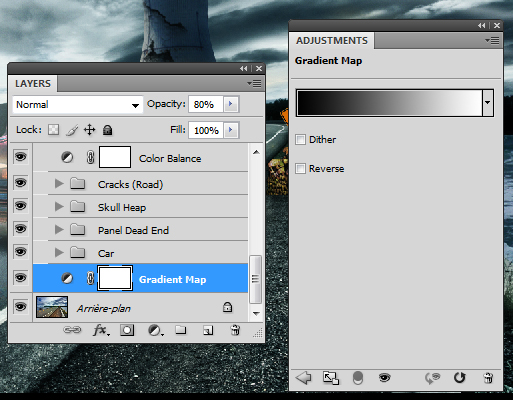 The resulting image should look something like this.  Step 2 – Add the CarNow, open the Car Stock Image and copy and paste it into your working document. Name the layer “Car.” Use any method to remove the Car/Truck from its background. At this point we also need to adjust the “Car” layer’s Brightness/Contrast. Go to Image > Adjust > Brightness/Contrast and set to -10/+5. 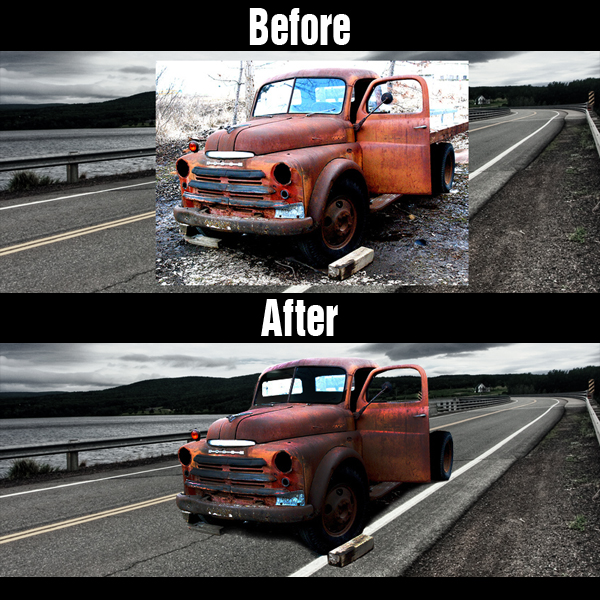 Step 3 – Add a Shadow Under the CarTo create a shadow for the car, Duplicate the “Car” layer and place the layer under the “Car” layer. Name the new layer “Shadow Car.” Cmd-click to select the pixels of the “Shadow Car” layer and fill it with black by going to Edit > Fill > Black with 100% Opacity. Set this layer’s blending mode to Soft Light and move it slightly under the car as shown. 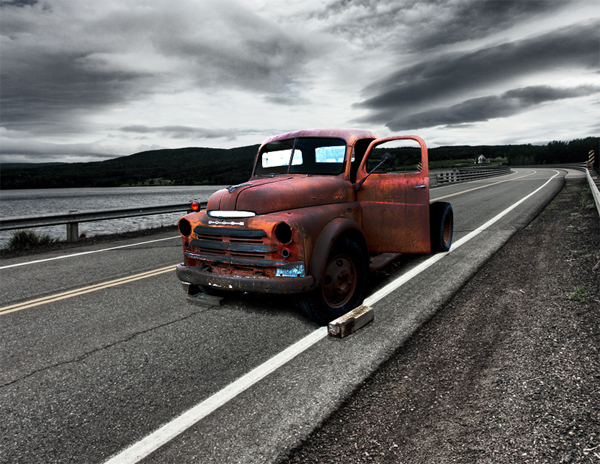 Step 4 – Adjust the Car WindowsIn this step we will make sure that we can see the background through the windows of the car. To do this, take the Rectangular Marquee tool and make a selection of the background layer directly behind the windows. If you need to, feel free to lower the opacity of the Truck to ensure that you are selecting the right spot. Paste this selection directly above the “Car” layer and hide it. 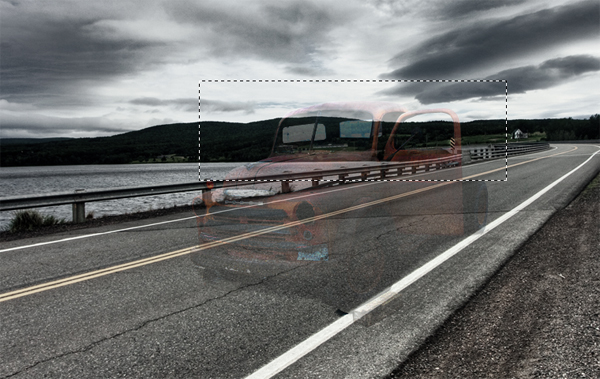 Make a selection of the windows of the car as shown below. Once your selection has been made unhide the selection of the background that you just made, make an inverse selection of the windows and press Delete. This should remove the excess area from your new windows. 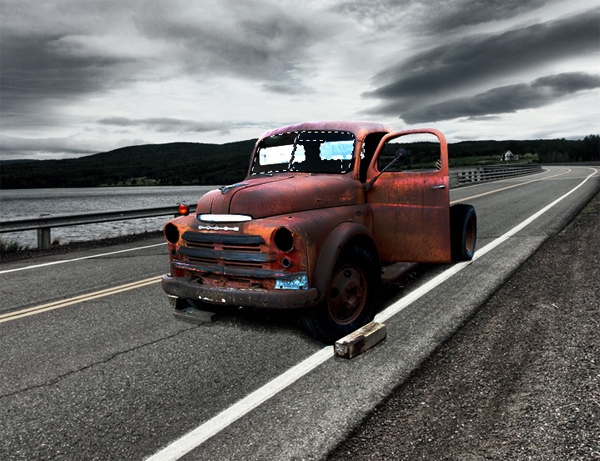  Step 5 – Add a Skeleton Inside the CarTo add the skeleton, extract it from its background and then copy and paste the end result into your working document. Resize and position it as shown below. Place it above the “Car” Layer and Delete the excess areas. Lower the Opacity a bit and name this layer “Skeleton.” 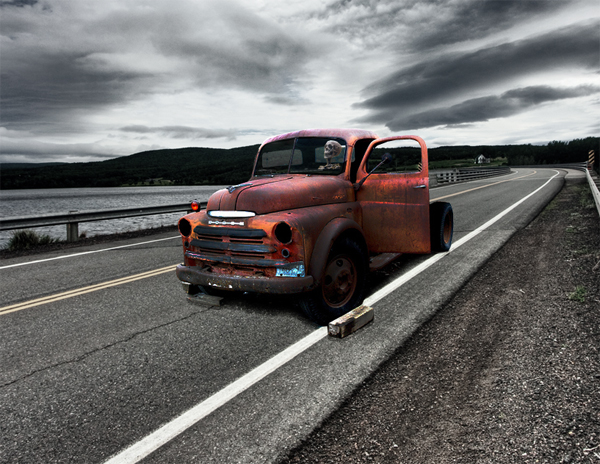 Step 6 – Add a Pool of GasolinePaste the Gasoline photo into your working document. Resize, position and transform as shown below. Use a soft brush to erase the parts that you do not need. Now adjust the Brightness/Contrast. Name this layer “Pool of Oil.”  Step 7 – Add the Dead End SignPaste the Dead End Sign into your working document and extract it from its background. Place it as shown below. Use the Burn Tool to darken the right side of the sign. Name this layer “Panel.” 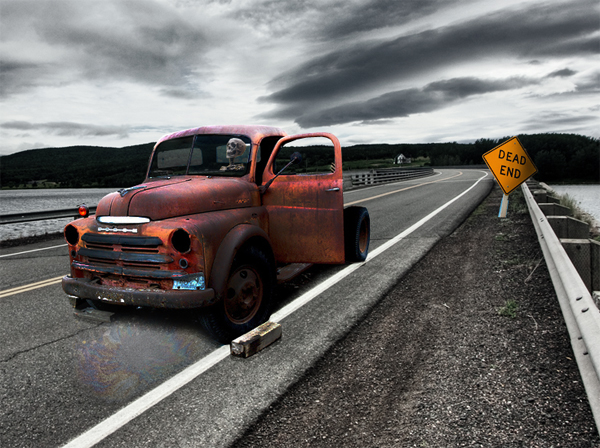 Step 8 – Add a Skull HeapPaste the Skull Heap image into the document. Extract it from its background as shown below, flip, and position it appropriately. Use the Burn tool to darken it a bit and name the layer “Skull Heap.”  Step 9 – Add Shadowing Under the Skull HeapAdd a shadow to the heap using the same technique that we used in Step 3. Name the shadow layer “Shadow Heap.” 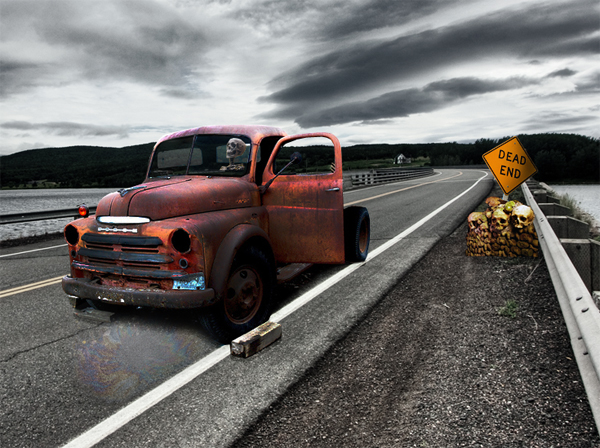 Step 10 – Add Cracks to RoadWe want our road to look a bit less pristine. To break up the pavement we will use these Brushes. Select a black brush and place a crack as shown below. 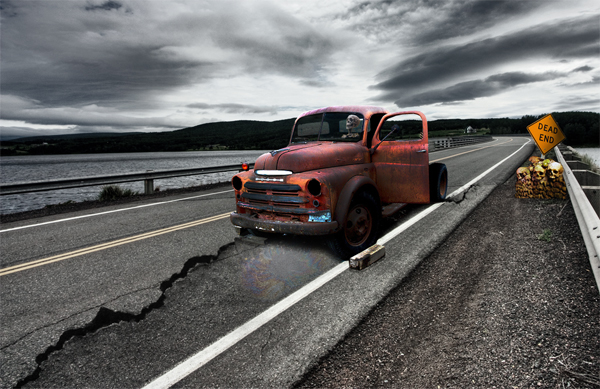 Step 11 – Add Color and ContrastTo add some color to add a new adjustment layer by going to Layer > New Adjustment Layer > Color Balance > -15/+10/+10. Now add some Contrast by going to Layer > New Adjustment Layer > Brightness/Contrast > 0/+15. 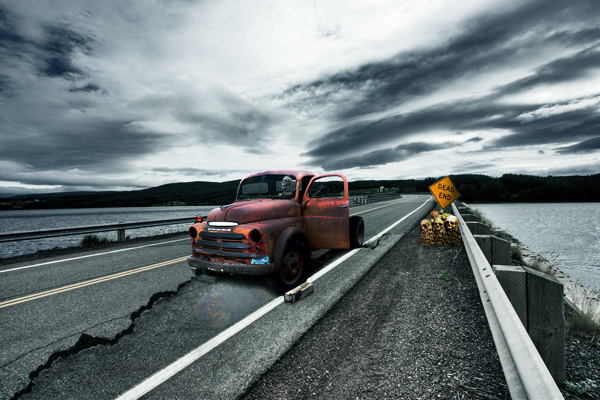 Step 12 – Add a NukeCopy and Paste the Nuclear Missile into your working document and extract it from its background as best as you can. Resize and place it as shown below. Name this layer “Nuke.” 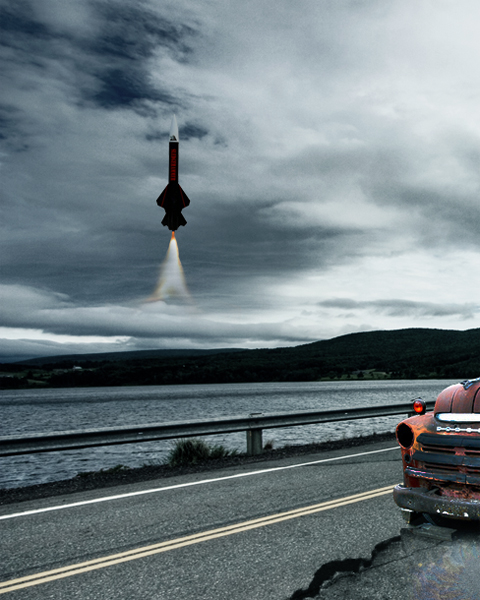 Step 13 – Add an Explosion Under the NukeNow copy and paste the Explosion photo into your working document. Use a soft eraser to remove the unwanted areas of the explosion and place it as shown below. Name this layer “Explosion.” 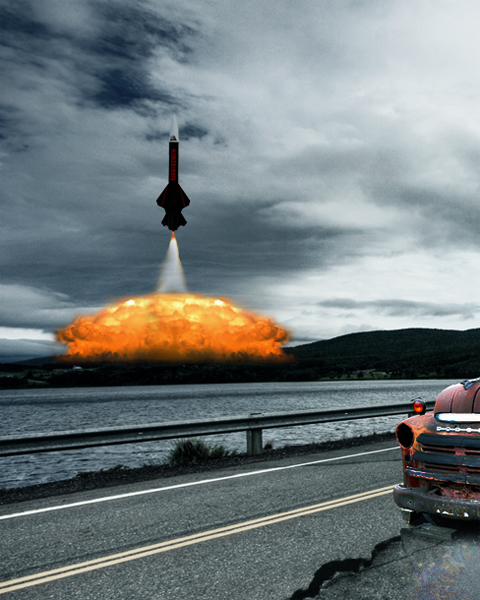 Step 14 – Add the ShockwavesAs you know an explosion would cause some shockwaves. You can add the shockwaves by copy and pasting a photo with some nice waves into the document and by erasing the unwanted areas. First do this on the left side and then do it on the right as well. Name each side “Left Water” and “Right Water” respectively. 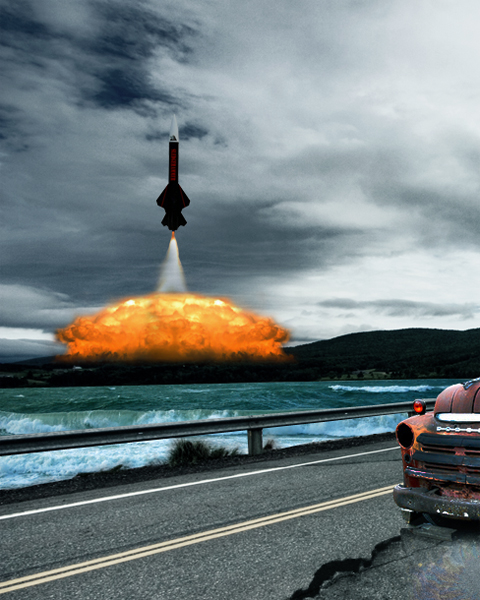 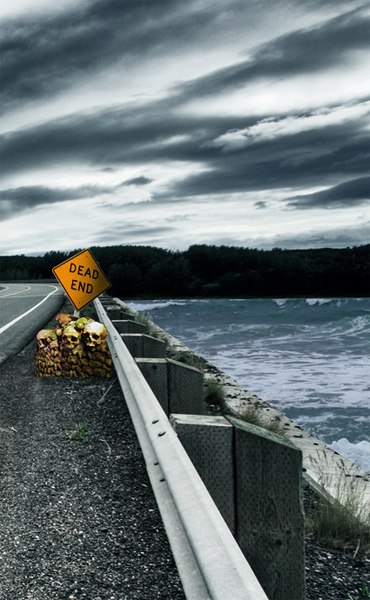 Step 15 – Adjust the ShockwavesAdjust the color of the waves using the Color Balance Adjustment under Image > Adjust > Color Balance and set to +19/-16/-8. Do the same for the "Right Water" layer. Step 16 – Add a Nuclear ReactorNow extract the Reactor from its background and paste it into place. Name it “Nuclear Reactor.” 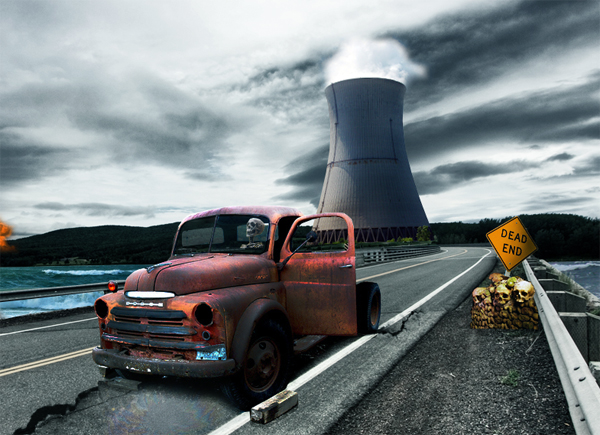 Step 17 – Adjust Shading on ReactorUse the settings below to adjust the lighting of the reactor using the Burn and Dodge tool. 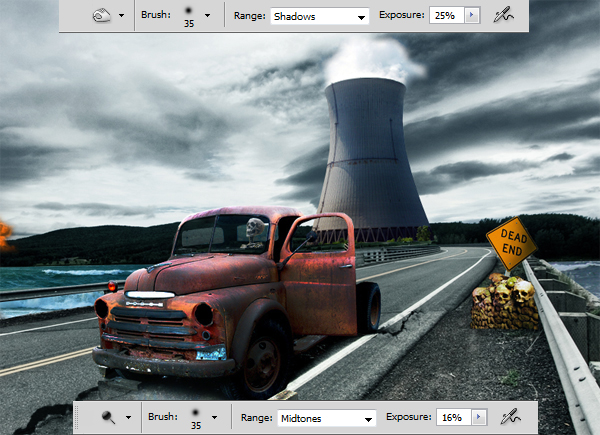 Step 18 – Add Cracks on the Nuclear Reactor and Darken VegetationUsing the same technique you used in Step 10, use the crack brushes that you downloaded earlier to apply some cracks to the reactor. Now grab a black brush, lower the opacity to 76% and change the brushes blending mode to Color. Use the brush to darken the vegetation.  Step 19 – Add Lights and Smoke to the RoofFind a photo of fire similar to the one placed on the roof below. Use a soft eraser to remove unneeded areas. 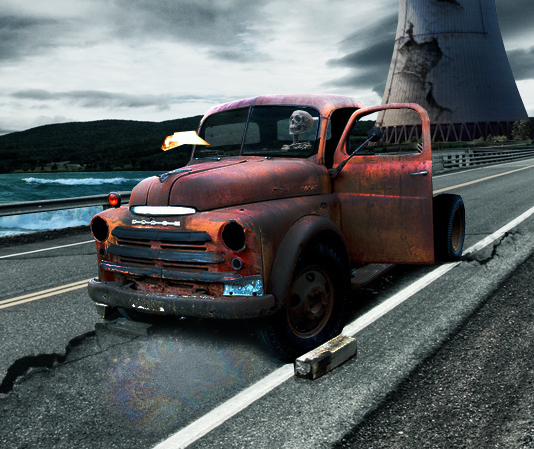 Next go to Filter > Distort > Motion Blur > set the Angle in the direction of your fire (in my case > 0), and the Distance to 24. 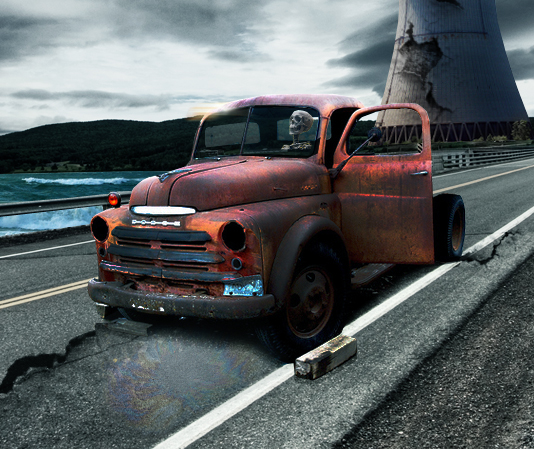 Next, take the Eraser Tool (E) and use a soft brush with low Opacity to erase all except the source of light, like this :  Name this layer "Roof Light 1", duplicate it, then go in Filter > Distort > Motion Blur, same Angle as before, but this time enter a Distance of 144. Replace it and lower the Opacity to 70%.  Duplicate “Roof Light 1” and name the new layer "Roof Light 2", set Opacity to 100%, place it next to “Roof Light 1” as shown. 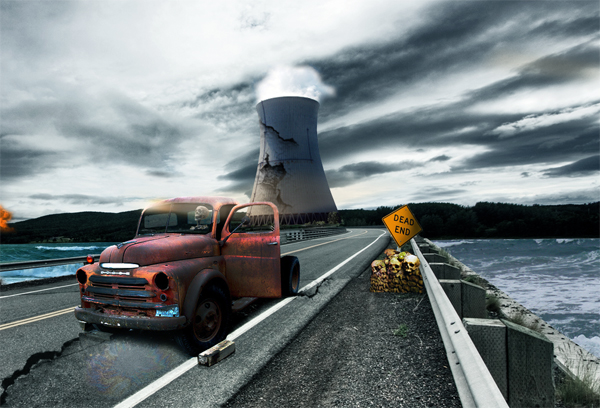 Step 20 – Add Lights and Smoke on the Hood and BumperUse the same technique outlined in Step 19 to place some lights on the hood and bumper as shown below. 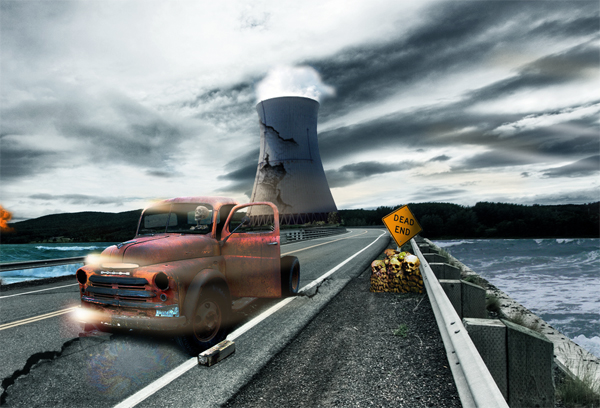 Step 21 – Add the PlaneCopy and paste the plane photo into your working document and extract it from its background. Resize the image and place it as shown below. Now apply a Brightness/Contrast adjustment to this layer using the following settings -20/+10. Apply some shading to the plane using the Burn and Dodge Tools. Name this layer “Plane.” 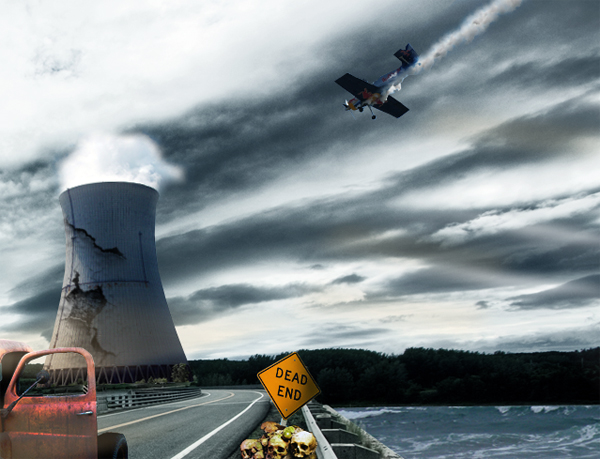 Step 22 – Add Flames to the PlaneOn a new layer, brush a strong yellow color using a soft brush over the smoke. Lower the Opacity to 36%. Name the new layer “Flames Plane.” 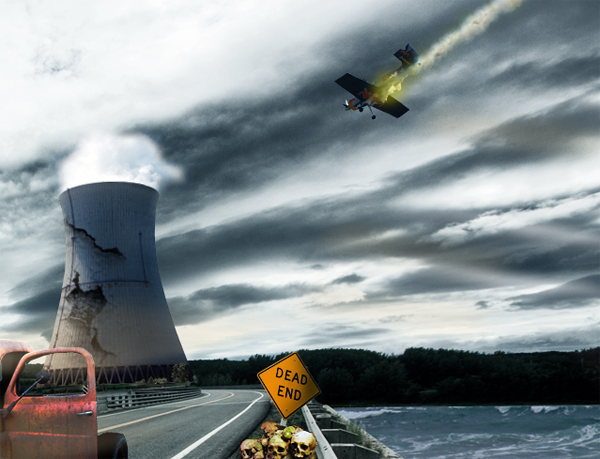 Step 23 – Add Nuclear DetonationCreate a new layer and fill it with black. Name the new layer “Halo,” and set the opacity to 40% . No go to Filter > Render > Lens Flare and use the settings below.  Step 24 – Touch Up the DetonationTake a large soft white brush and paint over the flare that we created in Step 23. 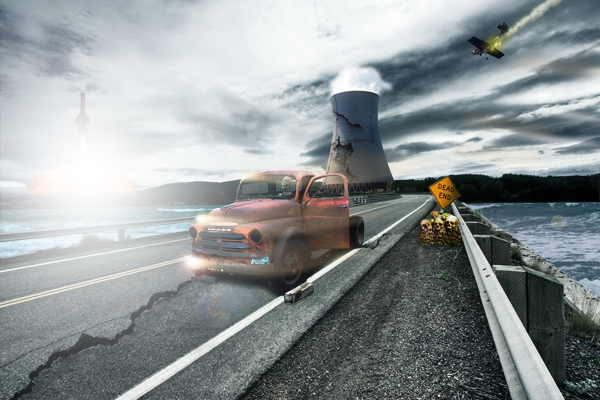 Step 25 – Darken the EdgesTo darken the edges of the image create a new Levels Adjustment by going to Layer > Levels. Use the settings below. After that add a layer mask to the adjustment layer and take a soft black brush and paint the middle as shown. Set the layer’s opacity to 66% and its blending mode to Soft Light. 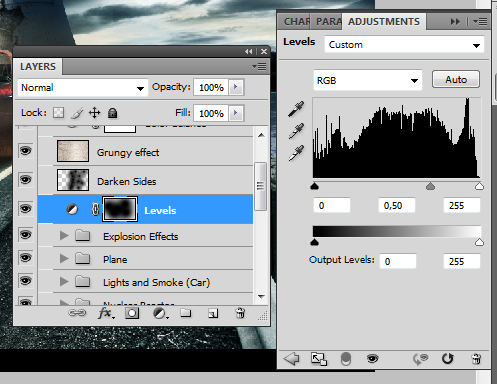  Step 26 – Add Grungy EffectNow let’s add a layer of grunge to our composition. To do this, find a grungy texture and place it on the topmost layer. Set it to Overlay and lower the opacity to 10%. Name it “Grungy.”  Step 27 – Final AdjustmentNow add one last final adjustment layer. Go to Layer > Adjustment Layer > Color Balance and set to -10/5/+10. 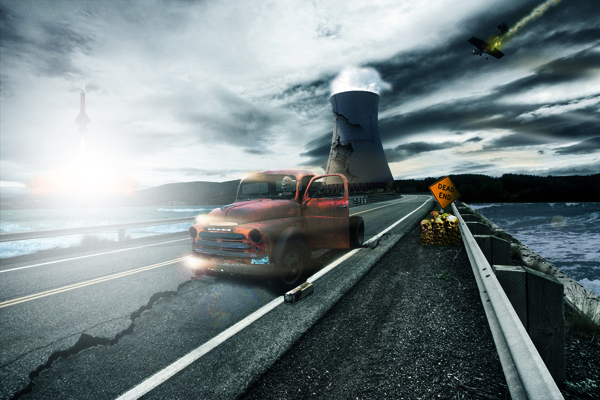 Final ImageTake a look at the final image below. 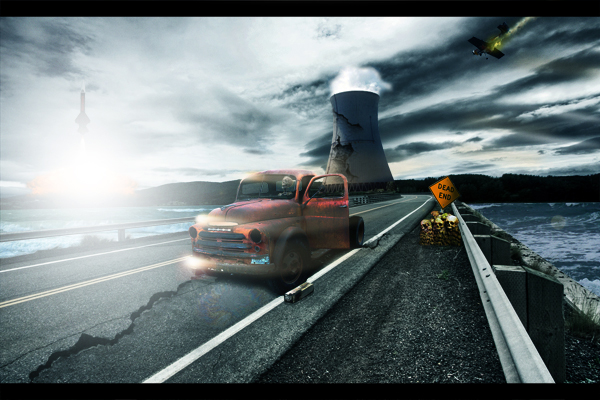
|
| You are subscribed to email updates from Psdtuts+ To stop receiving these emails, you may unsubscribe now. | Email delivery powered by Google |
| Google Inc., 20 West Kinzie, Chicago IL USA 60610 | |
0 comments:
Post a Comment