PSDTUTS Updates |  |

| Creative Sessions: Illustrative Lettering Launch Posted: 17 May 2010 07:07 AM PDT
Our first creative session on Character Illustration was a runaway success. This month we’re covering Illustrative Lettering, which touches on numerous creative fields. Historically, one could look to calligraphers, hand painted signage, and more. Even with early printed books it was small print runs and hand set type. In this session, you’ll learn how professional illustrators are inspired by lettering traditions from the past, and how they integrate this into their digital workflow.
We’ll cover theory on how to creatively use type. You’ll learn how to integrate lettering and style. We’ll deliver a handful of case studies that range from lettering in the context of culture, to wearable letters, and merging one’s digital process with hand painting a type inspired canvas. This session also deliver a truckload of lettering tips and typographic inspiration. Get started with Day 1 Developing a Passion for Illustrative Lettering.
Participate in this Session’s Group ProjectJump over to this Session’s creative project Illustrate the Alphabet. In this session’s project the brief is to illustrate the alphabet, that’s right draw the letters A-Z. Not only does this project build your skills with crafting letters, refining your process, and mastering your craft, but it will get you thinking about how letters work together, and how to build a stylistically cohesive set. You can post your projects in the comments here and get some feedback from the community. Download this Session’s Cover Art as a Digital WallpaperJump over to this session introduction to download this session’s wallpapers made by Matt Lyons. 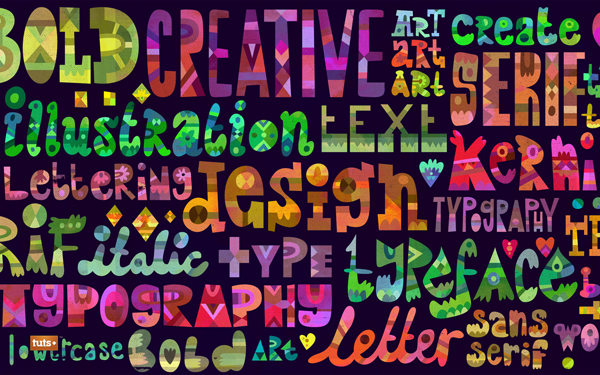 More Creative Sessions
|
| Create a Realistic Soda Bottle in Photoshop Posted: 17 May 2010 05:45 AM PDT
For many, the complexity of Photoshop’s tools can be a bit intimidating. If used properly however, almost anyone can create realistic and impressive-looking graphics. In today’s tutorial we will demonstrate how to create a stylish soda bottle using some easy-to-learn techniques.
Step 1Create a new document 600 x 800 pixels with a Resolution of 72 dpi. With the Pen tool, draw the outline of half the bottle. I recommend grabbing an image of a bottle to use as a reference. This tutorial does not use any outside images or resources but it may help to use an image of a bottle to get an idea of how the outlook will be. Now create a selection of the path you just created by Cmd + click on the layer in the Paths palette. You can fill this selection with any color you want, depending on what kind of bottle you are creating. But in this case I filled it with #872a12.  Step 2Now duplicate the layer by right clicking on it in the Layers palette and clicking Duplicate Layer. Take the new layer and press Cmd + T to Free Transform it. Move it over to the right side of the original layer and continue to stay in Free Transform mode. Right-click on the screen and Flip Horizontal. Press Enter to exit Free Transform. Now highlight the 2 layers and press Cmd + E to merge them together. Call this Layer Outer Bottle Shape.  Step 3We are going to start making highlights and shadows on the bottle to give it more of a 3D look. For the top part of the bottle grab the Elliptical Marquee Tool and drag it out near the top of the bottle, as shown in the image below. Take the Burn tool and bring down the Exposure to around 20% and set the Range to Midtones. With a very soft brush start brushing the inside of the selection and create a soft line across the top of it. Now inverse the selection by pressing Cmd + Shift + I. Take the Dodge tool with the same hardness of 0 and brush across the selection as shown in the 2nd image below. This will give the bottle a nice ridge effect. You can touch up this area by also using the Dodge tool on the other side as well.  Step 4Start adding some highlights along the side of the bottle. First grab the Burn tool with a soft brush. Exposure set to around 20% and Range set to Midtones. Start brushing along the side of the bottle to give it a nice shadow. Take the Dodge tool with the same settings and brush on the inside of where you used the Burn tool.  Step 5Duplicate the layer and name it Noise. Add some noise by going to Filter > Noise > Add Noise. Set the Amount to around 12%, with Gaussian and Monochromatic checked. Set the Blending Mode of this layer to Overlay and bring the Opacity down to around 15%. If you feel there is too much noise on the bottle you can take a soft Eraser brush with low Opacity and erase some of the noise away. This will give it a nice subtle textured look.  Step 6Let’s add some liquid inside the bottle. Go back to the first layer called Outer Bottle Shape and duplicate it, call this layer Liquid. Cmd + T on the new layer to enter Free Transform mode. Hold down Alt + Shift and slightly bring down the size. Press the Down Arrow key a few times to align the Liquid layer near the bottom of the bottle. Now take the Rectangular Marquee Tool and delete the top part of the Liquid layer, as shown in the image below. Drag out the selection over the area that you want deleted and hit the Delete key. We will now add a gradient overlay to this layer. With the Liquid layer still selected, go into the Layer Style window. To do this you can either double click on the layer or go to Layer > Layer Style > Gradient Overlay. The only settings you will need to change are the colors. Set the Blending Mode of this layer to Overlay and bring the Opacity down to around 30%.    Step 7Create a new layer on top of the Liquid layer and name it Liquid Top. Grab the Elliptical Marquee Tool and drag it out over a small area above the liquid, as shown in the image below. Fill it with a dark color (#791c0c) and add a Gaussian Blur. Filter > Blur > Gaussian Blur. Set the Radius to 2 pixels. Bring the Opacity down to around 70%.  Step 8Now we’ll start creating the outter ridges of the bottle. Create a new layer called Ridge and with the Pen tool draw where you think the ridge on the bottle will be. This would be a good time to consult your reference image as to where the details and textures are. Make a selection of the path and give it a Feather of 1. Select > Modify > Feather. Fill with a lighter color, keep the selection highlighted and grab your Burn tool. Start brushing the edges of the selection with the Burn tool but try not to overdo it. Also make a nice highlight with the Burn tool at the bottom of the selection to make it look like the ridge is sticking out. Do the same with the Dodge tool except use the brush down the middle of the selection. To make it look like the ridge is attached to the bottle, erase the top of the selection with a very soft brush. The Opacity of the brush should be about 40%.    Step 9Repeat Step 8 by creating more ridges along the bottle until it looks similar to the image below. If you want your layers to stay organized, you can put all of the Ridge layers into a Folder and name it Top Ridges.  Step 10Now it’s time to create the bottom ridges of the bottle. Repeat Step 8 except in this case these ridges will extend out to the bottom of the bottle. When using the Pen tool, draw the ridge to stay consistent with the flow and shape of the bottle. When you are done creating the highlights and shadows of the first ridge, duplicate the layer. Ctrl + T the layer and move it over to the right side of the bottle, then right-click on it and Flip Horizontal. When creating the middle ridge, use a soft Eraser brush with low opacity to erase away the bottom of the layer.   Step 11Now add some more glare and highlights to the bottle. Duplicate the Outter Bottle Shape layer and call it Highlights. Take your Dodge tool and raise the Exposure to about 25% or 30% with a soft brush. Start painting the bottle down the middle and a bit on the sides. Now take the Burn tool and do the same thing around the sides and bottom of the bottle.  Step 12Now it’s time to create the cap for the bottle. Create a new layer called Cap. Use the Pen tool to draw out a selection on top of the bottle. Fill the selection with a red color, I used #ce1831. To create the small ridges in the cap use the Dodge and Burn tools. With the Dodge tool selected use a very small brush with a Hardness of about 20% and create the outter ridges of the cap, shown in image below. Do the same thing with the Burn tool to create the small inner ridges. Take the Dodge tool and create a very soft highlight on top of the cap. Create a new layer under the Cap layer and name it Shadow. Take the Brush tool with a color of Black and hardness of 0. Paint in behind the cap and turn down the opacity to about 70%.    Step 13aNow it’s time to create the condensation (bubbles). To do this, we will create a new brush preset. Create a new document 300 x 300 pixels with a Resolution of 72. Create a new layer and call it Bubble. With the Elliptical Marquee Tool create a circle the size of the document. Remember to hold down shift when creating the circle to make it perfect. Fill the selection with white. Let’s apply a few Layer Styles to this Bubble layer. Layer > Layer Style > Gradient Overlay and add the following settings in the image below. When you are applying the Gradient Overlay take the cursor over the Bubble image and move the gradient to the upper left area of the bubble. Then add an Inner Glow layer style with the same settings as the image below. 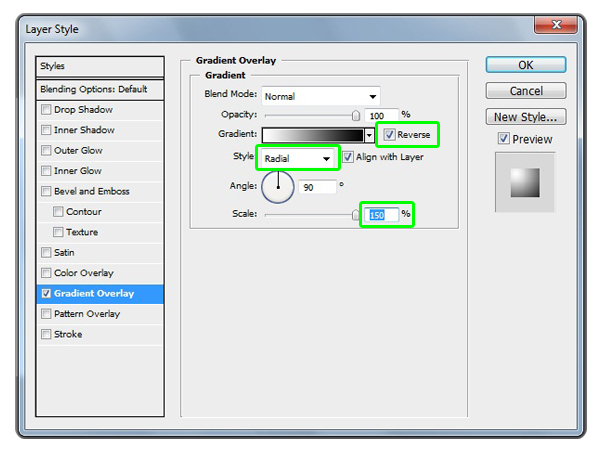   Step 13bOn the Layer Palette, right-click on the Effects of the Bubble layer and choose Create Layers (a). This will turn the Layer Styles to Layers. Then select all of the layers (b) and merge them together by pressing Ctrl + E (c). 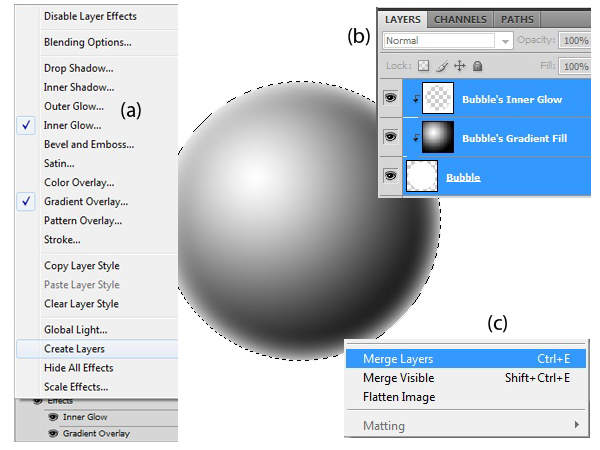 Step 13cNow we’re going to change how the bubble looks. Go to Image > Adjustments > Curves and change the settings similar to the image below. Once you have applied the Curves to the Bubble layer go to Image > Adjustments > Invert. To turn this Bubble layer into a Brush Preset, go to Edit > Define Brush Preset and name it Bubble. 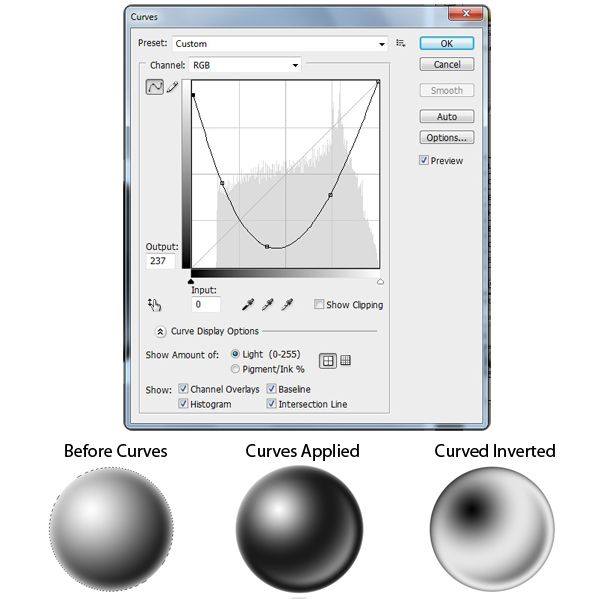 Step 14Now go back to your original document and select your new Bubble Brush that you have just created. Create a new layer and use a small brush size of around 10 pixels and a color of white. Start brushing in the bubbles onto the bottle. Try not to make all of the bubbles the same size. Use the ‘ [ ' and ' ] ‘ keys to quickly change the size of the brush. Now take the Smudge tool with a Strength of around 25% and start brushing away some of the bubbles. This will give the bubbles a cool drip effect. When you are done, set the Blending Mode to Overlay and duplicate the layer. Set the new layer’s Blending Mode to Normal and bring back the Opacity to about 33%. 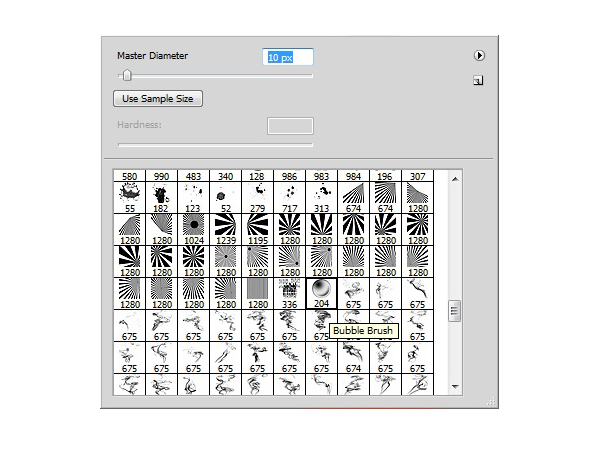  Step 15aNow it’s time to add a label. I created a custom label but you can use whatever you want. Make sure the label is approximately the same size as the middle indented area of the bottle. 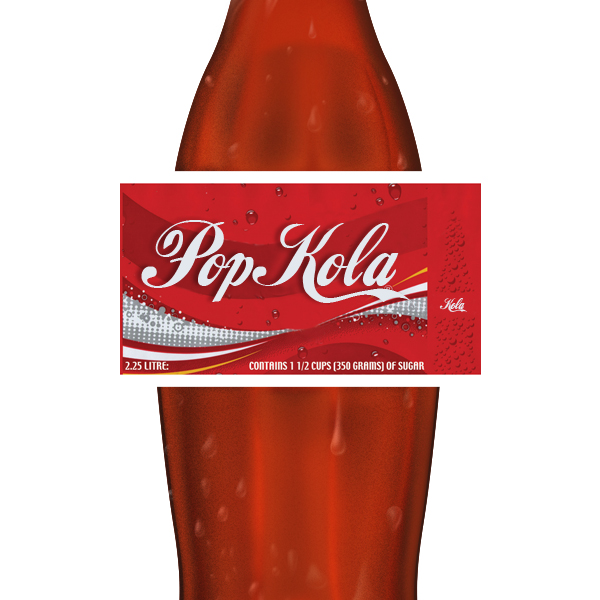 Step 15bClick on the Label layer and go to Edit > Transform > Warp. Bring back the Opacity of the layer to about 50% so you can see the bottle. Grab each corner of the Warp window and bring it in, adjust it until the label fits perfectly onto the bottle. Once the label is nicely fitted to the bottle use the Burn and Dodge tools to give the label some nice highlights and shadows. 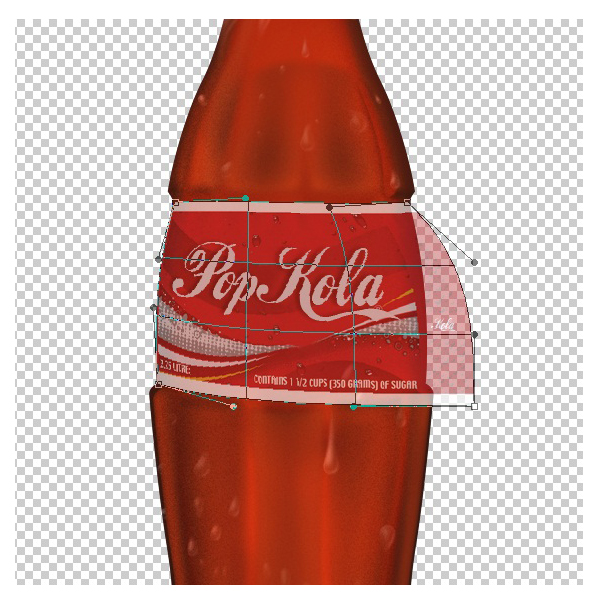  Step 16For the background I just used a simple gradient of dark to light blue. 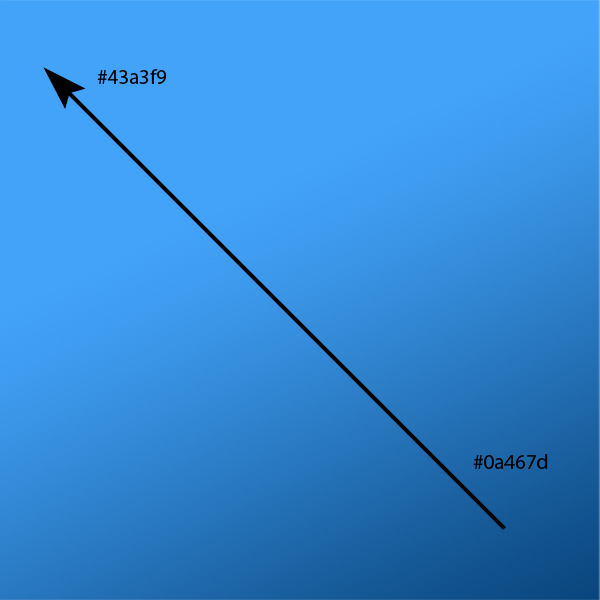 Step 17aFinally, I added a reflection to the bottom of the image. Duplicate the Outer Bottle Shape layer and bring it to the bottom on the layers palette. Rename this layer Reflection. Press Cmd + T and right-click on it, Flip Vertical. Press the Down Arrow keys until it is placed just underneath the bottle image and press Enter to exit Free Transform. Now take the Eraser tool with a soft brush and erase away some of the edges. Turn down the opacity to around 60% 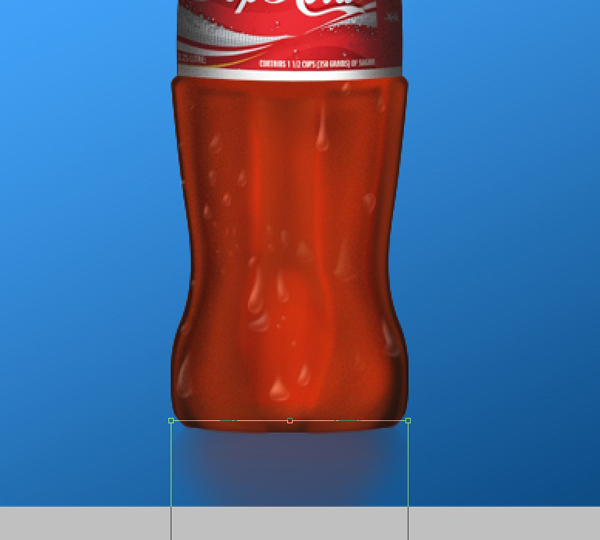 Step 17bNext make a new layer above the Reflection layer and name it Reflection Blur. Take the Polygonal Lasso Tool and create a quick shape around the bottom of the bottle, shown in the image below. Ctrl + D to Deselect it and go to Filter > Blur > Gaussian Blur. Give it a Radius of 12 pixels and set the Blending Mode to Overlay and set the Opacity to about 50%. 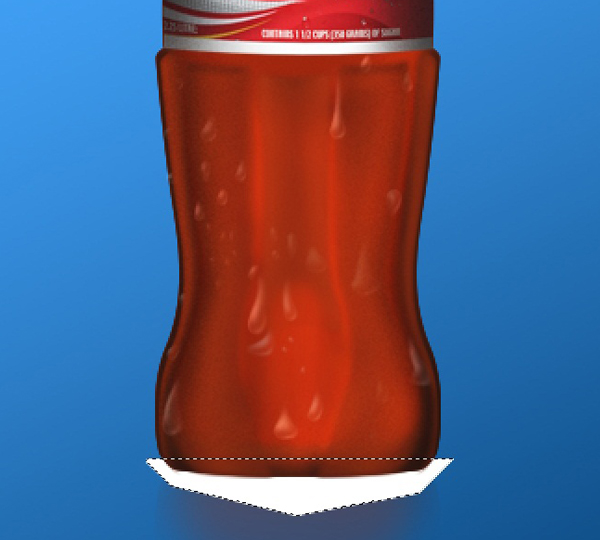  ConclusionThe more you use tools like Pen, Dodge, and Burn the better you’ll become with them. Hopefully this tutorial has given you some practice and has inspired you to create different types of objects using similar styles and techniques. 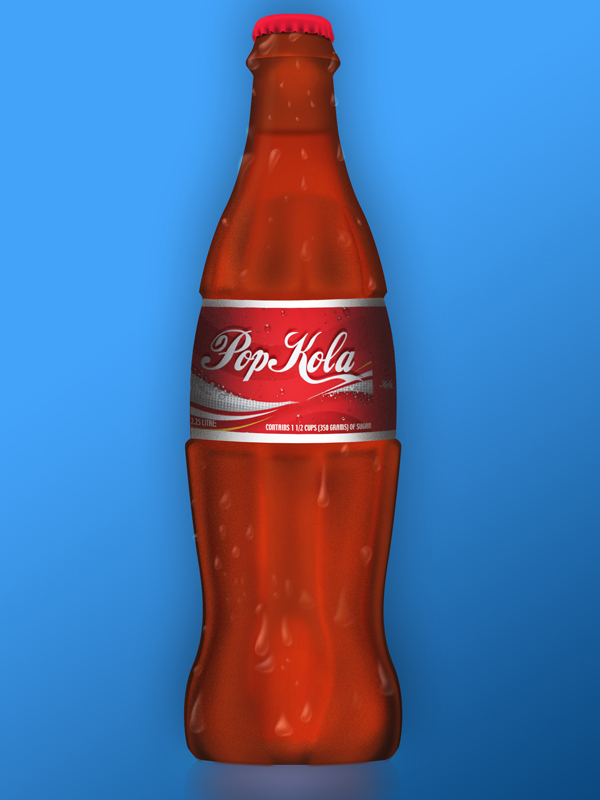 |
 Every month we’ll be running a two week Session on a creative topic. Our second Session, beginning today, is on
 | You are subscribed to email updates from Psdtuts+ To stop receiving these emails, you may unsubscribe now. | Email delivery powered by Google |
| Google Inc., 20 West Kinzie, Chicago IL USA 60610 | |
0 comments:
Post a Comment