PSDTUTS Updates |  |

| How to Create a Social Media UFO Icon Posted: 22 May 2010 05:45 AM PDT
When we design websites or user interfaces, often times we need to create unique and creative icons. Most websites these days have some sort of social media presence; with a link to their Facebook or Twitter pages prominently displayed on their front pages. With so many sites linking to their social media profiles, it’s not surprising that many sites are simple regurgitating the same icons. In today’s tutorial we will demonstrate how to create a completely unique UFO inspired social media icon based on a theme. Let’s get started!
ResourcesThe following resources were used during the production of this tutorial: Step 1Create a new file 600 x 450 pixels and fill the background with black. Then apply a radial gradient using a layer style with the center color #353535 and the edges black #000000.  Step 2Create an oval shape layer that will become the base of our UFO. 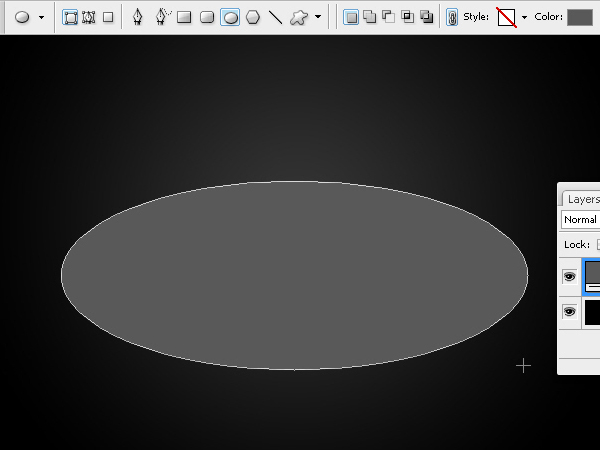 Step 3Go to Layer > Duplicate Layer and duplicate the oval but make this one a darker gray color. 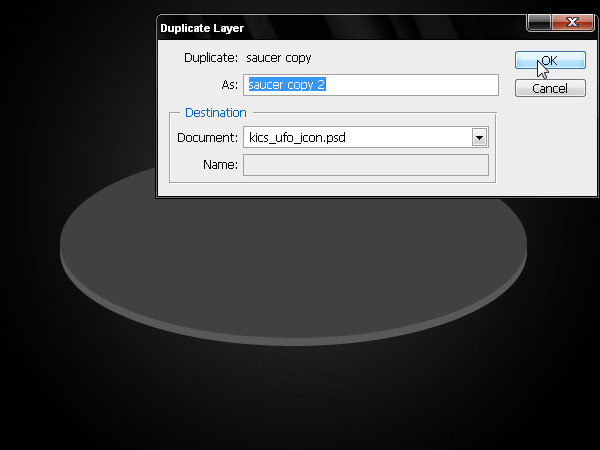 Step 4Now duplicate the layer again but distort its upper area as shown below. 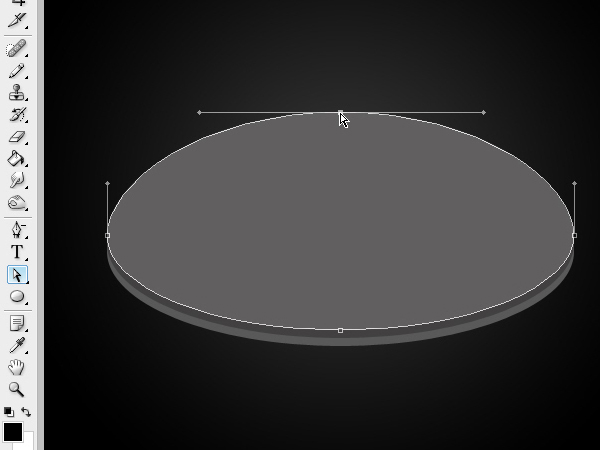 Step 5To create a polished metallic texture use an Angle and scale it up to 150%. Double click the gradient bar and open the Gradient Editor window. 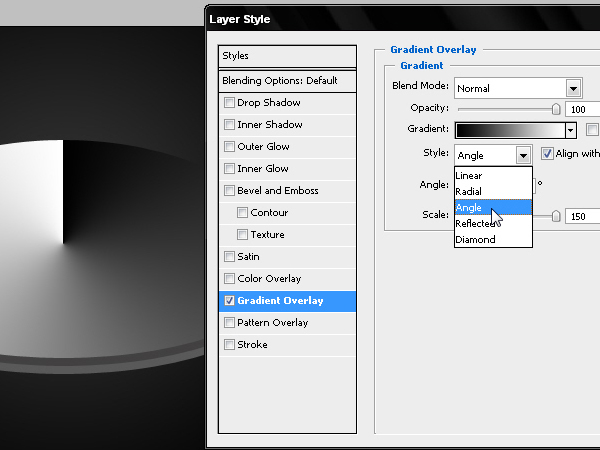 Step 6Use 2 tones of gray; #CCCCCC and #666666. 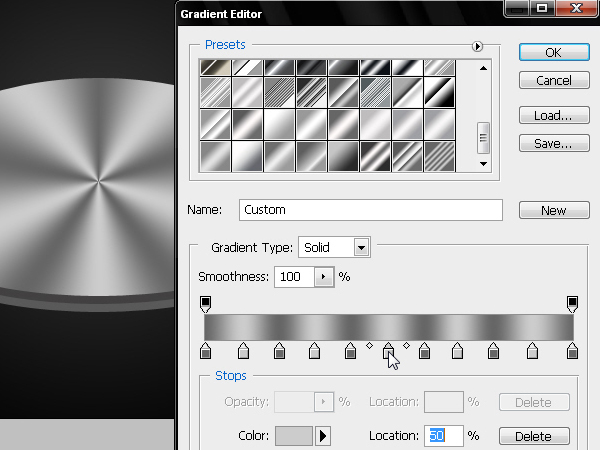 Step 7Place the center of the gradient towards the top of the shape to reinforce the conic shape of the object. 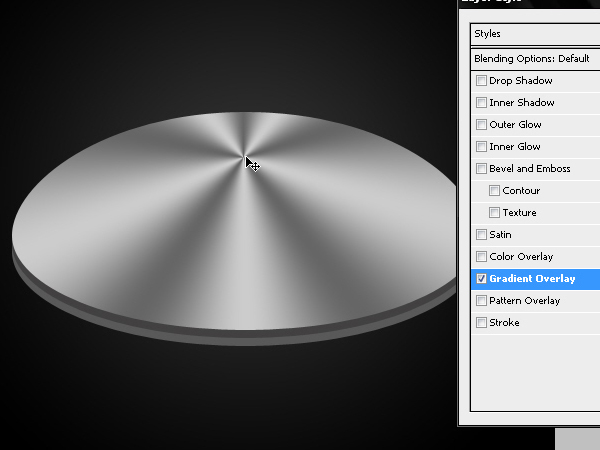 Step 8To create a 3D extrusion of the upper oval, use an inverted Inner Shadow (this means a –90º angle) with a black color and an Overlay blend. Drag the Choke to 100 and reduce the Size to zero. 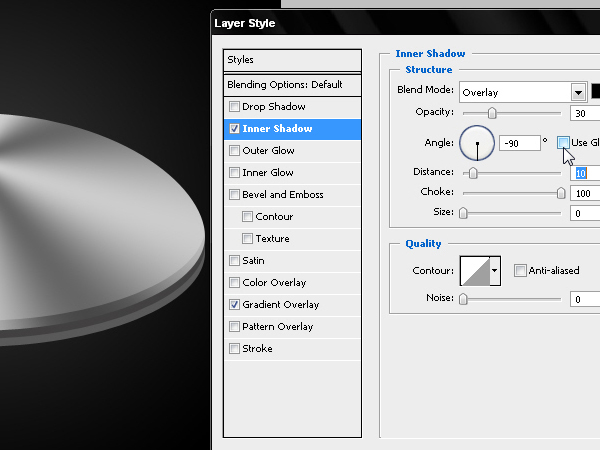 Step 9Include a thin Inner Glow that will allow the upper oval to receive the light reflected on its inner edge. 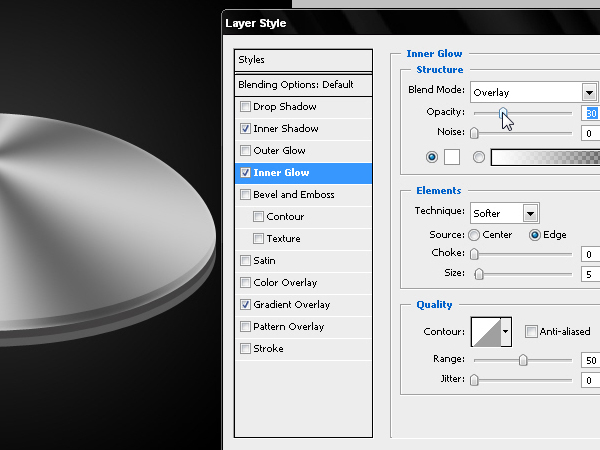 Step 10Now let’s work on the central oval. Add a Gradient Overlay using the settings below and place the gradient just below the center of the shape. 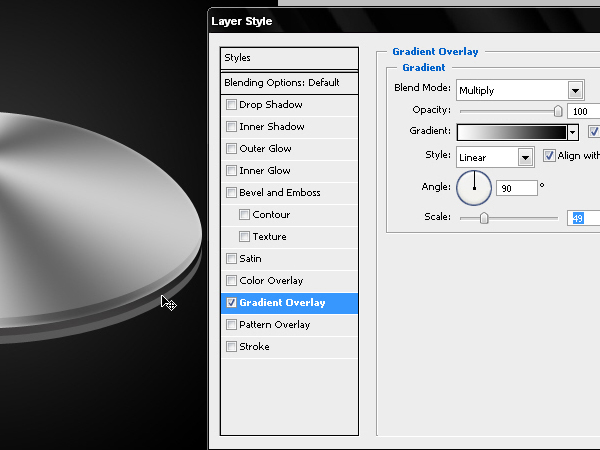 Step 11Use a white Drop Shadow to simulate a glow over the bottom oval. 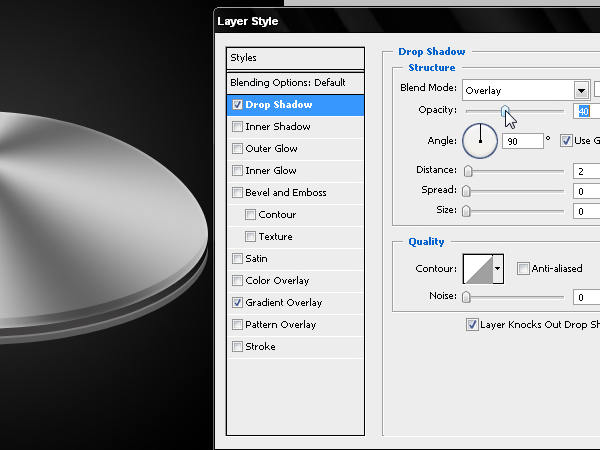 Step 12Apply the same layer style to the bottom saucer by copying and pasting the layer style. 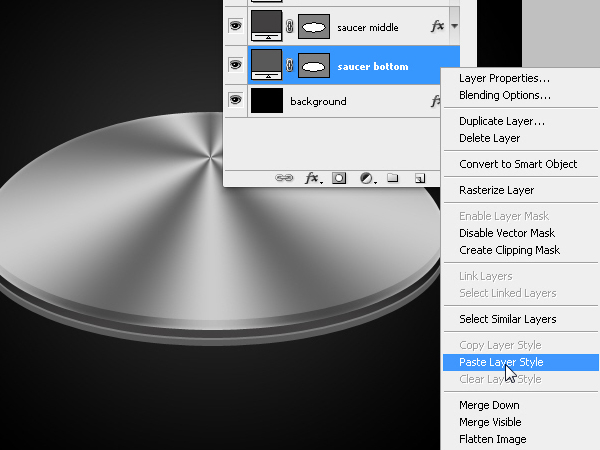 Step 13Reduce the opacity of the bottom layer’s gradient. 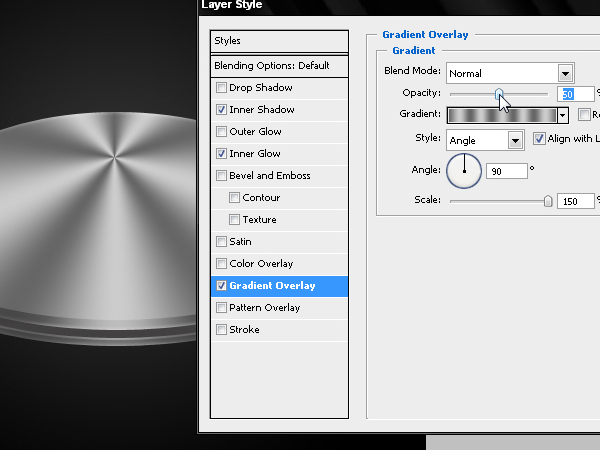 Step 14Now we need to create an insert over the upper oval. 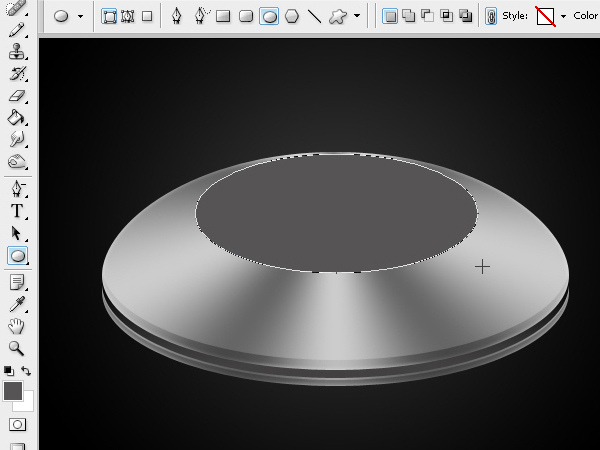 Step 15Apply a gradient to this layer as shown below.  Step 16Also add a stroke in gradient mode, using colors white #FFFFFF and grey #CCCCCC. 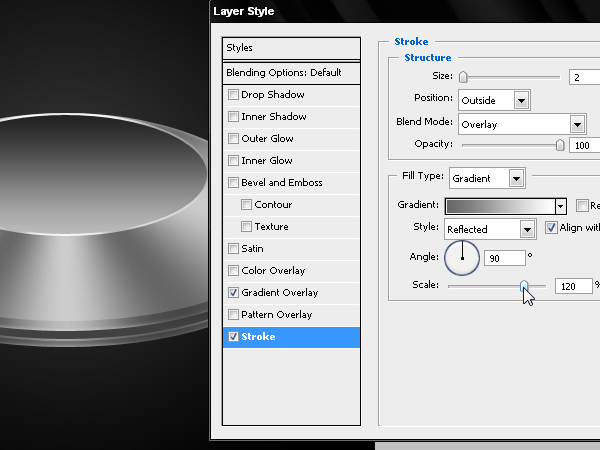 Step 17Now it’s time to create a glass dome of our UFO. To do this draw a shape as shown below. Use a blue #1D408A color. 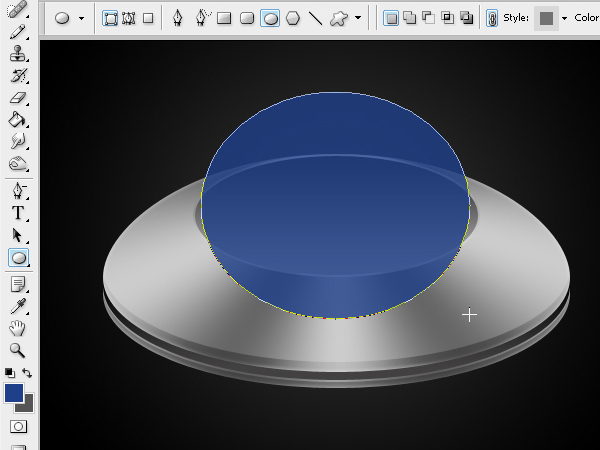 Step 18Edit the anchor points as shown below. By pressing the Alt key (Windows) you can separate the anchor points and transform each segment of the oval independently. 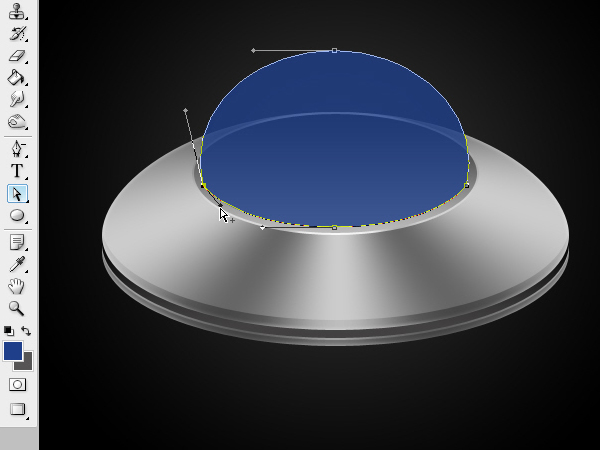 Step 19Let’s add some layer styles. First, a Satin effect with the values shown below. 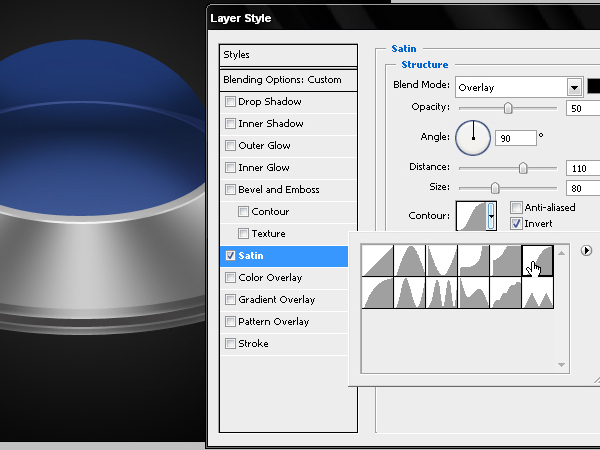 Step 20Now apply an inner glow using #1D408A. 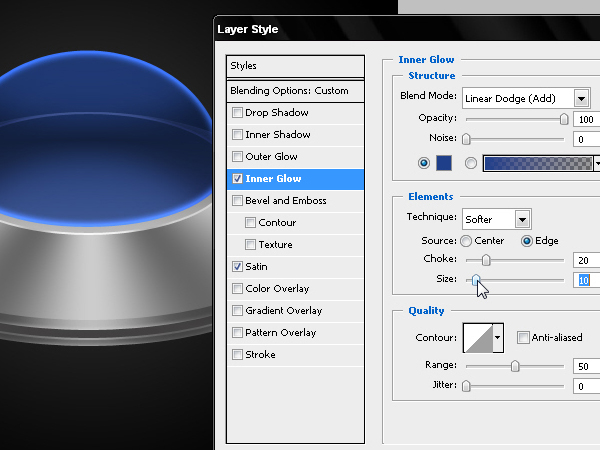 Step 21Add a radial gradient color #000000 and #76B9FD using Linear Dodge (Add). 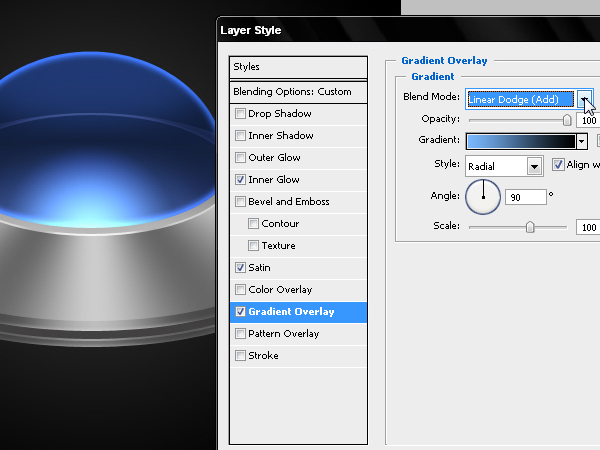 Step 22Then add an inner shadow but used as a light over the dome. Use the values as shown below. 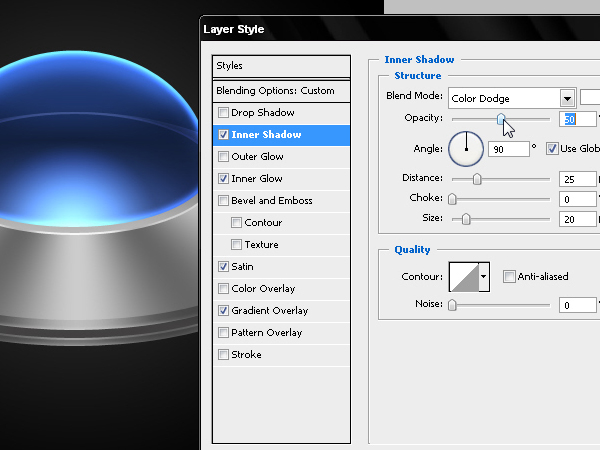 Step 23Finally add a Drop shadow to lighten up the bottom edge of the dome. 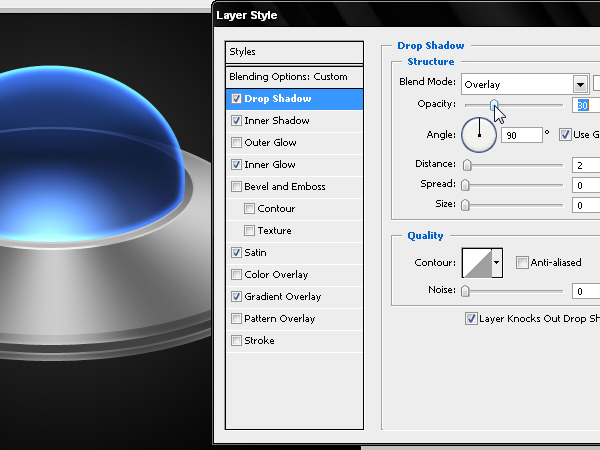 Step 24Now let’s add a reflection to the sphere. Use a smaller oval and edit the anchor points as shown below. 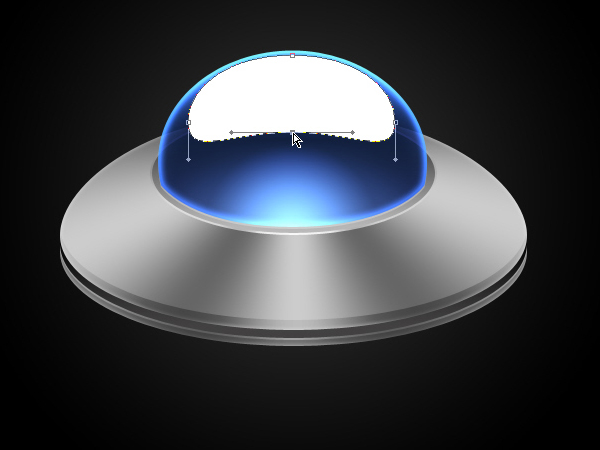 Step 25Apply a layer style to the reflection and add a gradient that starts from #44A9FE and ends with black. Set the Blending Mode to Screen as shown below. 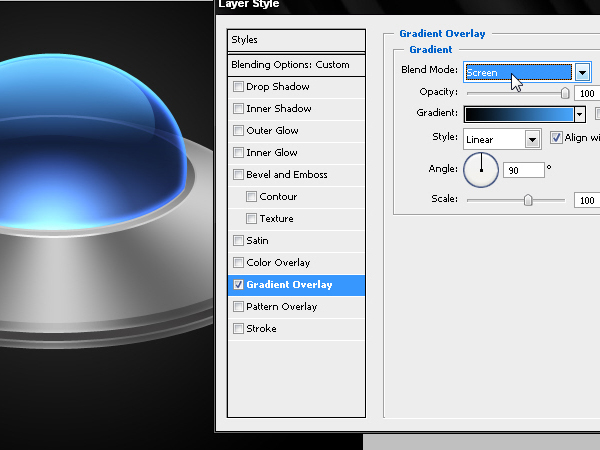 Step 26Add an inner shadow using the values shown below. 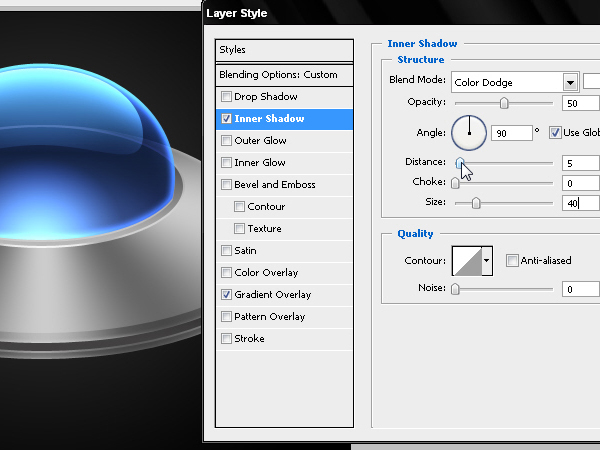 Step 27Download the Facebook Logo in EPS or, if you prefer Twitter, you can download it from here as well.  Step 28Open the vector logo directly into Photoshop. This will open a raster.  Step 29Use the settings below to set the logo to a larger size.  Step 30Make a selection of the letter "f." Once it is selected go to Edit > Copy o Cmd + C.  Step 31Paste the letter "f" onto the canvas and reduce its size to fit within the sphere. 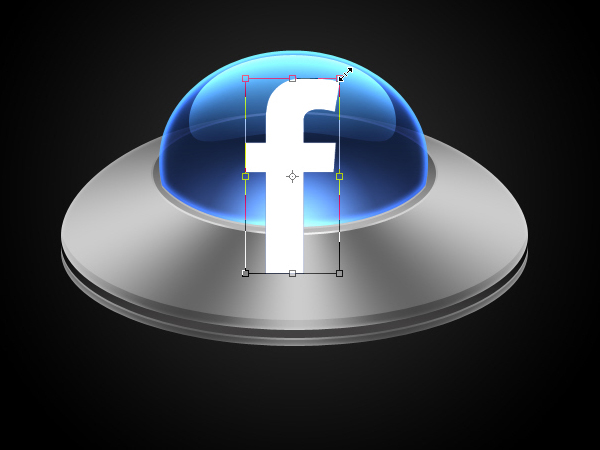 Step 32Apply a gradient as shown below. 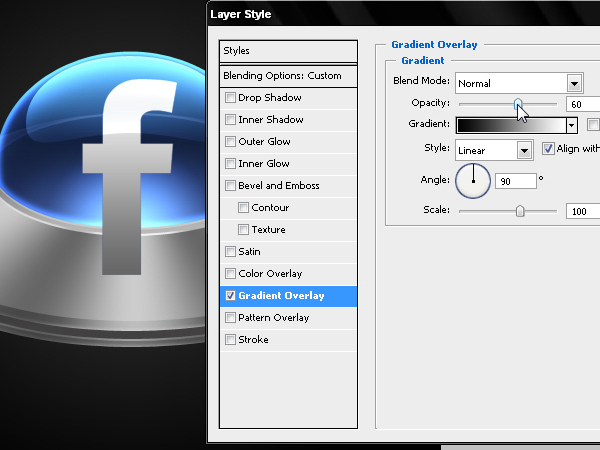 Step 33Create an illusion of 3D by adding a small stroke as shown below. 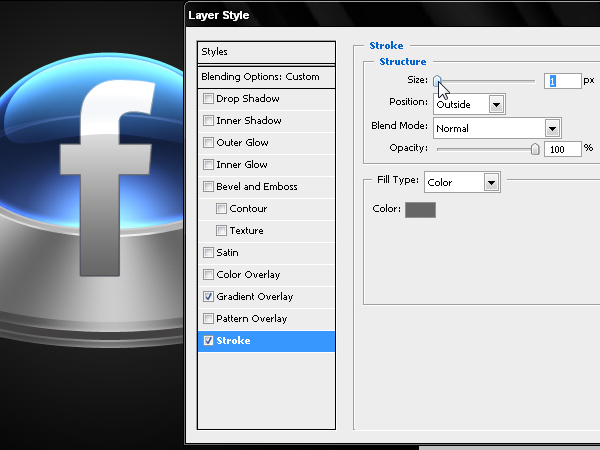 Step 34Intensify the stroke using Bevel & Emboss. 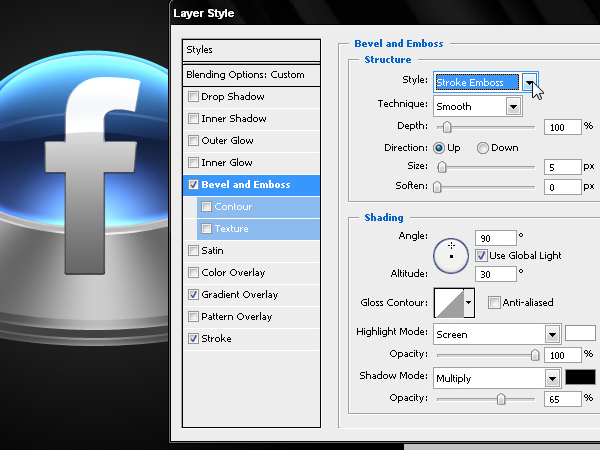 Step 35Apply an inner glow using to the "f" as shown below. 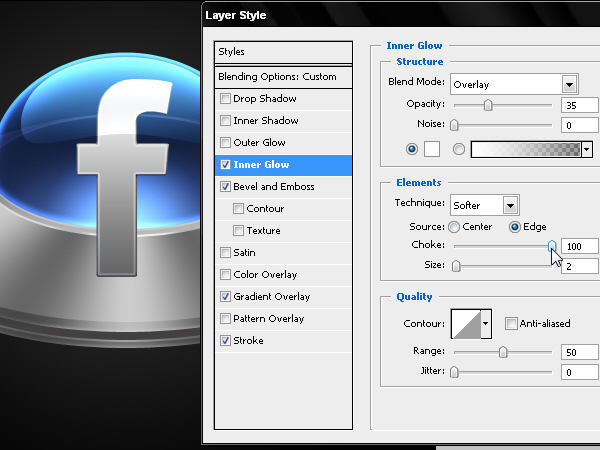 Step 36Use the dome to hide part of the "f" by selecting the path and by converting it into a selection.  Step 37Return to the Layers palette and mask the letter. 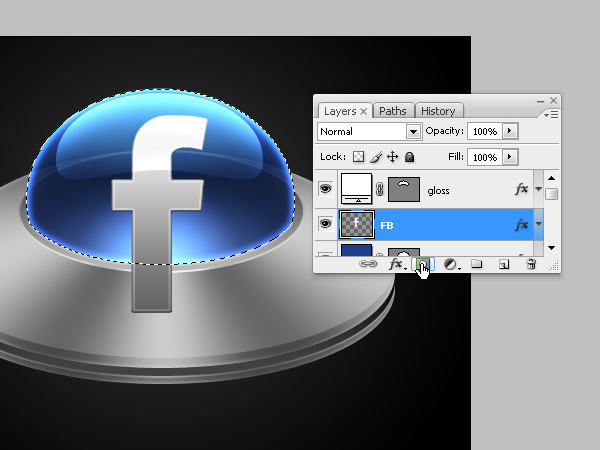 Step 38Hide all the effects inside the mask by clicking the “Layer Mask Hides Effects” in the layer styles dialog box. 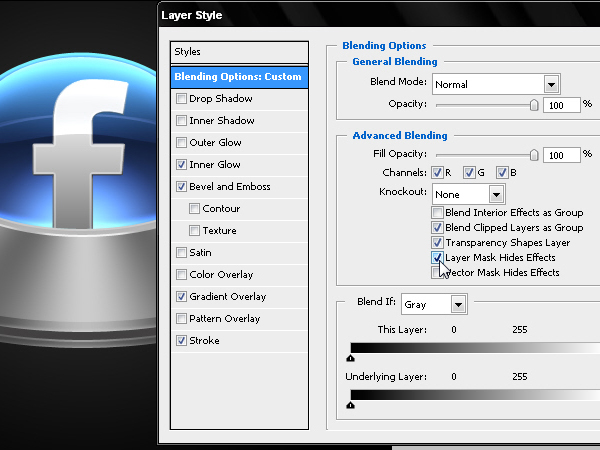 Step 39Use different brushes to paint the perimeter lights depending on their distance. Try to make them as symmetrical as possible. 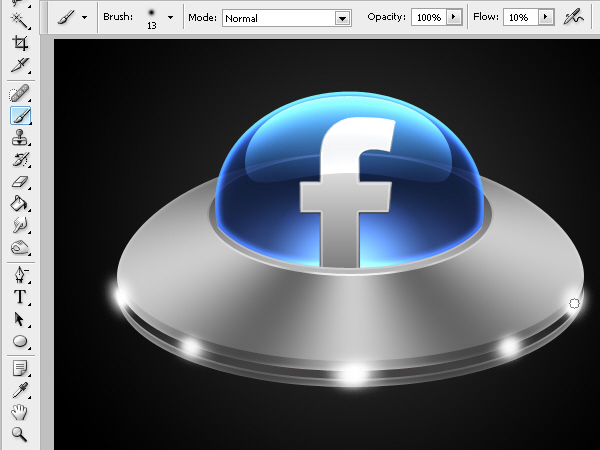 Step 40Add an Outer Glow using #0099FF. 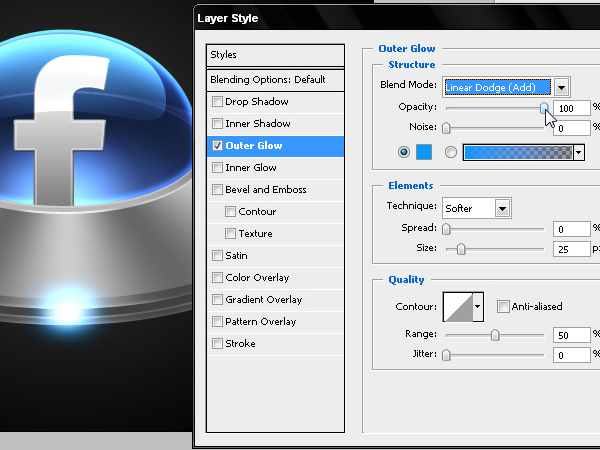 Step 41Group all the layers in a folder. 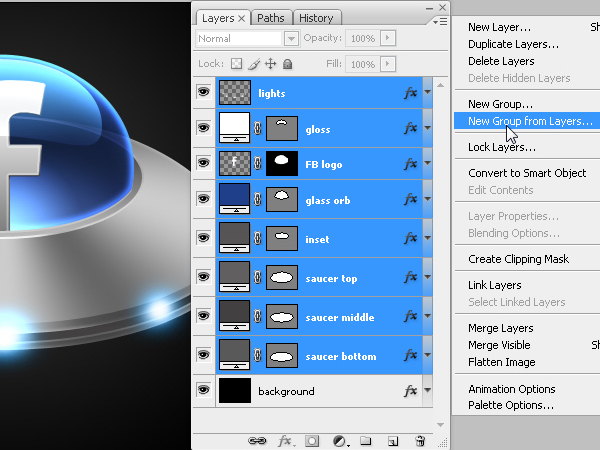 Step 42Name the folder. 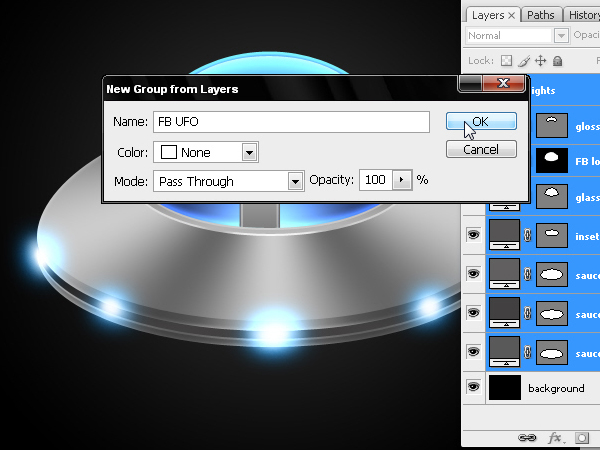 Step 43Duplicate the folder to keep a safe copy of your work. 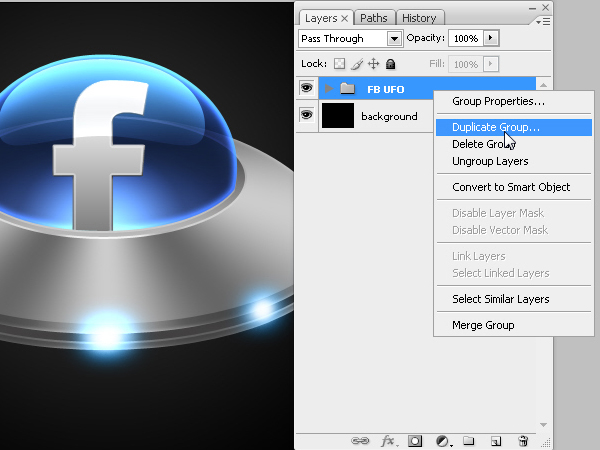 Step 44Convert the group into a Smart Object or select the option Merge Groups. The aim is to have the whole UFO on one layer so we can reduce the size without affecting the proportion of the layer styles. 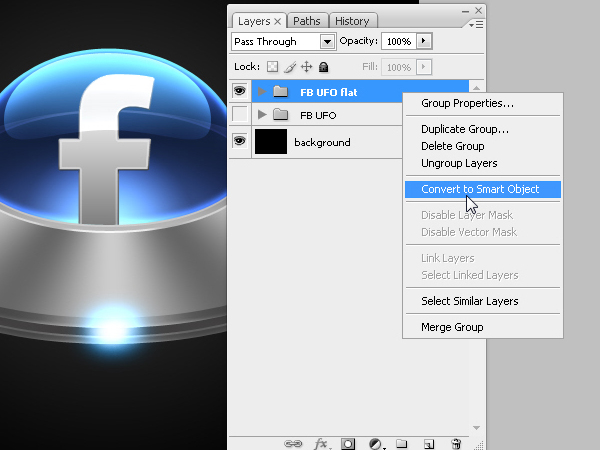 Step 45Reduce the UFO to 65% of its original size and place it as shown below. 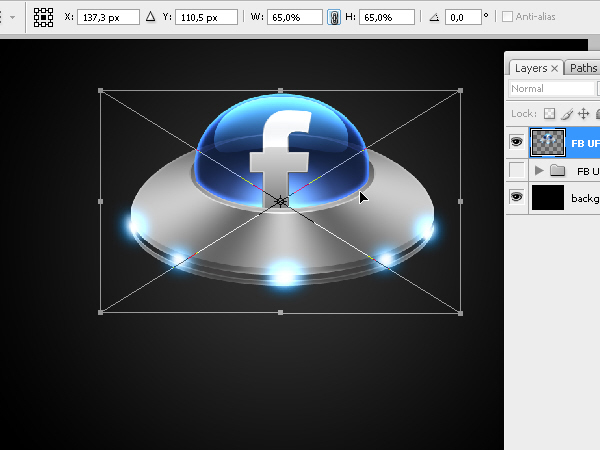 Step 46Now create the ray of light that the UFO will project onto the floor. To do this, draw a rectangular shape layer with the same width as the dome. 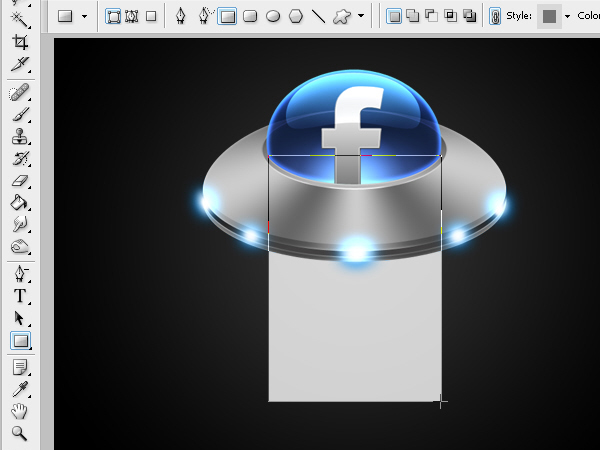 Step 47Edit the anchor points of the shape layer as shown below. 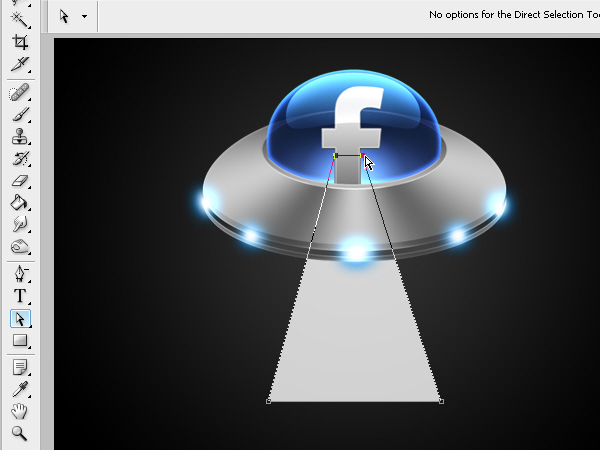 Step 48Add an anchor point to make a curve as shown below. 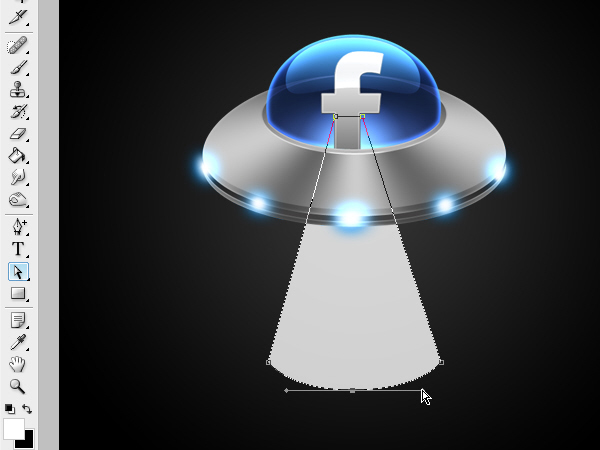 Step 49Convert the vector into a selection using the Paths Palette. 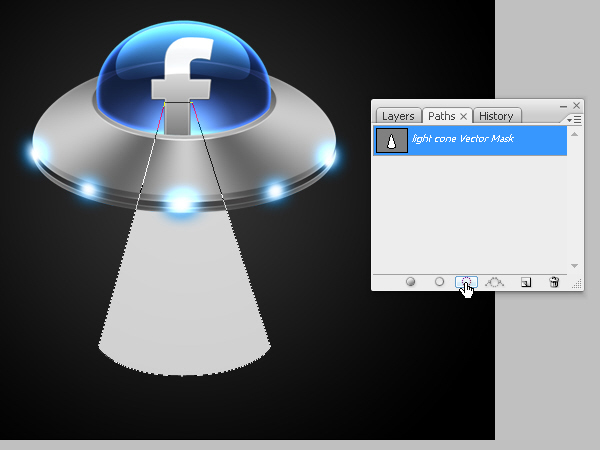 Step 50Soften the selection by going to Select > Modify > Feather. 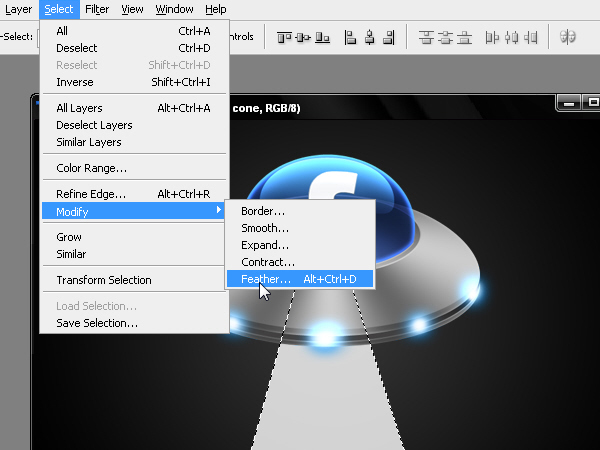 Step 51Set the Feathering to 3 px. 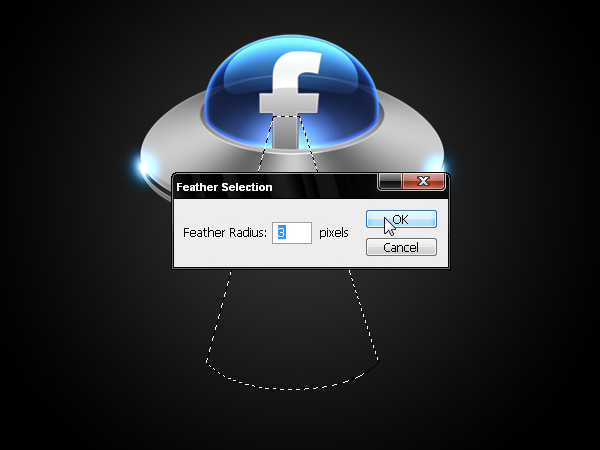 Step 52Paint inside the selection with more intensity near the source of light (the UFO). And with the same softened selection technique, paint the floor of the scene. 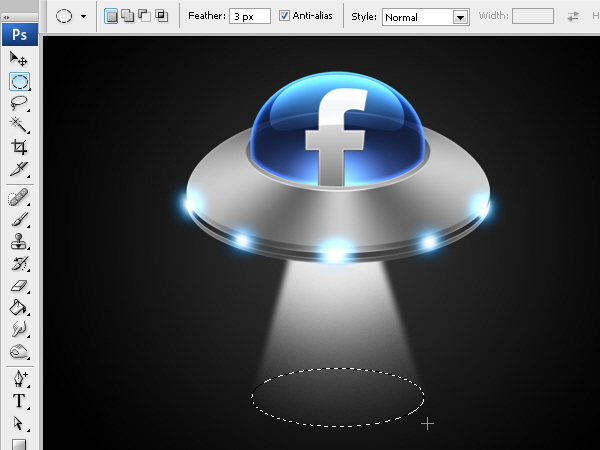 Step 53Now add light to the floor. 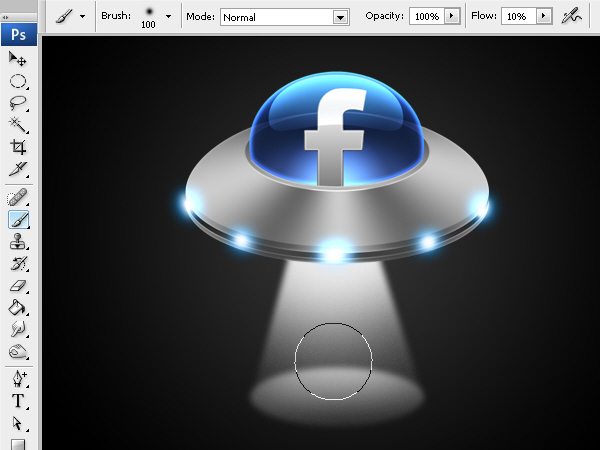 Step 54Add the following image to our artwork. Or find another one that you feel appropriate. 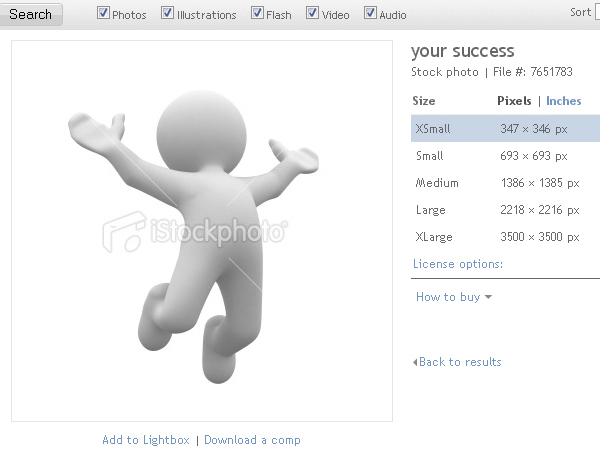 Step 55Cut it out from its background and reduce its size as shown below.  Step 56Create a shadow of the character by duplicating, inverting, blurring, and distorting it as shown below. 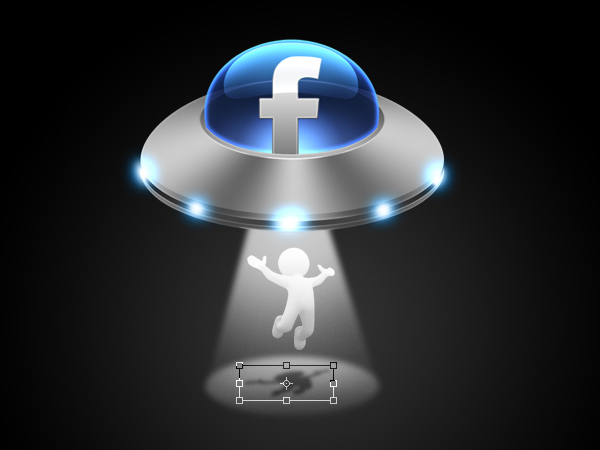 Step 57Download this font and include it in our composition.  ConclusionFor some finishing touches, apply a drop shadow to our text with the color set to #0099FF and its blending mode set to screen. Then add an Outer Glow with its Blending Mode set to Linear Dodge. For the Background, paint a blue glow to give the icon more visual appeal.  |
| You are subscribed to email updates from Psdtuts+ To stop receiving these emails, you may unsubscribe now. | Email delivery powered by Google |
| Google Inc., 20 West Kinzie, Chicago IL USA 60610 | |
0 comments:
Post a Comment