PSDTUTS Updates |  |

- Psdtuts+ Present – Exclusive Wallpapers From Intrinsic Nature
- Quick Tip: How to Smooth Skin Without Losing Texture in Photoshop
- Create A Wooden House Icon in Photoshop
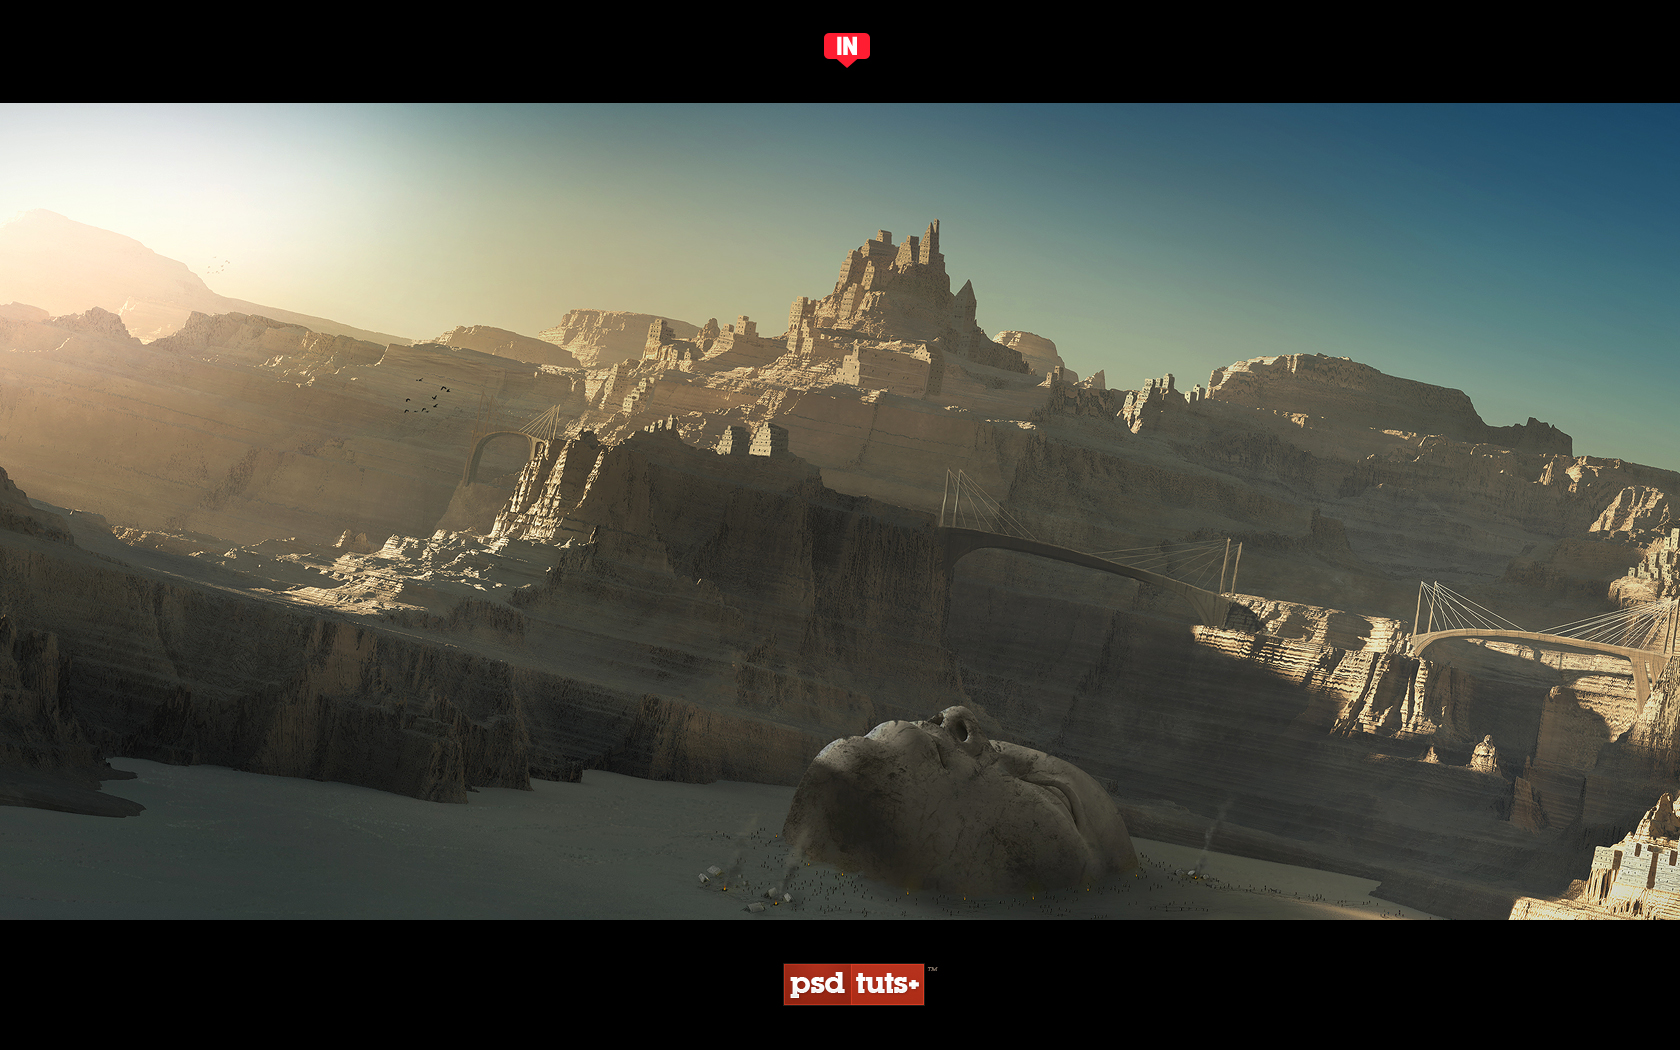
| Psdtuts+ Present – Exclusive Wallpapers From Intrinsic Nature Posted: 26 May 2010 10:30 AM PDT
Five talented designers from the online design collective Intrinsic Nature have volunteered to produce a set of exclusive wallpapers specifically for the readers of PsdTuts+. They have created some amazing wallpapers for just about anyone’s preferred style, so check out this post, download some wallpapers and then go check out Intrinsic Natures latest design pack.
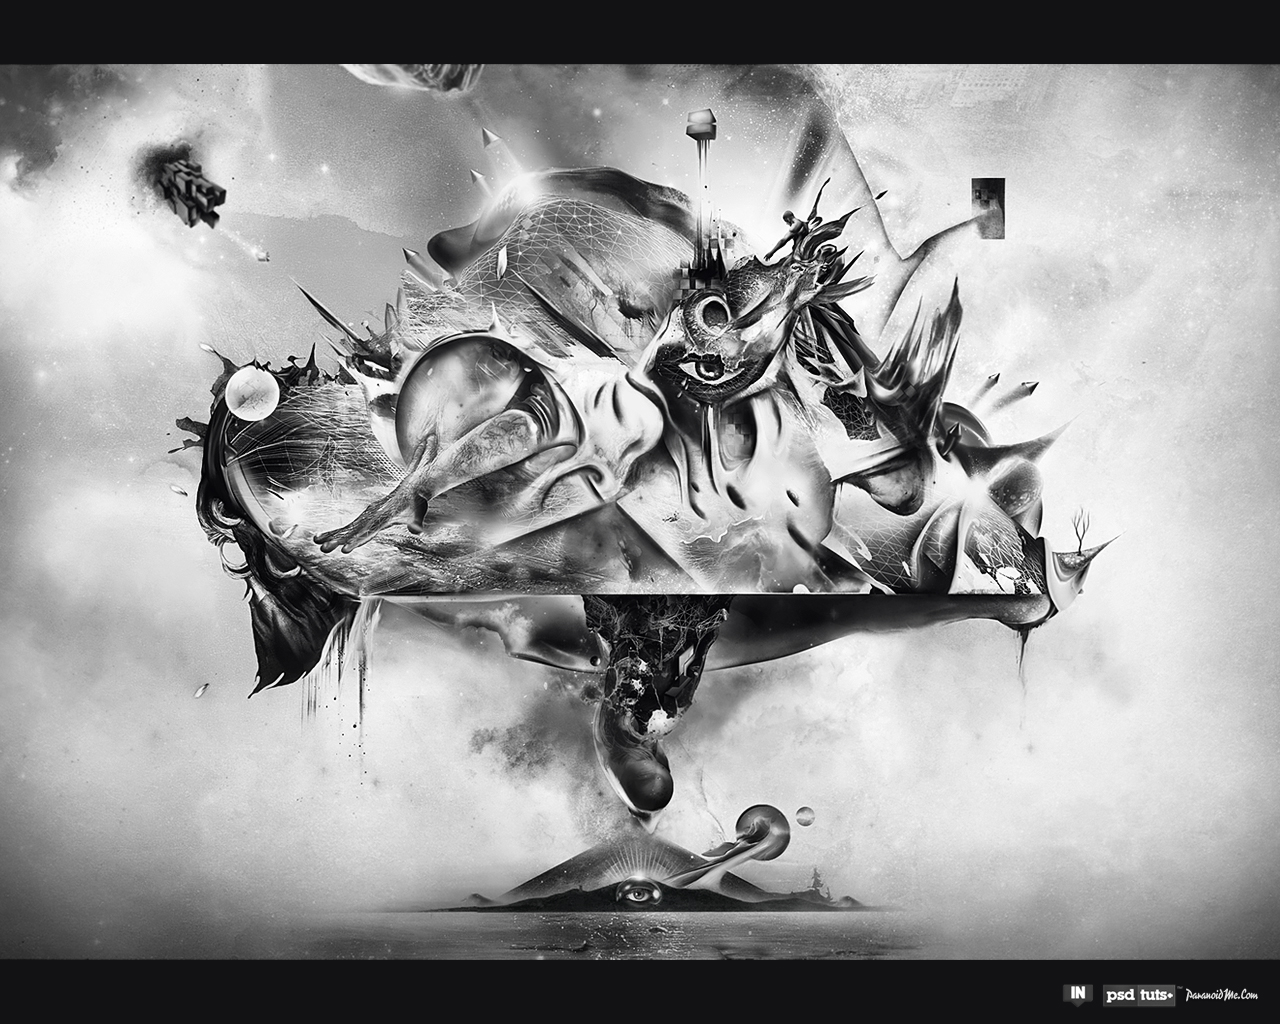
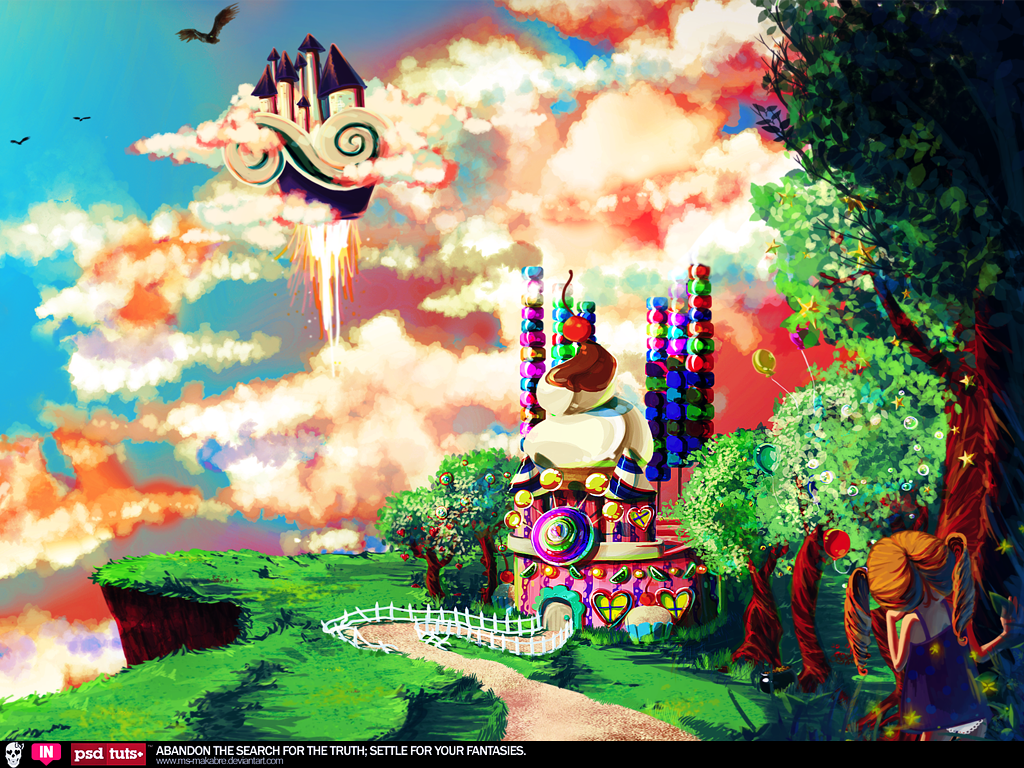
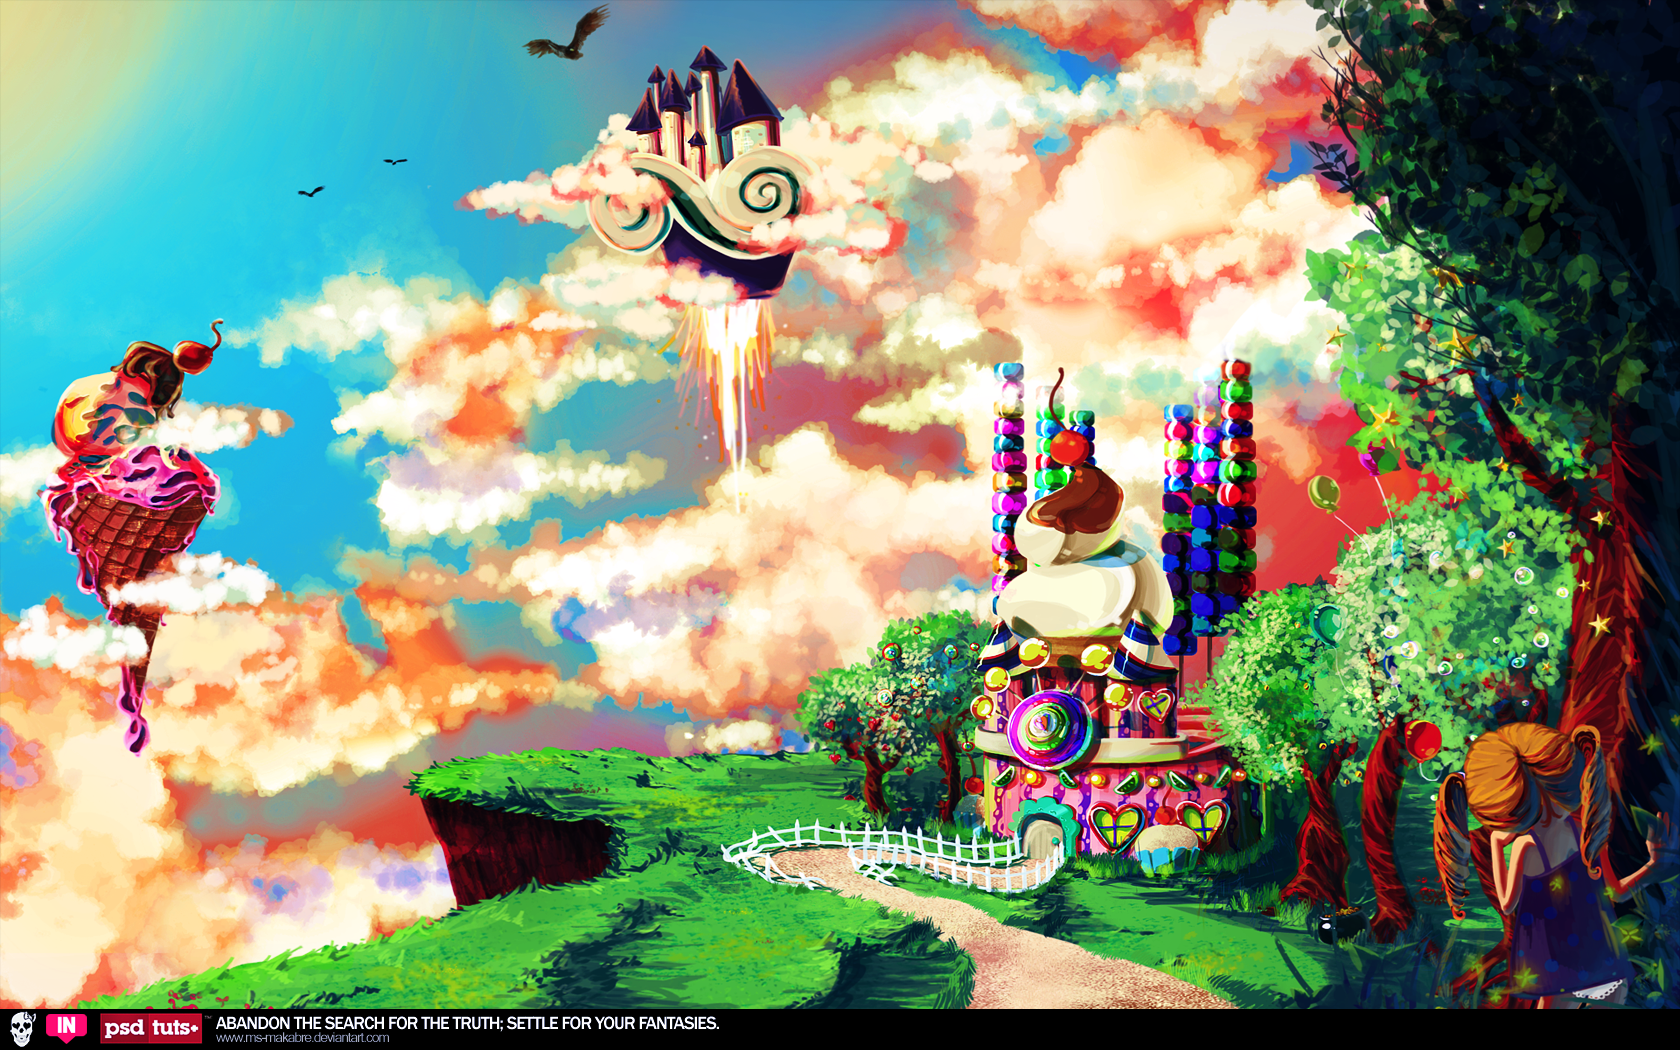
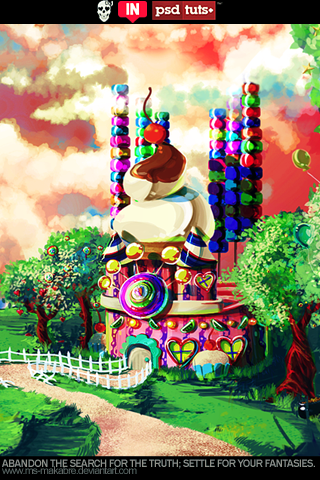
About Intrinsic NatureIntrinsic Nature is an online art group consisting of a select community of creative minds from around the world. Every few months, Intrinsic Nature releases a public showcase of exclusive art in what they call their "Experiments". This talented group of designers work hard to produce quality art, so make sure to support their website by checking out their Experiments.  Exclusive Wallpaper – BMX Created by Anthony Harmon Exclusive Wallpaper – The Variable Created by Diego L. Rodríguez AKA Paranoid Park Exclusive Wallpaper – Cherry Cocktail Created by Dominique Fung Exclusive Wallpaper – Settle for Fantasies Created by Reichull AKA Macabre Exclusive Wallpaper – Anasazi Created by Ed Lopez AKA Edlo Make Sure to Check Out Intrinsic Nature’s Latest Experiment Out Now!This month, the talented folks over at Intrinsic Nature released their 8th Experiment and it is a phenomenal pack. It consists of 58 illustrations from 36 talented designers so you definitely have to check this pack out. And if you haven’t already done so make sure to bookmark their website for updates and new experiments. Below is a small sample of the amazing art you will find in this new Experiment, so make sure to check the whole thing out here. Special Thanks to Designers at Intrinsic NatureI’d like to give a special thanks to each designer who submitted a wallpaper, as well as Glenn from Intrinsic Nature for helping make this possible. So once again, please support this great design collective by checking out their incredibly talented artists. Also stay tuned for some more exclusive high quality wallpaper projects in the near future! |
| Quick Tip: How to Smooth Skin Without Losing Texture in Photoshop Posted: 26 May 2010 09:35 AM PDT
There are several ways to smooth skin in Photoshop. All to often, however, skin can appear too smooth, fake, and synthetic. Today I will demonstrate a straightforward technique to help you smooth skin fairly quickly while preserving the texture of the pores. Let's get started!
Final Image PreviewTake a look at the final image that we will be creating.  Original ImageBefore we begin, let’s take a look at the original image.  Step 1First, open your image and duplicate your background layer. Simply drag the layer onto the new layer icon in the bottom right of the layer palette. Now set the blending mode of this newly created layer to "Vivid Light."  Step 2Now, let's invert this layer. Do this by pressing Cmd + I or Image > Adjustments > Invert. Then, apply a Gaussian Blur by selecting Filter > Blur > Gaussian Blur. Applying a blur filter to an inverted picture will make it look shaper. Use the slider until you can see the pores on her face.  Step 3Now let smooth the skin! Go to Filter > Other >High Pass. Move the slider until you are happy with the smoothing. You may notice some ghosting and other weird stuff around the eyes – just ignore it for now. Concentrate on the cheeks, forehead and nose.  Step 4Almost done! Create a new mask for the layer and fill it with black to hide the image. Switch your color to white, select the mask and start drawing on the skin with a soft brush. Start at the cheeks, move over to the forehead, the nose and stop on the chin. If the effect is too strong for your liking, just lover the opacity of the brush and you're good to go!  Final ImageWe're finished! I hope that you learned a few new techniques here. If you have a different approach, let me know in the comments! |
| Create A Wooden House Icon in Photoshop Posted: 26 May 2010 05:45 AM PDT
You might be surprised what you can do with Photoshop’s drawing tools, a few textures, and a basic understanding of light and shadow. In today’s tutorial we will demonstrate how to create a wooden house icon in Photoshop by applying textures to basic shapes.
ResourcesThe following resources were used during the production of this tutorial although you are free to use any other textures you have at your disposal. Step 1In new document, create a new layer, draw as shown in (1a). Press Command + J to duplicate this layer and press Command + T, right click the mouse on image and choose Flip Horizontal to reverse the second layer. Position it as shown in (1b). Then press Command + E to merge the two layers into one, rename the new layer “H1”. Step 2Press Command + T. While holding “Command” edit “H1” as shown below (2a). Then press Command + J to duplicate “H1”, rename new layer “H2” and place is as shown in (2b). Step 3Create a new layer on top and call it “h2.” Draw as shown below. Step 4Create a new layer on top and call it “Left roof 1”, draw as shown in (4a). Then press Command + T, while holding “Shift” + “Alt” make it larger (4b). Step 5Create a new layer under “left roof 1”, call it “left roof 2” and draw as shown in (5). Step 6Continue drawing the roof as shown below. Step 7Create 2 new layers, one “door” and one “window”. Draw as shown below. Step 8Now let’s add some texture to the house. Open a wood texture. Any will do but mine came from bigstockphoto.com. Step 9Apply a layer style to “H1 texture” and use the settings below. Step 10Apply a layer style to “h2 texture” and use the settings below. Step 11Now apply the following layer styles to “left roof 1”, “left roof 2”, “left roof 3” and “right roof 1”. Step 12Create a new layer under “left roof 1”. Select it and “left roof 1” then press Command + E to merge these layers to one. Keep its name “left roof 1” (12a). While holding “Command,” click on “left roof 1” to obtain its selection. Go to menu Select > Modify > Contract, set Contract By: 1 px. Then press Command + Shift + I to reverse this selection. Choose Dodge Tool (smooth brush, 35px) and draw as shown in (12b). Step 13Repeat Step 12 for “left roof 2”, “left roof 3” and “right roof 1.” Step 14Press Command + J to duplicate “left roof 1”, rename new layer “light roof 1” and fill it with white as shown in (14a). Make a selection as shown in (14b). Press Command + Alt + D and set Feather Radius to 20px then press Delete. Change its Blending Mode to Overlay (14c). Step 15Press Command + J to duplicate “light roof 1”. Rename new layer “light roof 2” and reduce Opacity to 50%. Step 16Select “left roof 1”, “left roof 2”, “left roof 3”, “right roof 1”, “light roof 1” and “light roof 2”, press Command + E to merge these layers to one. Rename new layer “roof”. Open the wall texture image (from bigstock.com), copy and paste it on top of “roof”. Select wall texture layer while holding “Command” click on “roof” to obtain its selection. Press Command + J to duplicate this selection, rename new layer “roof texture” (16a). Then change its Blending Mode to Multiply and reduce Opacity to 30% – 40% (16b). Step 17Add a wood texture layer to the door call it “door texture 1” (17a). Apply a layer stle and use settings as shown in (17b). Step 18Add one more wood texture layer for the door (on “door texture 1”), call it “door texture 2” (18a).While holding “Command” click on “door” to obtain its selection. Then while choosing Marquee Tool (M) press up key and down key and position as shown in (18b). Press Delete (18c) and remove “door” (we don’t need it). Step 19Choose the Dodge Tool and the Burn Tool (smooth brush, about 10px – 35px) and apply shading as shown on “door texture 2”. Step 20Add a wood texture layer for the window (on “window”), call it “window texture” and use the techniques outlines in Steps 18 and 19. Step 21Create new layer under “roof” and call it “roof shadow 1”. Choose the Brush Tool with black (set as in (21a)) to draw the shadow (21b). Step 22Create a new layer beneath all the other layers and call it “pillar” and draw as in (22a). Then add a wood texture for the pillar, call new layer “pillar texture”(22b). Apply a layer style and use settings as shown in (22c). Step 23Create a new layer on top of “pillar texture” and call it “house shadow 1”. Choose Brush Tool with black color (set as in (21a)) to draw the shadow (23a). Then on “pillar texture”, use the Burn Tool to draw as shown in (23b). Step 24Create a new layer under “pillar”, call it “house support 1” and add a wood texture as in (24a). Go to menu Image > Adjustments > Brightness/Contrast, set as in (24b). While holding “Command” click on “house support 1” to obtain its selection. Then choose Brush Tool with black color (set as in (21a)) to draw the shadow inside the selection (24c). Step 25Add one more wood texture for the house support. While holding “Command” click on “house support 1” to obtain its selection. Go to menu Select > Modify > Expand, set Expand By: 3px to get the larger selection. On the wood texture, press Command + J to duplicate the selection. Rename new layer “house support 2”. Step 26Perform the following steps. Step 27On “house support 1”, use the Brush Tool and draw a shadow as shown below. Step 28Create a new layer under “house support 2”, call it “house support shadow” and draw as in (28a). Then create a new layer under “pillar”, call it “house shadow 2” and draw as in (28b). ConclusionHope you learned something new and had fun. The final image can be seen below. |


| You are subscribed to email updates from Psdtuts+ To stop receiving these emails, you may unsubscribe now. | Email delivery powered by Google |
| Google Inc., 20 West Kinzie, Chicago IL USA 60610 | |
0 comments:
Post a Comment