Abduzeedo - graphic design | design inspiration | tutorials - |

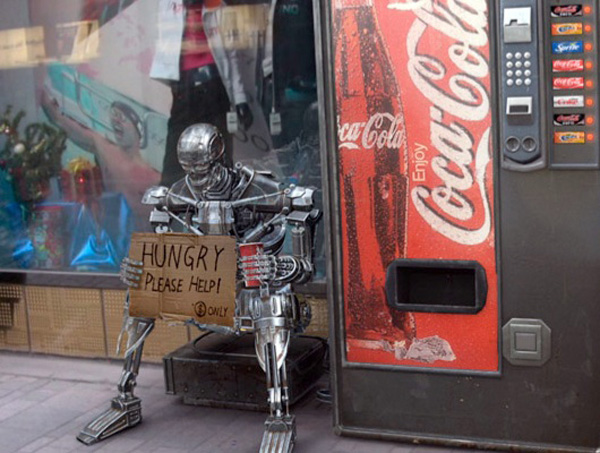
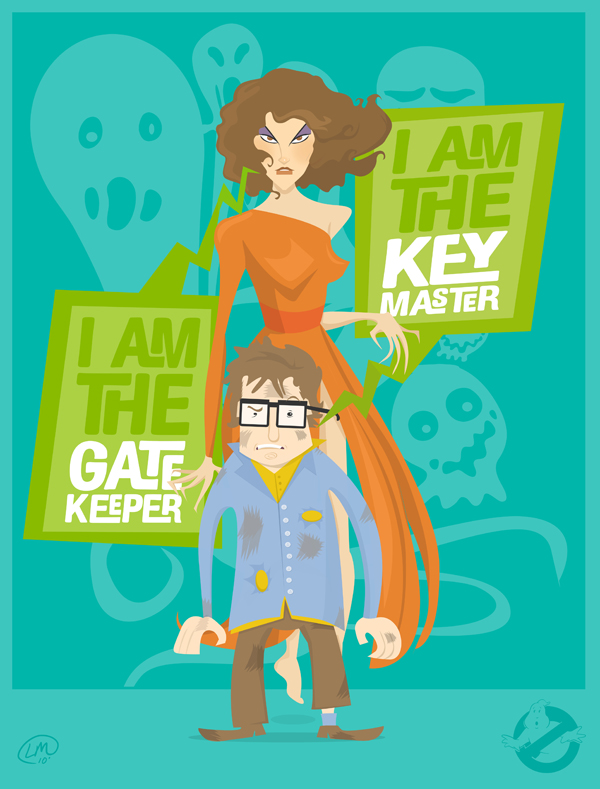
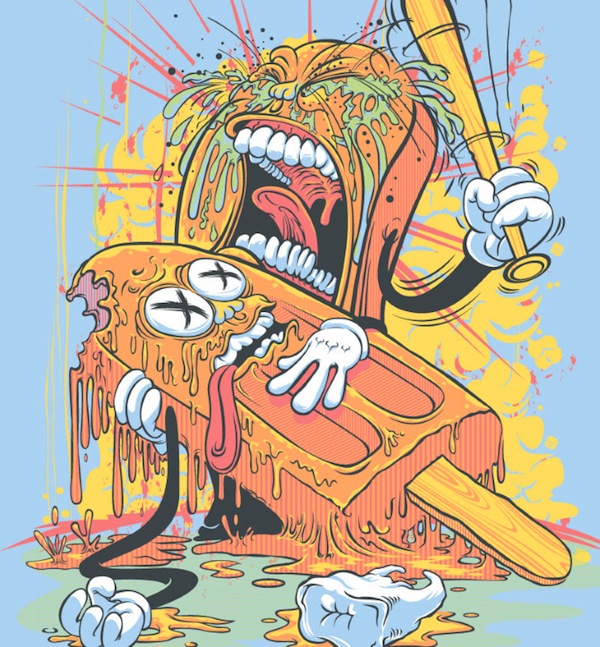
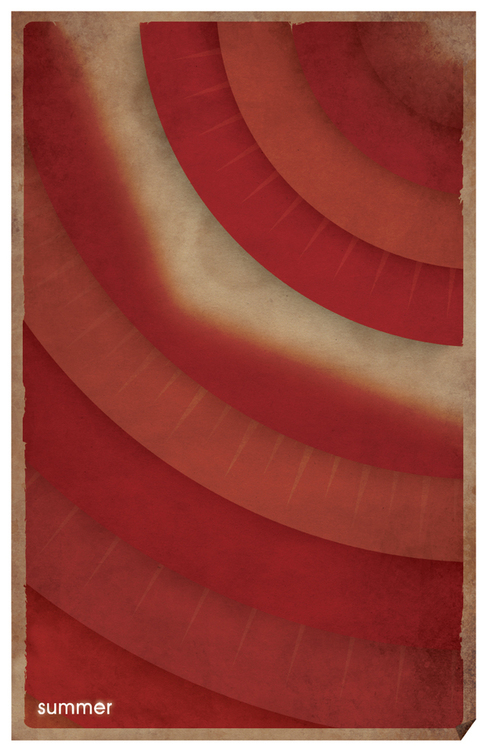
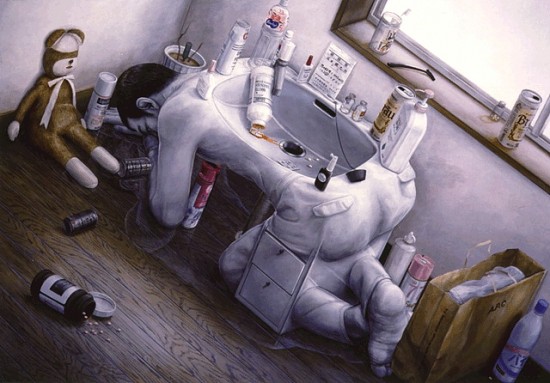
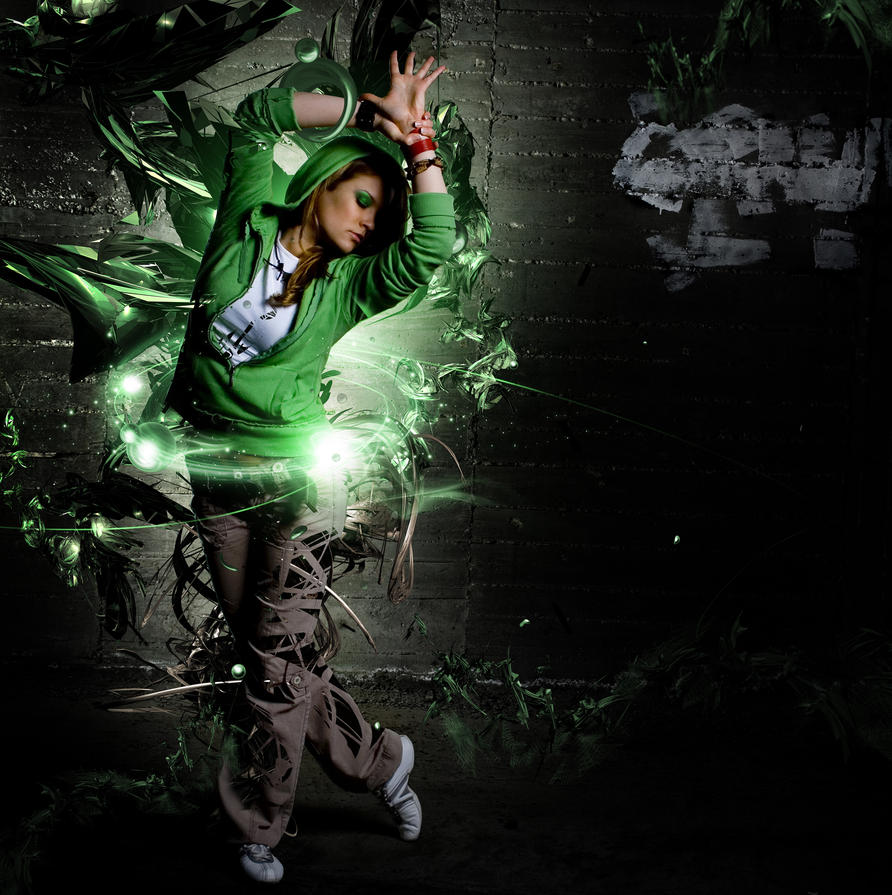
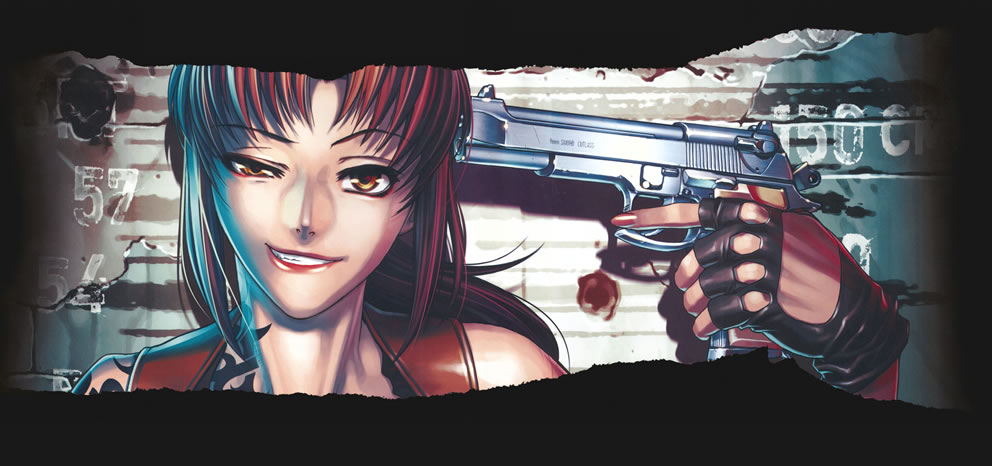
- Daily Inspiration #529
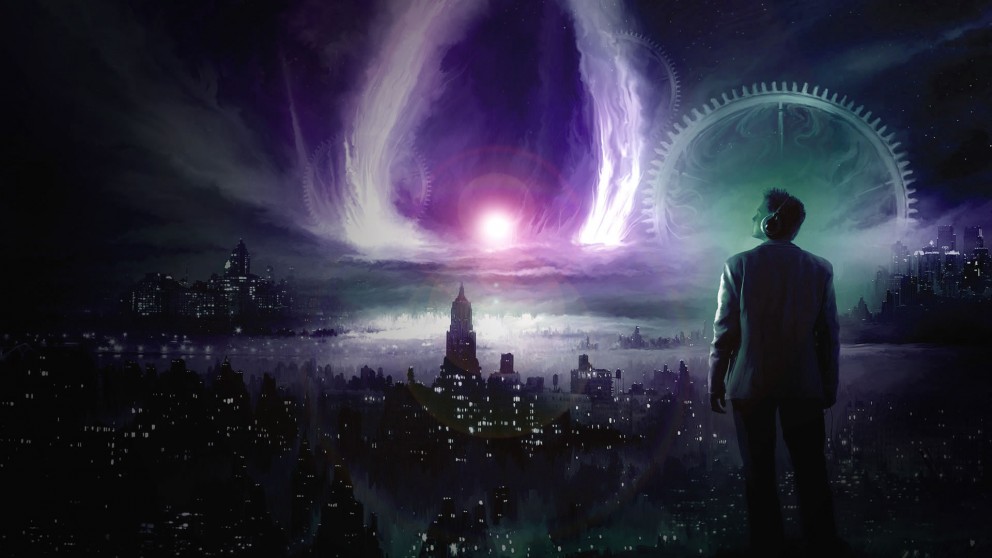
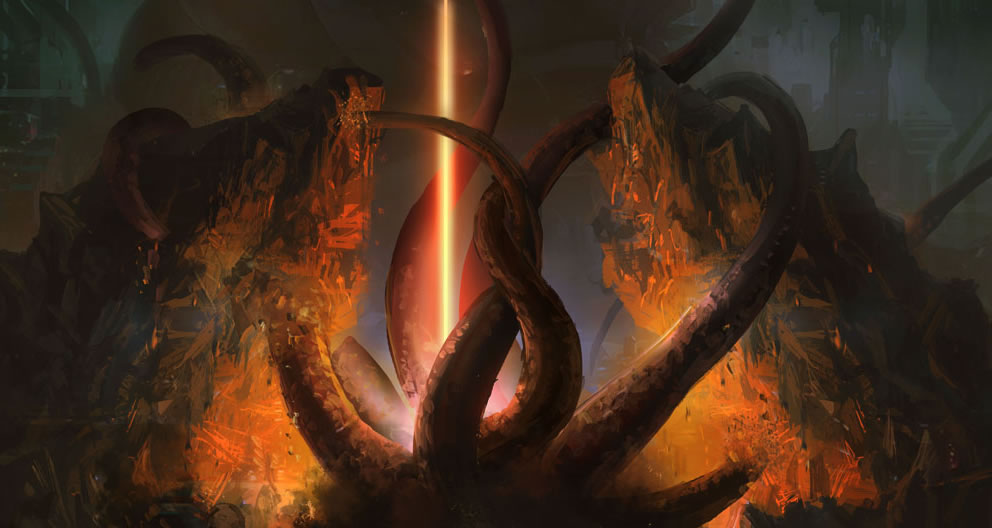
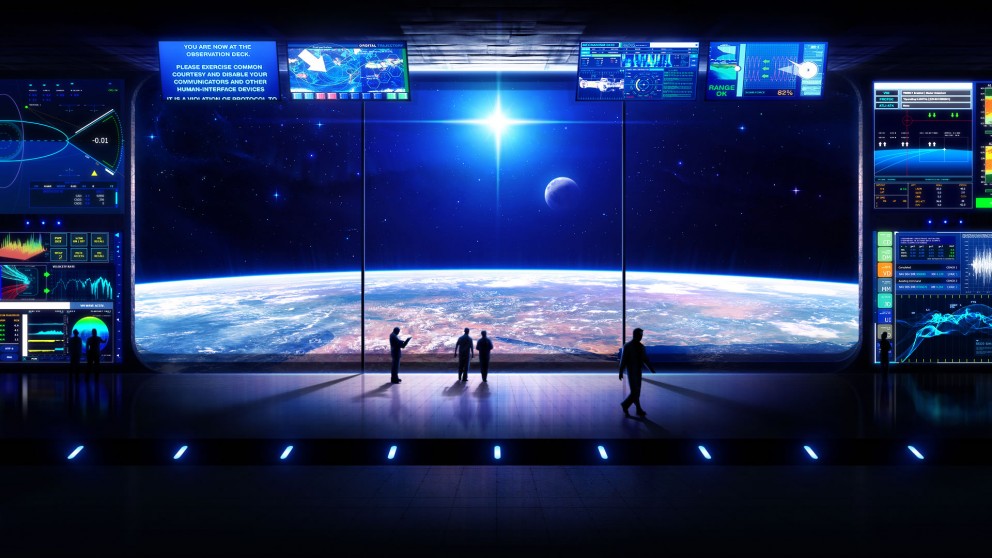
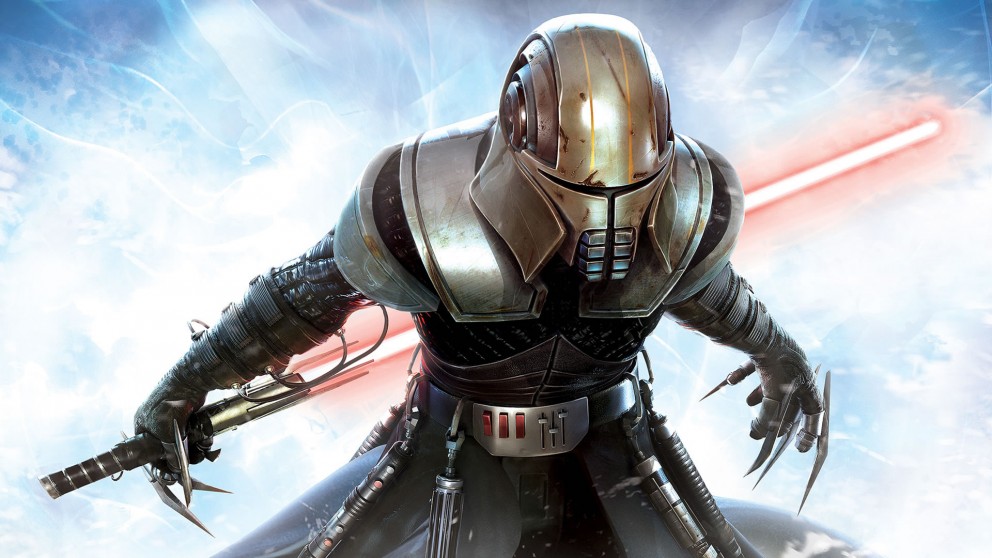
- Mixed Illustrations by Mike Harrison
- Simple Underwater Scene in Photoshop
- The Perfect Office #40
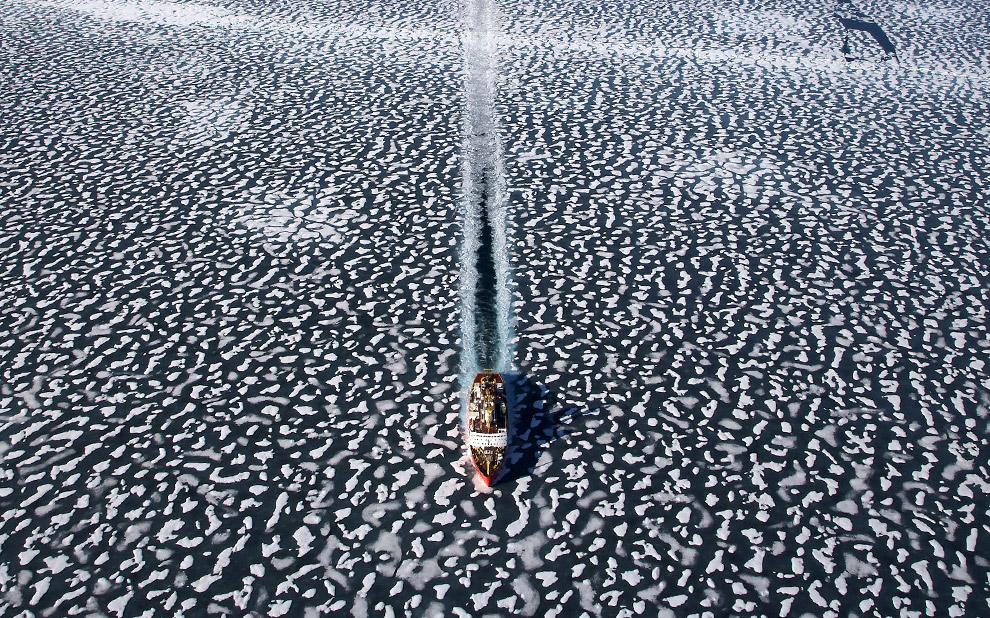
| Posted: 07 Jun 2010 01:58 PM PDT
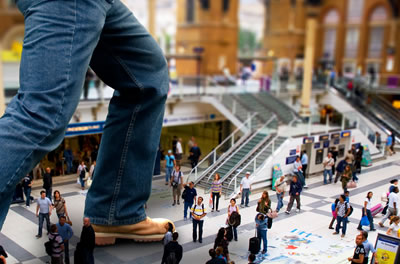
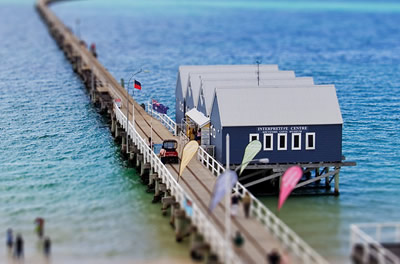
This post is part of our daily series of posts showing the most inspiring images selected by some of the Abduzeedo's writers and users. If you want to participate and share your graphic design inspiration, just send us, via email, the image with the link from where you found it, also use "Daily Inspiration" in the subject, and don't forget to send your Abduzeedo username; or via Twitter sending to http://twitter.com/abduzeedoIf possible use the HTML code: <p class="imgC"><a href="Link to the page you found the image"><img src="Link to the Image" /></a></p> Do you want to see all images from all Daily Inspirations? Check out http://daily.abduzeedo.com2D
al b sure
Best Bookmarks
drfranken
ekgraphics
Fabiano
Fabio
Gisele
Jeroen van Eerden
Kevin.Roodhorst
Lionel CHICHE
ricardofx
suprman79
Via TwitterSend your suggestions via Twitter to http://twitter.com/abduzeedo using #abdz in the end of the tweet. @djbennett999
iPad + Velcro from Jesse Rosten on Vimeo.
@Marcos333
@daniel_nelson
@tiagobenevides
|
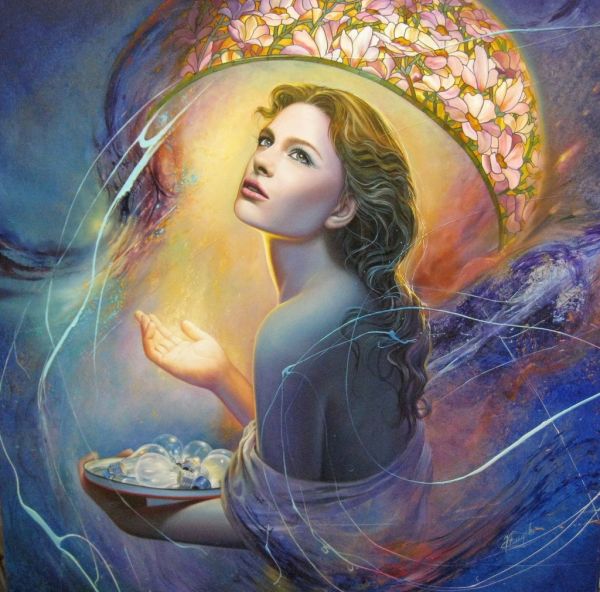
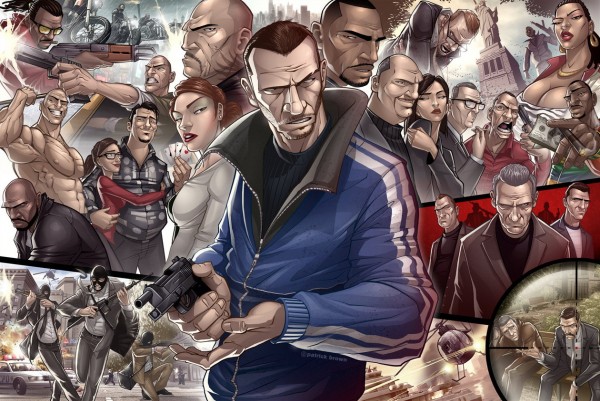
| Mixed Illustrations by Mike Harrison Posted: 07 Jun 2010 06:41 AM PDT
Mike Harrison has a style that is hard to miss and easy to love, a complete mix of photos with drawings into illustrations that bring the best out of both worlds. Mike is a 25 year old designer and illustrator currently residing in Torquay in the UK and has already gained lots of recognition worldwide. Check it out!<!--break--> He is always looking to expand his skills in as many fields of design as possible as the design scene moves at a very fast pace. He very much enjoys keeping up with it and inspiring others along the way. "I love collaborating with other artists and am also available for commissions, contact me via the email or phone on the left over there" - Mike Harrison For more from mike visit www.destill.net About the authorHi! I'm Paulo Canabarro and I'm here to post some really cool stuff for you, if you have any ideas or any requests please get @ me - pvpcanabarro@gmail.com you can also Follow me on twitter! Sponsored Links: |
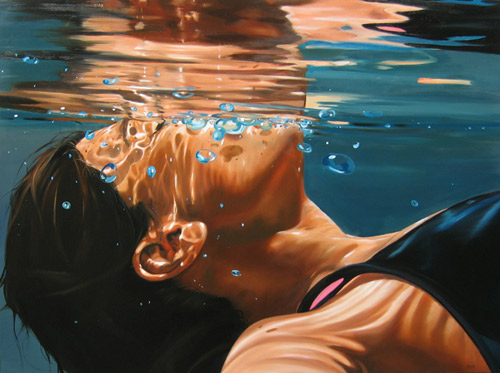
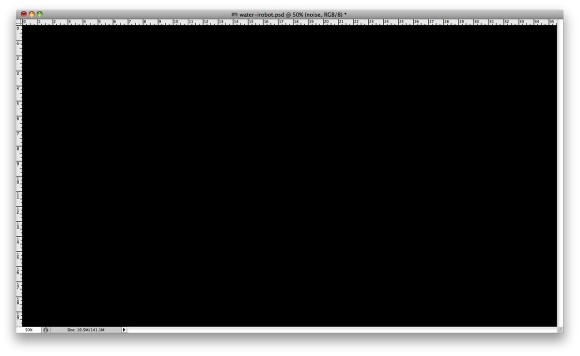
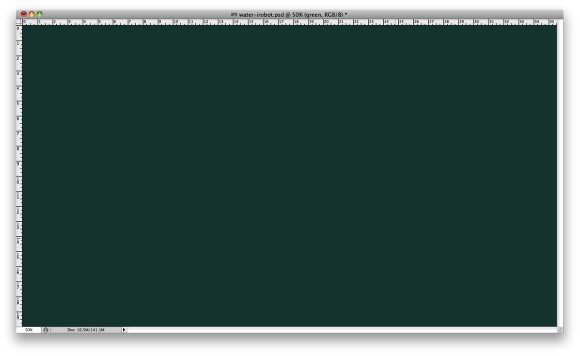
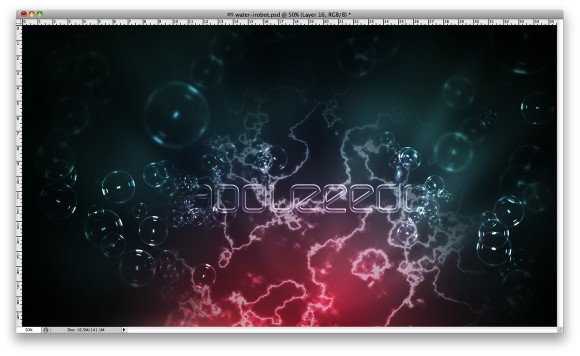
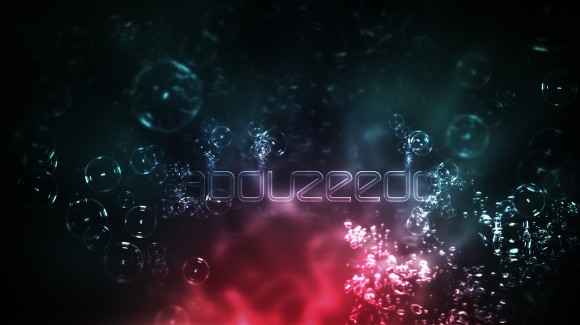
| Simple Underwater Scene in Photoshop Posted: 07 Jun 2010 04:03 AM PDT
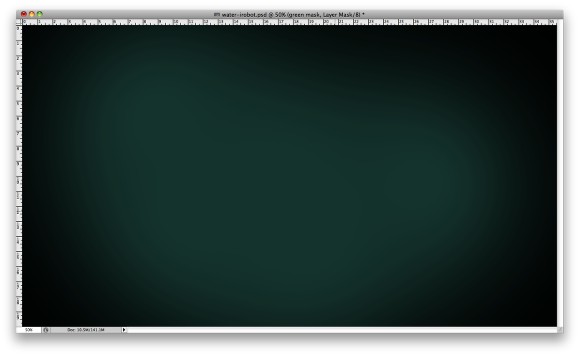
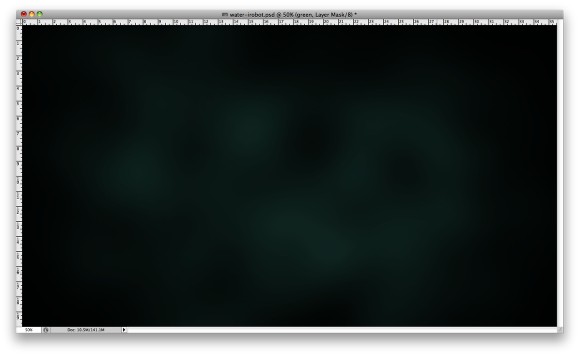
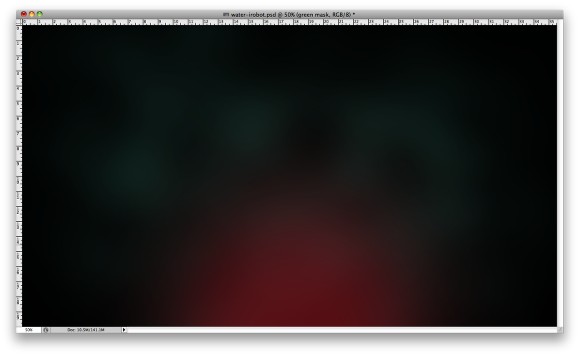
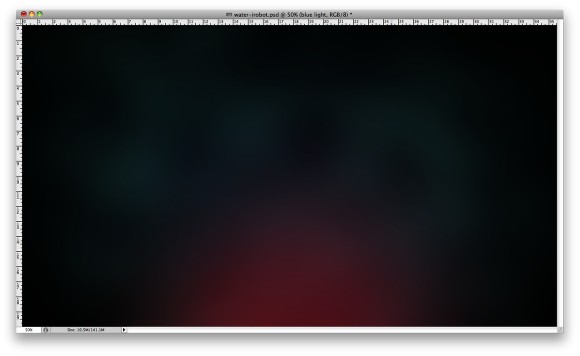
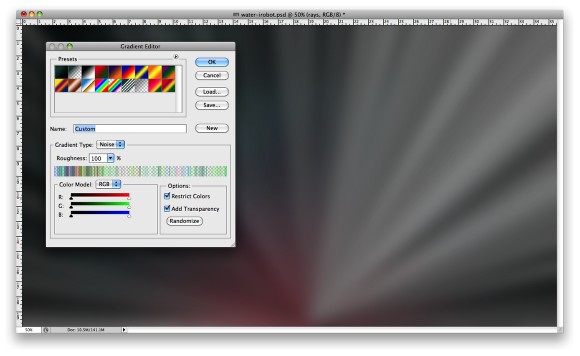
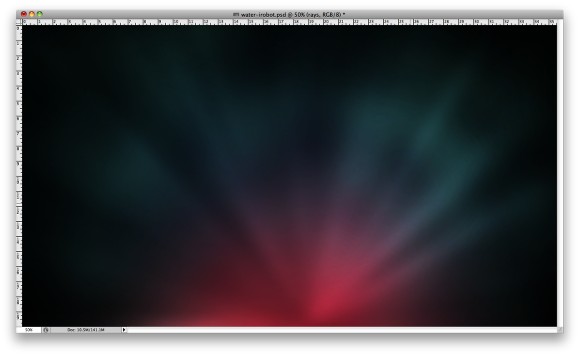
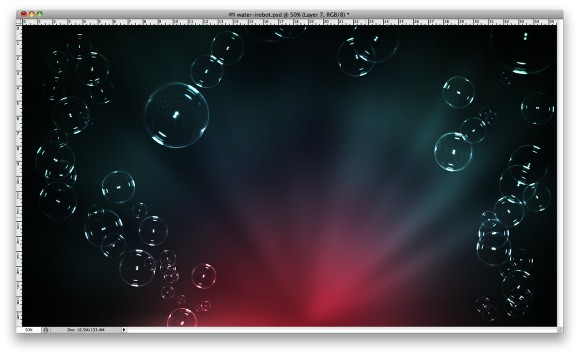
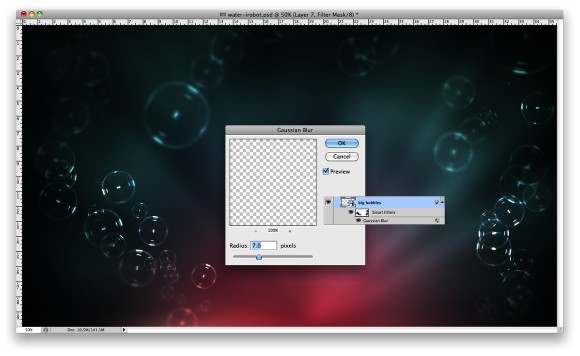
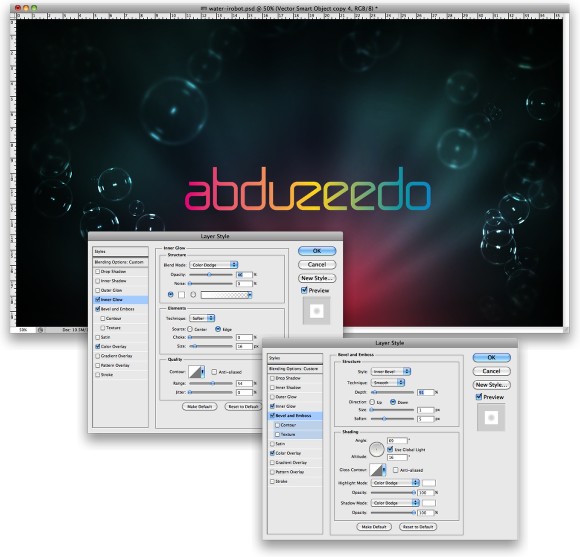
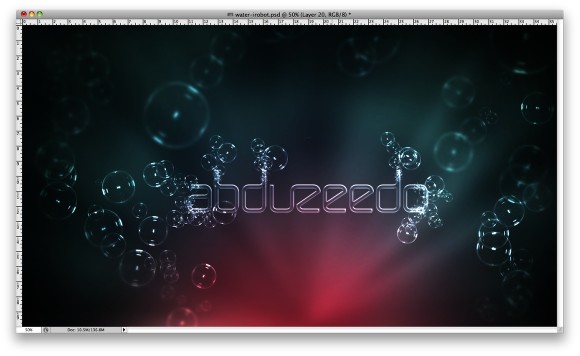
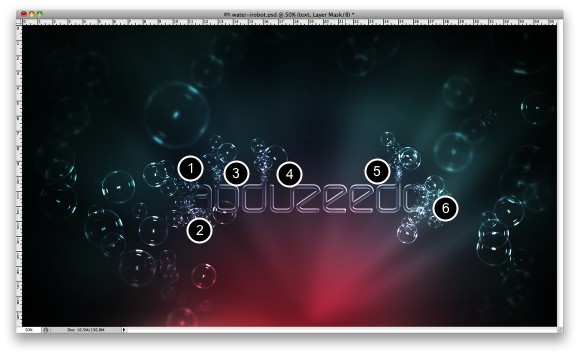
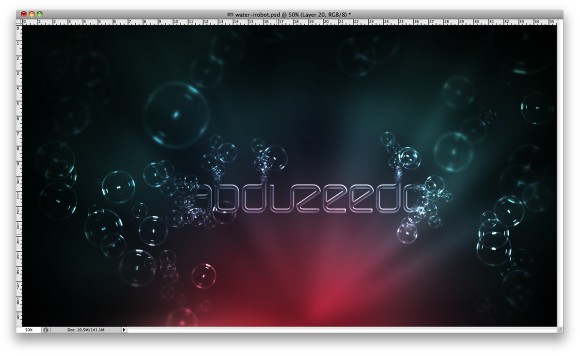
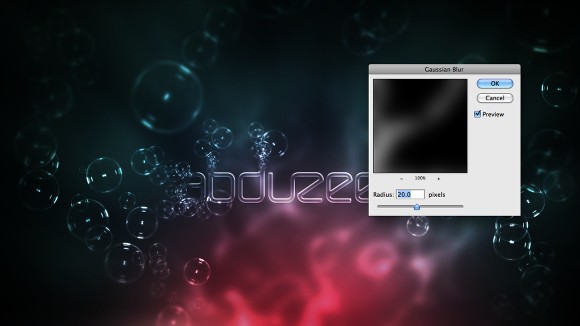
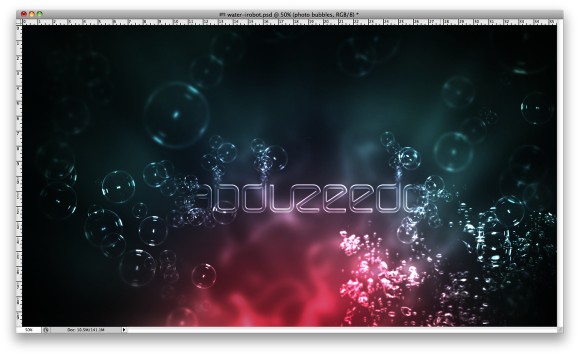
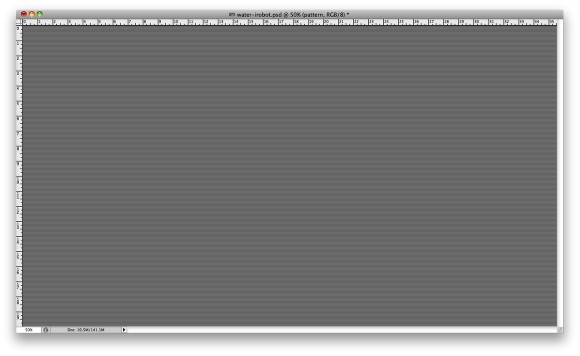
A few weeks ago I received an email from a reader asking me if I could write a tutorial showing an underwater scene. I have written some tutorials on this subject like the 3D type made out of water or the underwater scene for Digital Arts in 2008. However I was watching TV this weekend when I started to watch I, Robot. The opening titles of that movie is awesome and really inspired me to write this tutorial.In this tutorial I will show you how to create a underwater scene with some bubbles and light effects. We will use the Brush Tool to create the bubbles and basic tools and filters for the rest of the effects. The whole process won't take more than 45 minutes and as usual you can download the Photoshop file in the end of the tutorial. Step 1Open Photoshop and create a new document, I'm using 2560x1440 pixels so I can use it as wallpaper. After that fill the background layer with black. Step 2Add another layer and fill it with green (234b44) Step 3With the green layer selected go to Layer>Group Layer. The layer will be inside a folder in the Layer Palette. Select this folder and go to Layer>Layer Mask>Hide All. Select the Brush Tool (B) and, with a big soft brush, paint with white over the areas you want to be shown, Step 4Select the green layer now and go to Layer>Layer Mask>Reveal All. Over the layer palette, select the mask of the layer and go to Filter>Render>Clouds. You will apply the clouds into the mask. After that, still with the mask selected, go to Filter>Blur>Gaussian Blur. Use a big value, I used 80px for the Radius but this value will vary depending on the size of your document. Step 5Add another layer on top of the others and with the Brush Tool (B) and a very soft brush, paint a red spot light like I did in the image below. Change the Opacity of this layer to 65% as well. Step 6Add another layer on top of the others and then again with the Brush Tool (B) and the big brush you used before, select now a dark blue and paint some areas above the red. This blue has to be very subtle, so change the Opacity to 20-30%. Step 7Add another layer and then select the Gradient Tool (G). Click on the gradient colors to open the Gradient Editor, then change the Type to Noise, the Roughness to 100% and select both Options: Restrict Colors and Add Transparency. Fill the layer with the gradient and then go to Image>Adjustments>Desaturate. After that go to Filter>Blur>Gaussian Blur. I used 30 pixels for the Radius, but once again this value will change depending on the size of your document. Step 8Just change the Blend Mode of the layer with the noise gradient to Color Dodge. Step 9For the bubbles I created a brush using a photo for reference. The photo I used was courtesy of Shutterstock and you can download it here. You can also download the brush I created here. Add a new layer and then select the Brush Tool (B) and then using a big size, I used 400 pixels, paint some bubbles using white for the color. Group this layer (Layer>Group Layers) and change the Blend Mode of the Folder to Color Dodge. Step 10Select the layer with the bubbles and go to Filter>Convert for Smart Filters. Then go to Filter>Blur>Gaussian Bur. Use 7 pixels for the Radius. The whole layer will get blurry, but notice that there is a sub layer with a white thumb called Smart Filters. Select the Brush Tool (B), with black for the color and start painting over the bubbles you don't want them to be blurry. It's like a maks for the smart filters. Step 11Import your logo and go to Layer>Layer Styles>Blending Options. Change the Fill to 0, then select Inner Glow. Use Color Dodge for the Color, 50% for the Opacity and change the Size to 15pixels. After that select Bevel and Emboss. Use Inner Bevel for the Style, 90% for the Depth, Down for the Direction, 1 pixel for the Size, 5 pixels for the Soften. For the Shading options use 70º for the Ange and 16º for the Altitude. For the Highlight and Shadow Modes use Color Dodge with white for the colors and 100% Opacity. Step 12Add another layer, you can add it inside the folder of the other layer with Bubbles, the one we created in the step 9. With the Brush Tool (B) and the bubble brush, this time with a much smaller size, paint some bubbles over the A, B, Ds and O like the word would be disintegrating into bubbles. Step 13Select the text layer and go to Layer>Layer Mask>Reveal All. With the Brush Tool (B) and soft brush with black paint over the areas that the text would be disintegrating into bubbles (1-6) Step 14Select the bubbles layer the one that is over the text and the repeat the same technique we did on the Step 10 to make some parts of the layer blurrier than other areas. Step 15Add a layer on top of the others and go to Filter>Render>Clouds. Make sure you had black and white for the background and foreground colors. After that go to Filter>Render>Difference Clouds. The layer will be very dark, so go to Image>Adjustments>Invert, then go to Image>Adjustment>Levels. Increase the white input until you have an image like the one below. Step 16Change the Blend Mode to Color Dodge and go to Filter>Blur>Gaussian Blur. Use 20 pixels for the Radius. You can also reduce the Opacity to 60%. Step 17To give more realism to the composition you can add some real bubbles, here I'm using a photo that is courtesy of Shutterstock and you can find it here. As you can see the photo has black background, in this case, change the Blend Mode to Color Dodge so the black becomes transparent. Step 18Once again you can convert the layer with the stock photo of bubbles to smart objects and then apply Gaussian Blur and paint of the areas you want to keep them without blur like we did on the Step 10. Step 19Add a layer on top of the others and then select the Paint Bucket Tool (G). Change the type to Pattern, then select the stripes pattern that I have created, you can download it here. Fill the layer with the pattern and go to Filter>Blur>Gaussian Blur. Use 2 pixels for the Radius, then change the Blend Mode to Overlay and the Opacity to 50%. ConclusionThe idea of this tutorial was to show you how to create a sort of underwater scene using basic tools like brushes and gradients combined with simple filters like blur and clouds. The whole process is pretty simple and you can now create some really nice wallpapers as well. Another Example Download the Photoshop FileClick here to download the Photoshop files used for this tutorial |
| Posted: 06 Jun 2010 10:02 PM PDT
We've seen some great gadgets and equipment for designers. So many cool stuff, that we could actually assemble infinite perfect office spaces! Every week we'll assemble a perfect office, and we'd like you to help us. What equipment would the perfect office have?<!--break--> Not only gadgets and equipment, but also furniture, sound system, gaming stuff (for lunch time!). A designer is totally allowed to dream with the perfect office, and that's what we're gonna do here! Comment telling us your suggestions, or even better, you may tell us via twitter (mine and fabio's), using #abdz_ofc so we can check it. Alright? I hope you guys enjoy this brief selection. Cheers! ;) P.S.: We REALLY need you to help us find cool stuff. It's been a hard time finding relevant things... it just feels that every single site is talking only about friggin' iPad, iPhone and Android, and forgot about those everyday gadgets we all love. So, did you find something and wanna share? Tell us via twitter. Seriously. Thanks! ;) Icon Letter and Envelope This reminds me of the icon notepad — the icon letter and envelope from Brigada Creativa is a cheeky take on a physical letter using well-recognized computer iconography. (at Design Milk) Black & White Clock Digital clock: only figures, no case, only the necessary – only accurate time. Each figure has self-contained power supply and independent control, it can be fixed to any surface autonomously. A light sensor will switch the clock to an invert mode: the figures are white in the dark time of day and black at daytime. (at Kibardindesign) Earth Lamp Planet Earth shows us the world in a brand new light. Delicate surfaces mark the continents as a bold relief. The smooth structure of mainland in relation to the glossy surface of the sea provide an interesting contrast. The globe is the symbol of our habitat. The questions of environment protection, climate change and human rights are more relevant than ever. With a part of the PLANET EARTH sales we will support organizations that are devoted to these issues. (at Design Spotter) Cordies Power cables, USB cables, charger cables, Vince Cables – the whole world's gone cable crazy. What's more the pesky things are forever falling behind your desk the second you unplug your bits. That's why you need a few Cordies. (at 7Gadgets.com) Joker MacBook Decal The sinister joker image will hold your apple tight as the light shines through. (at Geeky Gadgets) Laptop Lilo Laptop Lilo is made from a heat resistant material non-slip PVC that can withstand temperatures up to 176 degrees Fahrenheit or 80 degrees Celsius. Holds laptops up to 17 inches in size and fully inflates in roughly 2 minutes and allows for an optimum 10 degree viewing angle. Includes a travel pouch. (at Red Ferret) Commodore Invictus Keyboard Compare the Commodus Invictus' 1.6Ghz Intel Atom 330 processor, up to 4GB RAM, 250GB HDD, nVIDIA GeoForce 9400, 802.11n, and HDMI out against the Asus Eee Keyboard's Intel Atom N270 processor, 1GB of DDR2 RAM, 16GB or 32GB SSD and the same 802.11n and HDMI out, and it looks like the Invictus squeaks out a victory. The Invictus will also run Windows 7 vs the Eee Keyboard's XP, so there's that. But the Invictus has a resistive touchscreen versus the Eee Keyboard's capacitive. (at Gizmodo) Gigabyte Aivia M8000X Gaming Mouse Gigabyte has added a new gaming mouse to their range, which is designed to be used by 'professional gamers', the Gigabyte Aivia M8000X Gaming Mouse. The Gigabyte Aivia M8000X Gaming Mouse features a 6,000 dpi resolution, and the resolution can also be adjusted to a lower settings, it also has built in memory that will store up to forty five different key settings. (at Geeky Gadgets) |


 />
/>


| You are subscribed to email updates from Abduzeedo | Graphic Design Inspiration and Photoshop Tutorials To stop receiving these emails, you may unsubscribe now. | Email delivery powered by Google |
| Google Inc., 20 West Kinzie, Chicago IL USA 60610 | |
0 comments:
Post a Comment