PSDTUTS Updates |  |

| Quick Tip: Create a Wood Panel Texture in Photoshop – Screencast Posted: 02 Jun 2010 09:45 AM PDT
In today's screencast we will revisit a quick tip tutorial by Bree L. that demonstrates how to create your own wooden panel texture in Adobe Photoshop. This tutorial shows how to use the liquify tool and noise filters to create a realistic texture.
Here is a link to the written version of this tutorial Quick Tip: Create a Wood Panel Texture in Photoshop |
| Design Your Own Graphic Tee in Photoshop Posted: 02 Jun 2010 06:00 AM PDT
This tutorial is the second installment of a 2 part series on designing graphic tees in Photoshop. If you have not already checked it out, please take a look at Part 1: An In-Depth Look Into the Graphic Tee. As printing technology and methodology improve, designers are given more freedom to push the canvas – in this case a t-shirt – to its limits. Don't feel like you have to design in your favourite Vector package, Photoshop is a powerful creative tool that can be used to great effect. In today’s tutorial I will demonstrate how you can create a composite t-shirt design from photo assets and basic drawing techniques.
ResourcesThe following resources were used during the production of this tutorial: Step 1Open your start image and draw a path roughly around the face using the Pen Tool (set to Paths). Imagine you're using scissors to cut the face out of the background and work loosely. This doesn't mean you can't create sharp corners though. Do this by drawing in an anchor point with a handle and then splitting the handle by holding Alt and drawing out from same point. 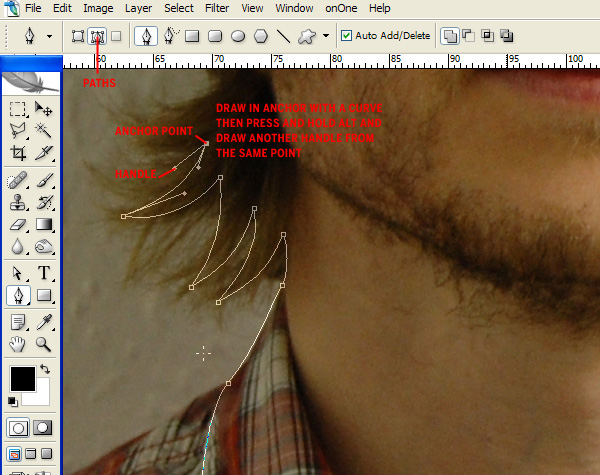 Step 2Create a selection from your path by opening the Paths palette and Cmd-Clicking the path thumbnail. Copy this to the clipboard. Create a new canvas set at 300dpi 300×400 mm for a nice, big, bold print. Paste your face into and the new document and rename the layer, I've gone with STEVE. 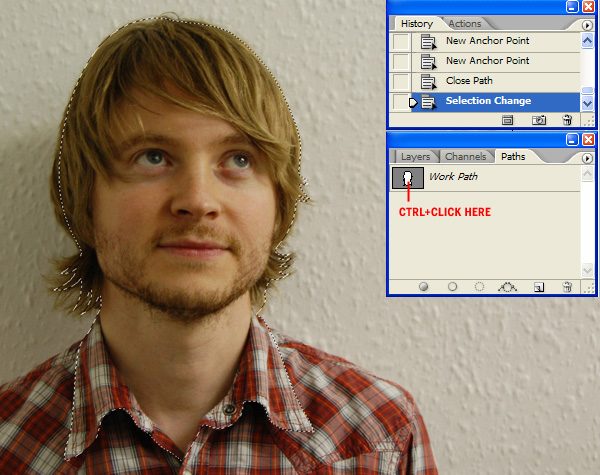 Step 3Use the Free Transform Tool (Edit > Free Transform) to resize STEVE so he's massive. 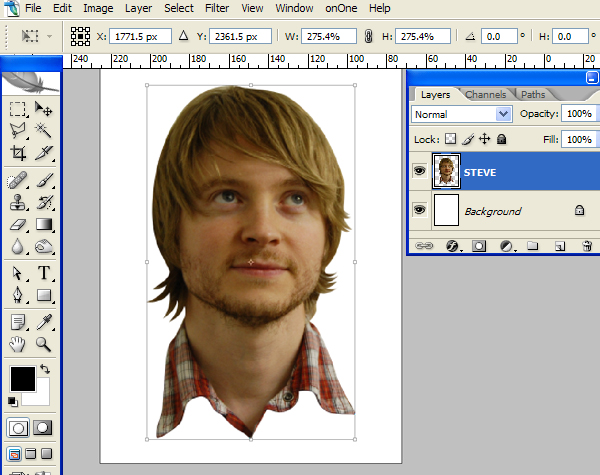 Step 4Download the Top Hat images from Deviant Art, cut it out using the Pen Tool and paste it into your working document. Use the Free Transform Tool to resize the hat to fit STEVES head. I think the hat could be taller so stretch the height more than the width 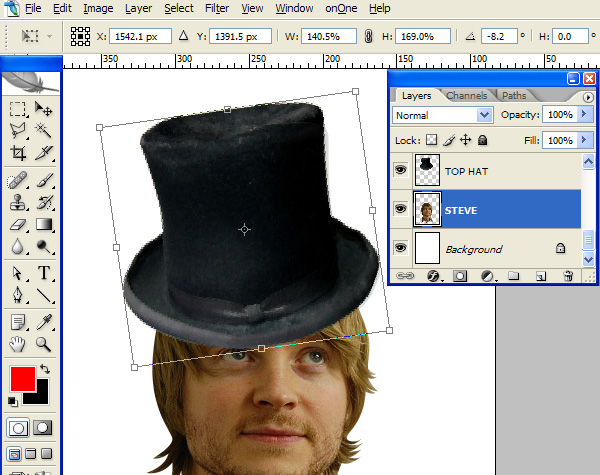 Step 5Download the Bow Tie from sxc.hu and copy & paste it into your working document. Go to Edit > Transform > Flip Horizontal and use the bounding box to resize and rotate the Bow Tie to fit. You should also skew it – using the same bounding box – as the perspective is slightly off by holding the Cmd key whilst manipulating the top central point. I also shifted the top right point to adjust the perspective slightly. 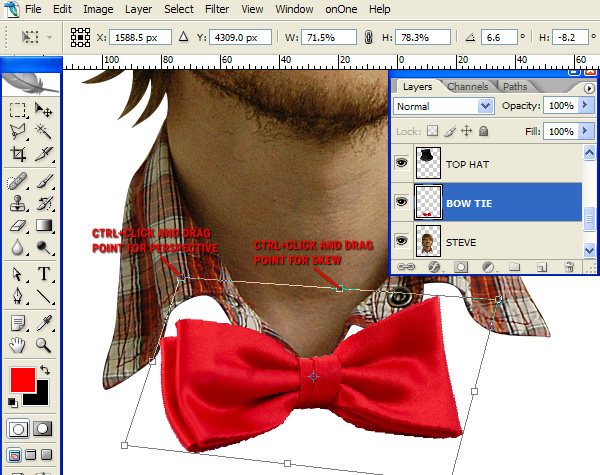 Step 6Select the Ellipse Tool (set to Shape Layers) and draw a white circle. Hold down the Shift key to maintain a perfect circle. Then, with your new shape layer selected on the Layers Palette, go to Layer > Layer Style > Inner Shadow and set-up as in the screen grab. 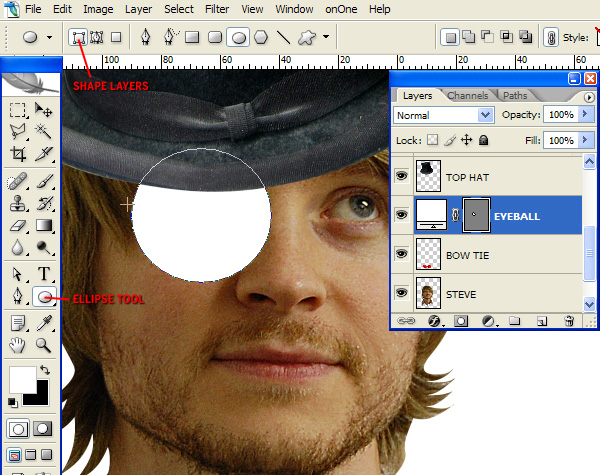 Step 7Next we want to draw guides running through the Eyeball (circle layer you just drew) so go to View > Rulers and draw a vertical and horizontal guide by pulling them from the rulers. If you have the Eyeball layer selected, the guides will snap to the centre. Then, using the Pen Tool, draw in some black shapes on one quarter of the circle. Select Add shape layer so they're all on one layer. Use the direct Selection Tool to clean up your shapes so they look exactly like the screen grab. 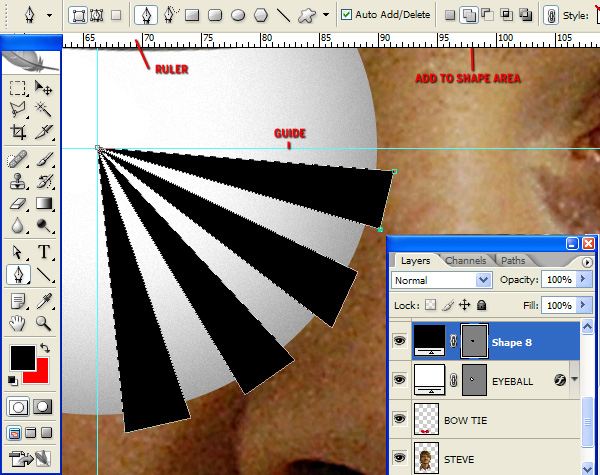 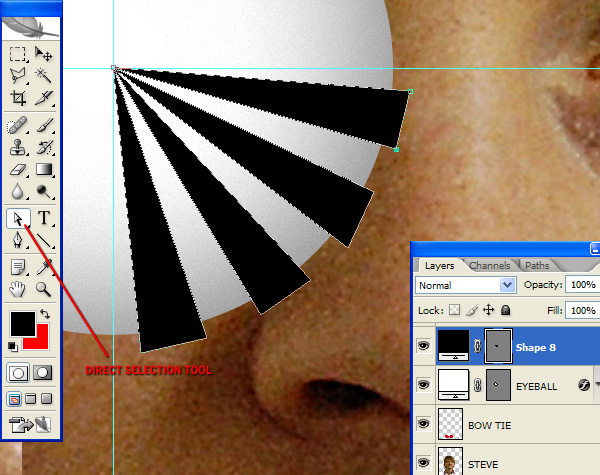 Step 8Duplicate the SHAPES layer so you have four of them. Use the Free Transform Tool to rotate each one by 90, 180 and 270 degrees (holding down the SHIFT key whilst rotating will snap at 15 degree intervals making it easier to hit the required angles. 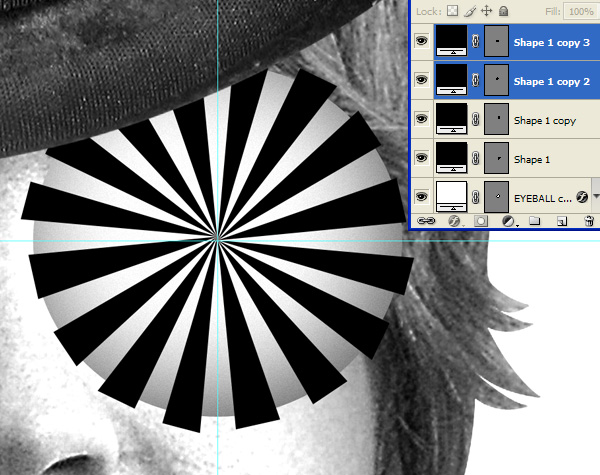 Step 9Select all four SHAPES layers and go to Layer > Merge Layers. Then go to Filter > Liquify, select the Twirl option on the right hand side. Then use the Tool Options to make a brush that completely covers your black shapes. Hover this brush over your shapes and click & hold until your shapes resemble the screen shot. Keep the brush stationary. 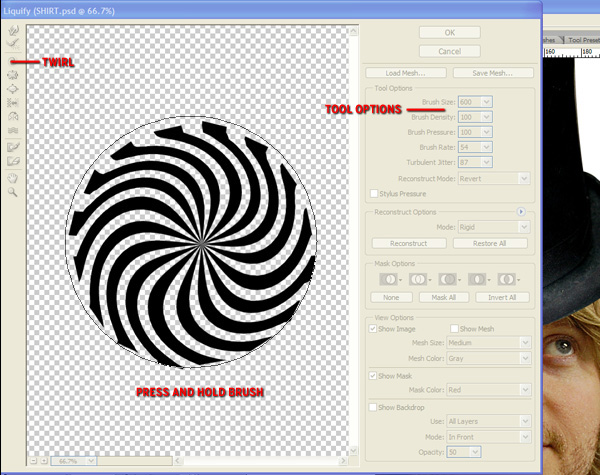 Step 10Create a selection from your Eyeballs by Cmd + clicking the Eyeball path thumbnail, then selecting the SHAPES layer and clicking Add Layer Mask (bottom of Layers Palette). Duplicate these two layers and position over the eyes 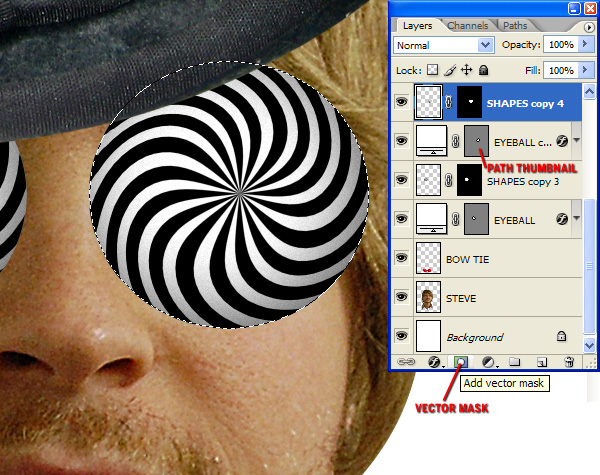 Step 11Desaturate (Image > Adjustments > Desaturate) the TOP HAT, BOW TIE and STEVE. Then select the Dodge Tool and set it to Highlights with an exposure of about 15% on the Options bar. Then select STEVE and use a soft-edge brush to dodge all of the mid grays in the skin. We want to keep the details only. 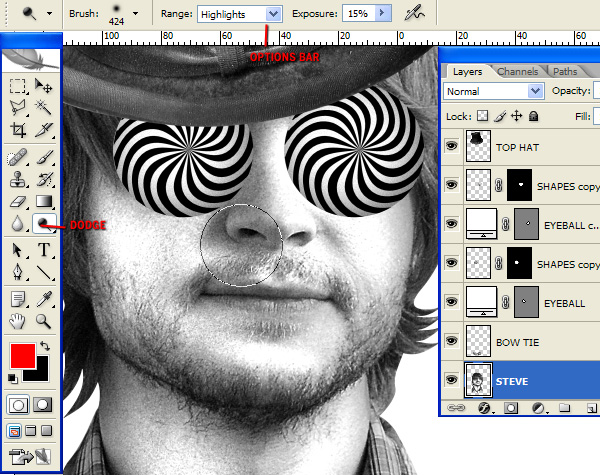 Step 12I want to make the Bow Tie darker so select the Bow Tie layer and go to Image > Adjustments > Levels and tweak the settings as shown in the screen grab.  Step 13Duplicate all your layers and Group the duplicates. Call the Group ORIGINALS. Select all of your loose layers and merge them into one. Then Go to Filters and apply a Noise, Gaussian Blur and Smart Sharpen in turn. Use the settings as in the screen grabs.    Step 14Use the Dodge Tool to further bleach out any grays within the skin. Then use the Burn Tool to strengthen detail such as the mouth and nostrils.  Step 15Once you're satisfied, run one more Smart Sharpen to further boost the contrast and strengthen the details. It should begin to look a little like a detailed sketch. 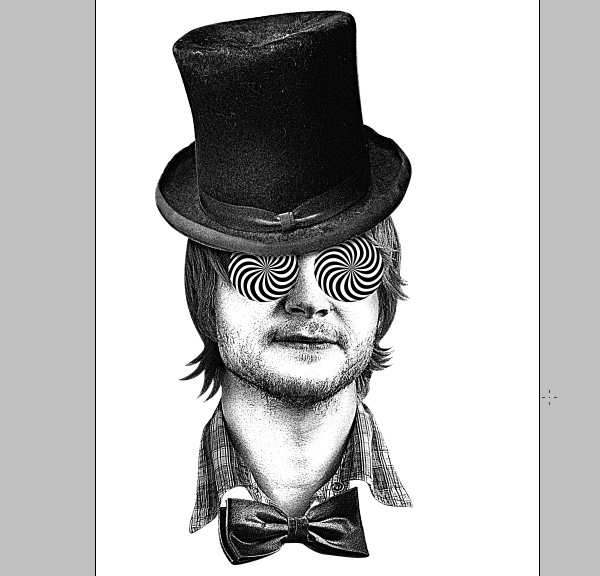 Step 16If you want to add a little colour here try the following. Turn the merged image layer Blending Mode to Multiply. Then create a new layer directly beneath it. Make a selection using your ORIGINALS by Cmd + Clicking STEVE's layer thumbnail. Then Cmd + Alt-click the TOP HAT, BOW TIE and EYEBALL layers to remove them from the section. Then select a new colour and fill the selection on your new layer. You could now flatten this and send it to a print shop for them to separate.  Step 17If you have your own screen printing set-up or just want to send the print shop a more finished plate you could try the following. Bear in mind that printers have different set-ups (meshes, inks etc), use different software (some very expensive) or employ different techniques. There is no definite rule that works for every design and I'm sure some people who use a different method will comment on this, but I've found that this technique has yielded pretty good results in the past. Either way, the artwork you have just created should print well in the hands of someone who knows what they are doing. Turn off all layers except your flattened and flatten the image.  Step 18Then go to Image > Mode > Grayscale. Then go to Image > Mode > Bitmap and set-up as on screen.  Step 19Click OK and input the settings as in the screen grab. In the past I've used a print shop that uses screens with a 220 mesh count. They recommended dividing this number by 3.5 to get your dot frequency – in this case is 63. The angle is more affected by the way the mesh interacts with the shirt weave. Trial and error is the only way to get this perfect as far as I know, but 52.5 or 45 degrees has never produced bad results for me. Apply this and zoom in to see your dots.  Step 20Here's where it gets a bit homebrew but again, it has never failed for me. Select all and copy it to the clipboard. Open up your History Palette (Window > History) and go back to before you flattened the image. Then paste your half-toned image into the document.  Step 21Delete all layers except your Black plate (halftoned image) and your colour plate (Pink). Then use the Magic Wand Tool, turn Anti-aliasing off and uncheck the Contiguous box. Select any white space on your newly half-toned layer and delete. These are your two final plates.  Final ImageThat’s it! We’re finished! Thanks a lot and I hope you’ve learned something new.  |
| You are subscribed to email updates from Psdtuts+ To stop receiving these emails, you may unsubscribe now. | Email delivery powered by Google |
| Google Inc., 20 West Kinzie, Chicago IL USA 60610 | |
0 comments:
Post a Comment