PSDTUTS Updates |  |

- Quick Tip: Create a Complex Pattern by Nudging Smart Objects
- Freebie Pack – 4 Free High Resolution Grunge Textures
- Black and White Grunge Textures – Psd Premium Texture Pack
| Quick Tip: Create a Complex Pattern by Nudging Smart Objects Posted: 03 Jun 2010 09:45 AM PDT
The offset filter is a great tool to use to create a repeating pattern for a website background. Unfortunately, for us, the offset filter only works for a flat, one layer image and doesn’t work under all situations. In today’s tutorial we will demonstrate how to create a repeating pattern using smart objects and the nudging technique with your arrow keys.
Resources UsedThe following resources were used during the production of this tutorial: Basic Principles of Pattern DesignBefore we begin, let’s start with some basic principles of pattern design.
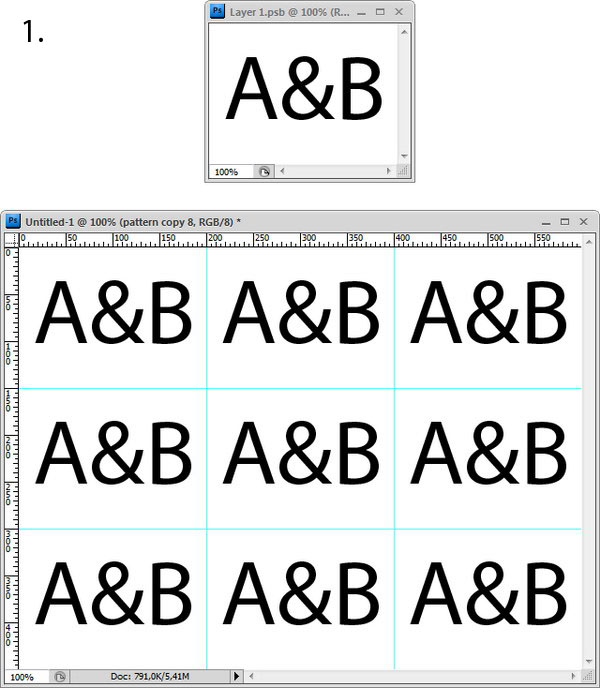 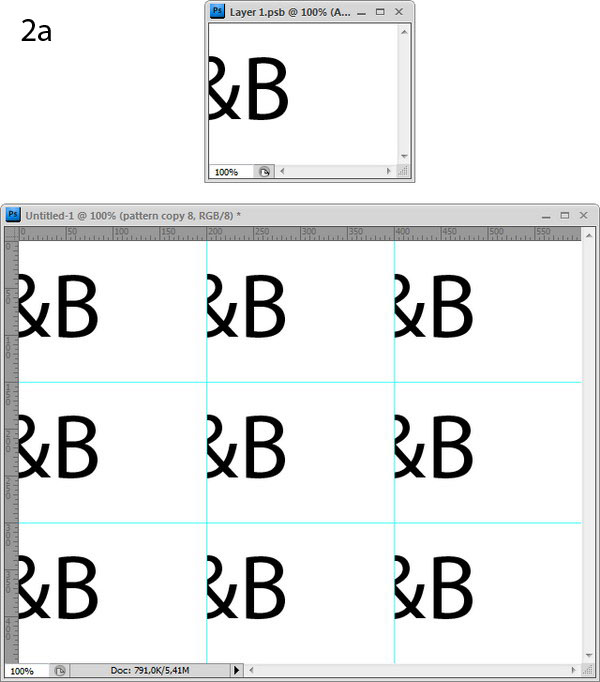 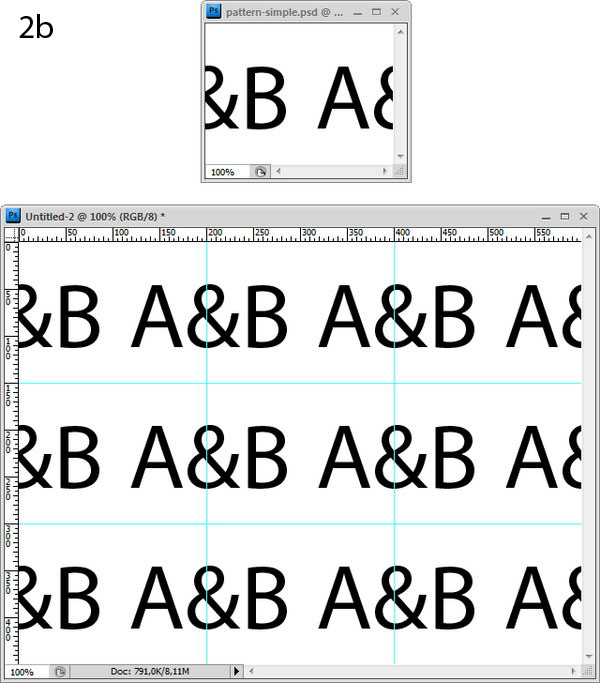 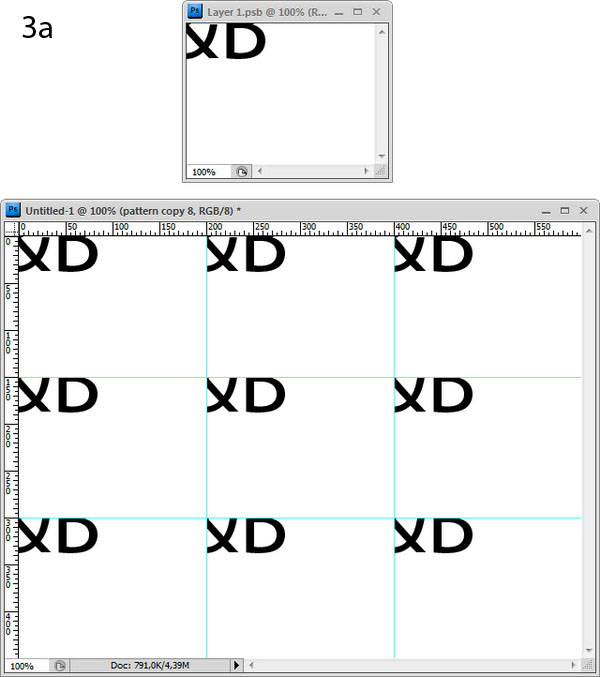 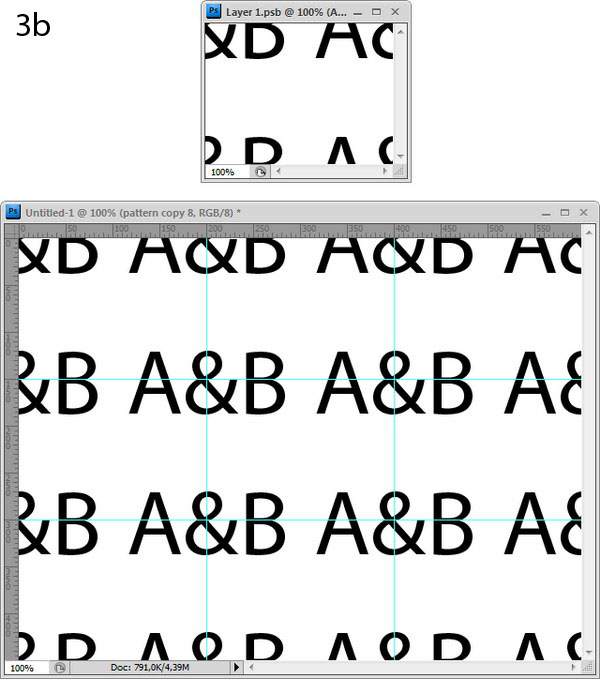 Step 1Download Floral Ornaments and open it in Illustrator. Select one of the objects and press Cmd + C to copy. 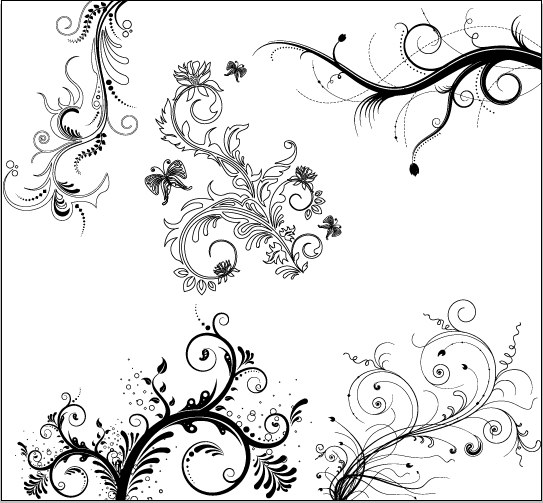 Step 2Create a new file. We are going to create a 256 x 240 px pattern. 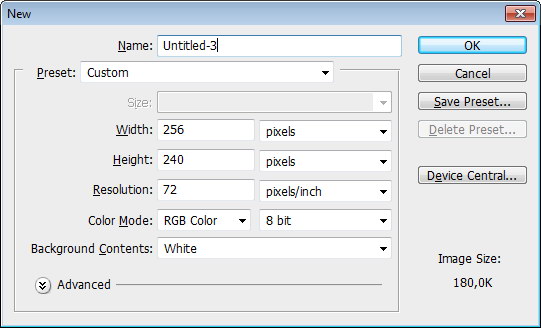 Step 3Create a new layer. Fill it with any color, right click and choose Convert to Smart Object. This smart object will become our pattern. 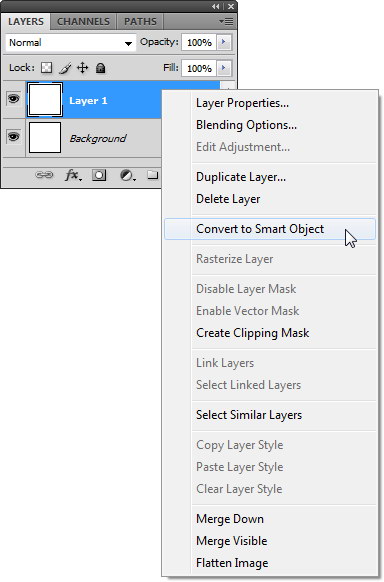 Step 4Click Image > Canvas Size. Activate Relative and set Width and Height to 200%. This will increase the canvas size to 3 times larger than our pattern will be. 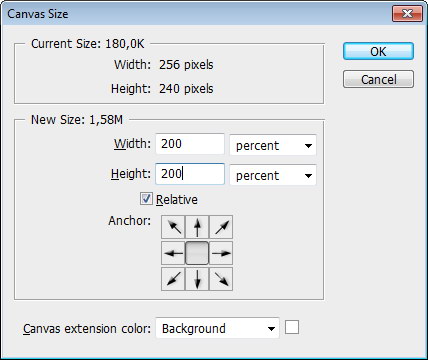 Step 5Duplicate the smart object pattern by pressing Cmd + J then fill the canvas with the pattern. At this point, you will have 9 smart objects on your canvas. These 9 smart objects were created from same parent, editing one of them will change the other 8. This means we will be able to see the edits we make to our pattern change in real time.  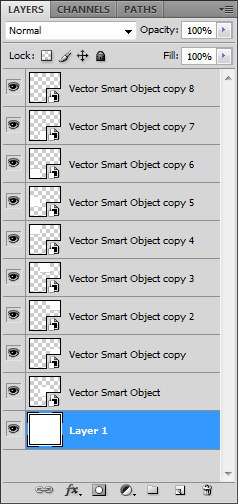 Step 6Double click one of the smart object thumbnail layers to edit its content. If you find this dialog box just click OK. The smart object will be opened as a new file in a new tab. This is the file that we will put the objects for our pattern. Click Window > Arrange > Float All in Windows to see both files at the same time. 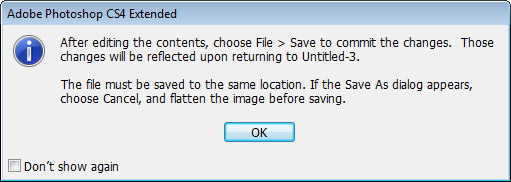 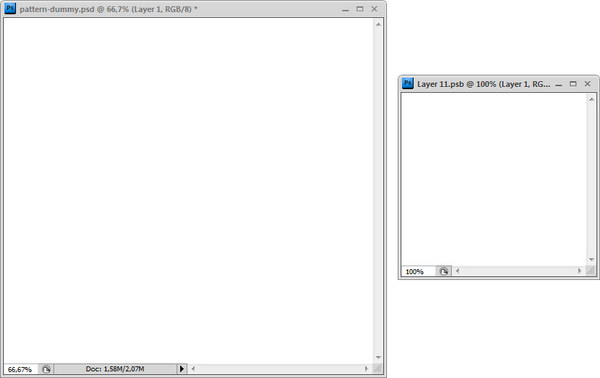 Step 7In the pattern file, paste (Cmd + V) the vector shape from Illustrator. Place it in the middle of the image. Save pattern file (Cmd + S) and automatically the big file will be updated. Because the object is in the middle, pattern looks fine (Principles #1).  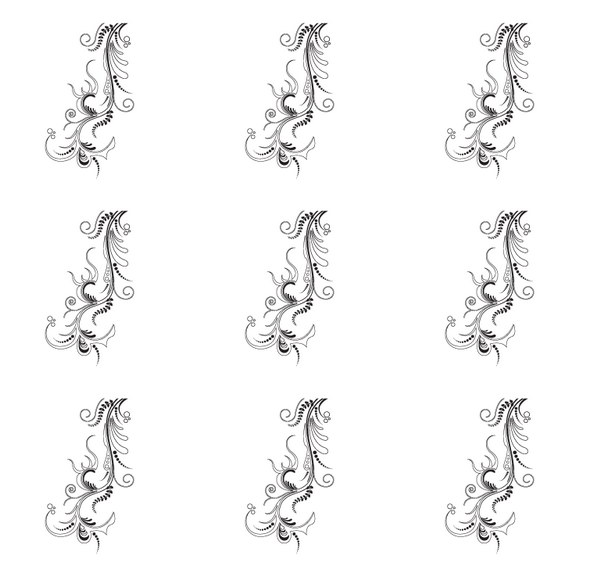 Step 8Return to Illustrator, copy another shape. In Photoshop paste the object and put it on left edge. Save file and you can see in the big file some part of the object is missing. 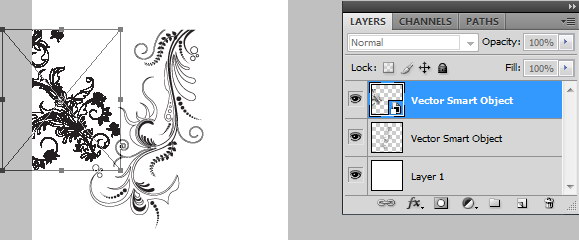  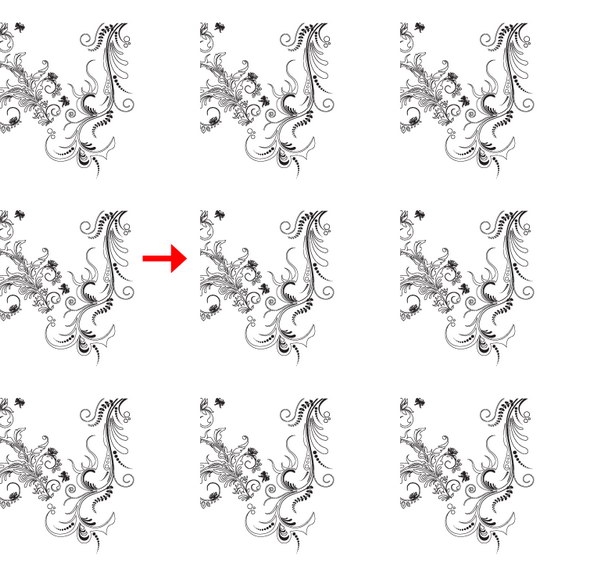 Step 9Duplicate layer (Cmd + J). We need to put this on the opposite side, right (Principles #2). Remember that the pattern width is 256 px. Nudge this layer 256 px to right. Every time you press arrow key, you nudge object 1 px. If you press Shift + Arrow you nudge 10 px. So, press Shift + Right Arrow 25 times then Right Arrow 6 times. Press Cmd + S to save pattern and see how the pattern changes. 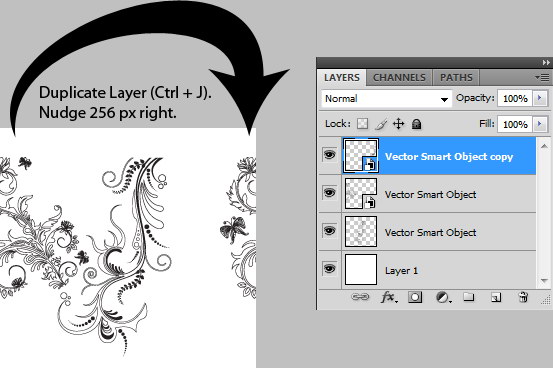 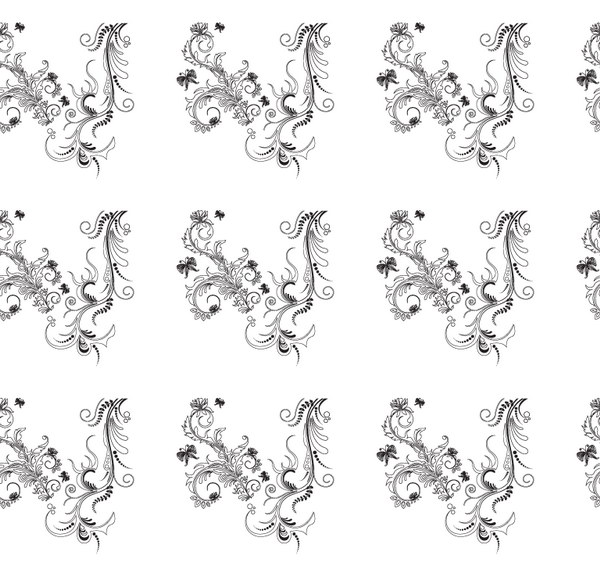 Step 10Grab another shape from Illustrator. This time put it on the top edge. Save the file and you’ll see that lower part of the pattern is missing. 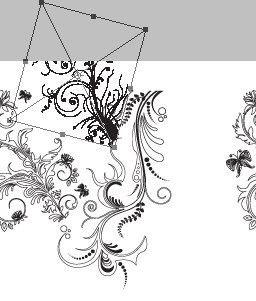 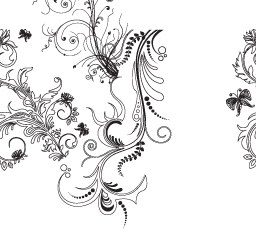 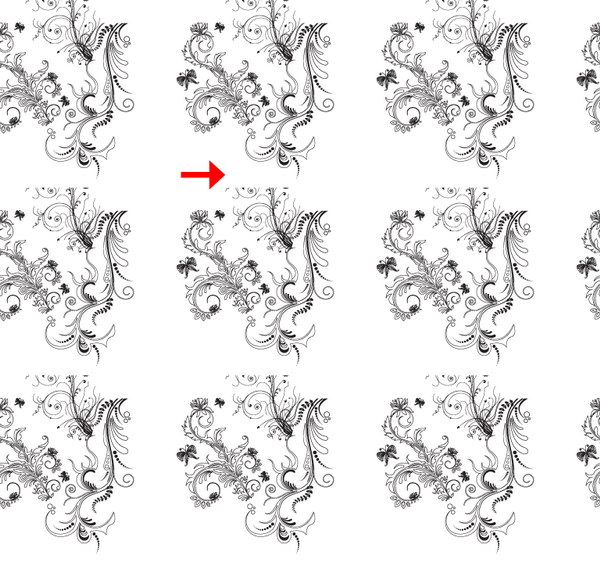 Step 11We still use Principle #2. Duplicate layer (Cmd + J). Nudge it 240 px down, that means press the arrow key 24 times. Save file and see the pattern working. 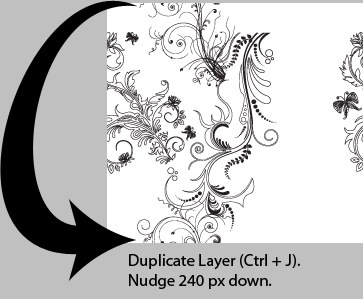 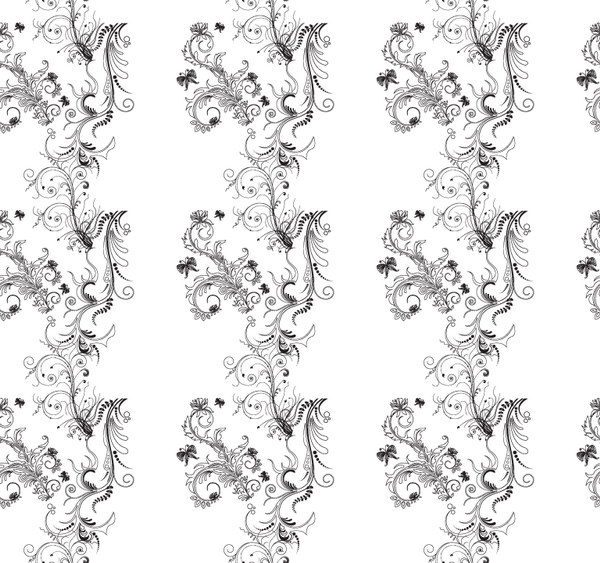 Step 12Grab another shape from Illustrator. Put it in right bottom corner. Save file and you’ll see that there’s missing piece in some areas. 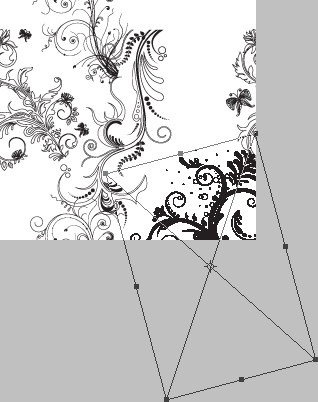  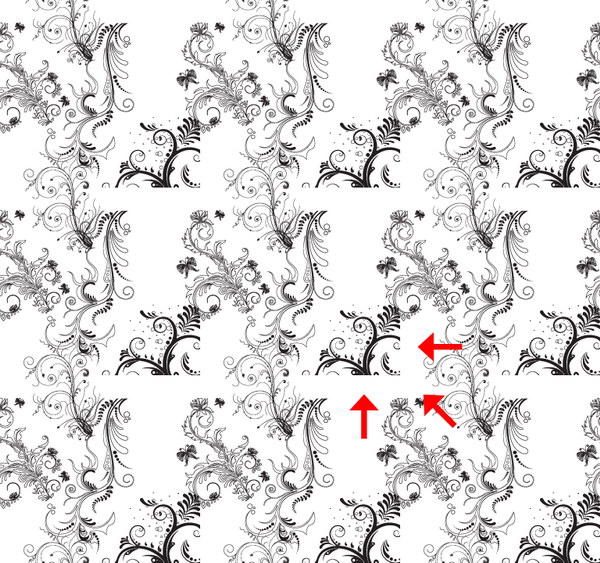 Step 13For object in corner, we need to put its pair in every other corner (Principle #3). Duplicate layer and nudge it 240 px up. Save file to see the result. 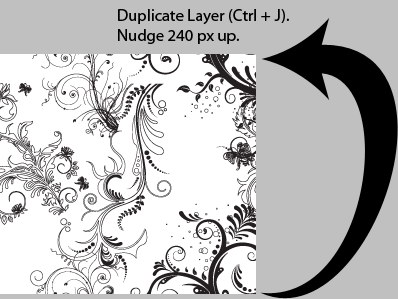 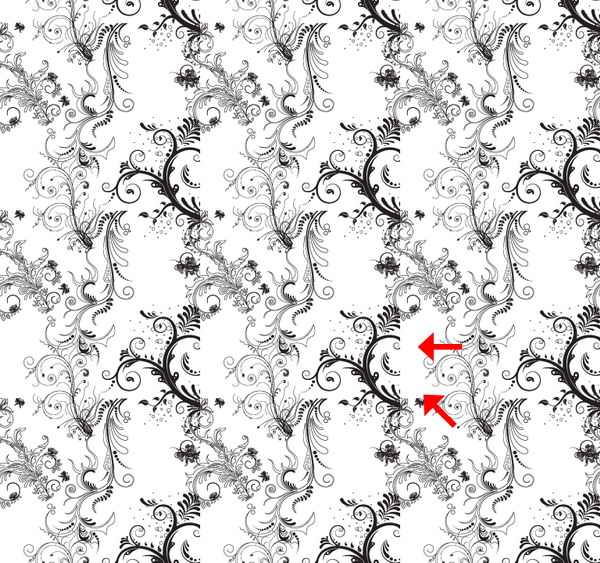 Step 14Duplicate layer and nudge it 256 px left. Save file to see the result. 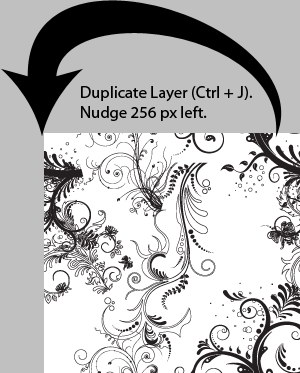 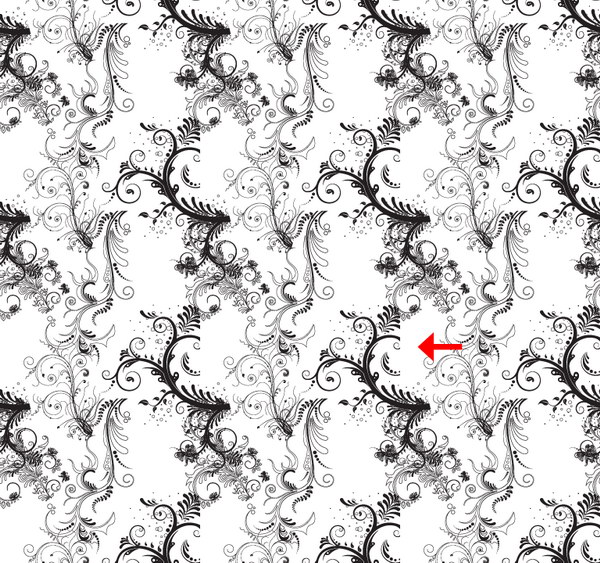 Step 15Now the last piece. Duplicate layer and nudge it 240 px down. Save to see the result. 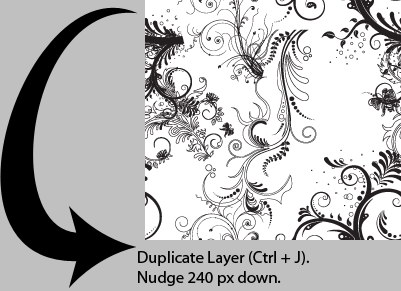   Step 16Fill empty space with smaller shapes from Illustrator without touching the edge. Save to see the result. 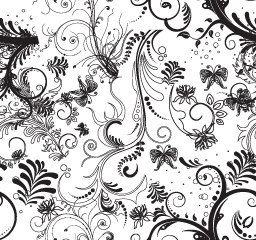  Step 17Delete background layer to make this pattern transparent. 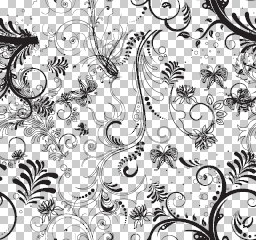 Step 18Click File > Save For Web & Devices. Choose Preset: PNG-24. Activate transparency. 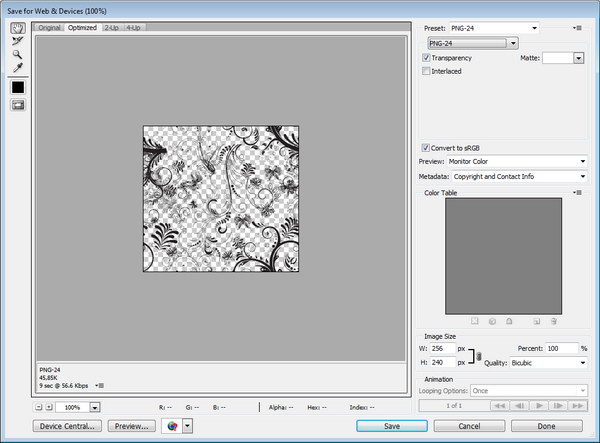 Step 19Open the PNG file we have just created. Click Edit > Define Pattern. 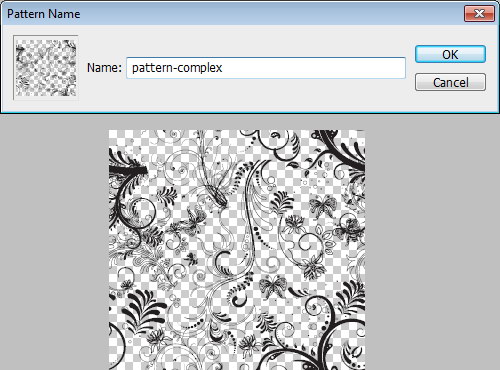 Step 20Create a new file. 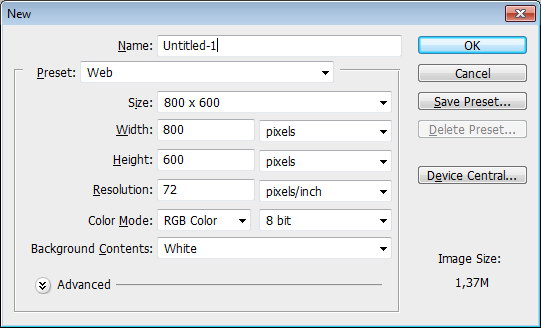 Step 21Add a radial gradient from white to black in background.  Step 22Create a new layer. Click Edit > Fill. Choose Use: Pattern and select pattern we have just created.  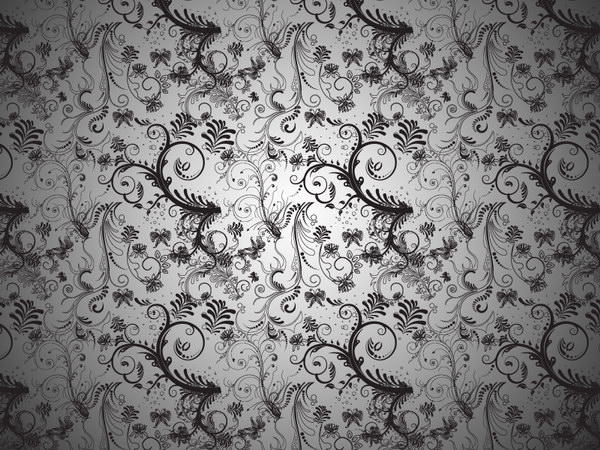 Step 23Add Adjustment Layer Hue/Saturation. Activate Colorize and move sliders to add a bit of color. 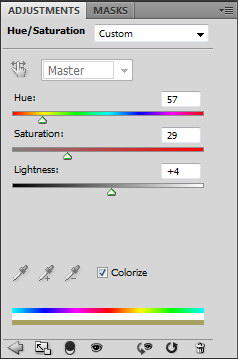 Final ImageThat’s it! We’re done. You can view the final image below. I hope you enjoyed this tutorial and learned something new. Try to use this technique with other shapes or lines. You’ll amaze yourself with the result.  |
| Freebie Pack – 4 Free High Resolution Grunge Textures Posted: 03 Jun 2010 08:34 AM PDT
Textures have a seemingly endless number of uses for graphic design. A nice texture can be used to add depth or a sense of realism to an otherwise flat design. They can be used in print design, web design, and even 3D graphics. Today, we have a really nice set of 4 free high resolution grunge textures from our friends at Texture Vault that you can download right now and use in your work.
4 Free High Resolution Grunge TexturesThis pack includes 4 free high resolution grunge textures that you can use for personal and professional projects. See the download file for more information regarding licensing. Below is an example of the textures included in this pack. This exclusive set of textures was created by Bjorgvin Gudmundsson of Texture Vault. We are excited to partner up with him on the release of this set.  |
| Black and White Grunge Textures – Psd Premium Texture Pack Posted: 03 Jun 2010 05:45 AM PDT
Today, we have a new set of Premium Textures available for Psd Premium Members. This set was crafted by Caleb Kimbrough of Lost and Taken and includes 25 high resolution black and white grunge textures. If your next project calls for some grungy textures, than this set is perfect for you. Learn more at the jump!
New High Resolution Black and White Grunge TexturesThis new Premium Psdpack Pack is available for Psd Premium Members today and includes 25 high resolution black and white grunge textures (3264px by 2448px). Members can Log in and Download! Otherwise, Join Now! You can view a preview of the textures below.  This new Premium Psd Texture Pack was created by Caleb Kimbrough of Lost and Taken and is available for Psd Premium Members to download today. Caleb is a freelance blogger and the brains behind Lostandtaken.com, a blog solely focused on giving away free, high-res textures. We’re excited to partner up with him on this release.  Psd Premium MembershipAs you know, we run a Premium membership system that costs $9 a month (or $22 for 3 months!), which gives members access to the Source files for tutorials as well as periodic extra tutorials, and Premium Packs like this one! If you’re a Premium member you can log in and download the tutorial. If you’re not a member, you can of course join today! |
| You are subscribed to email updates from Psdtuts+ To stop receiving these emails, you may unsubscribe now. | Email delivery powered by Google |
| Google Inc., 20 West Kinzie, Chicago IL USA 60610 | |
0 comments:
Post a Comment