PSDTUTS Updates |  |

| Quick Tip: Create an “Awesome” Wrinkled Sticker Posted: 18 Jun 2010 09:50 AM PDT
Burn and Dodge are very powerful tools that you can use in Photoshop to create a great number of things. In today’s quick tip tutorial we will demonstrate how to create a wrinkled sticker in Photoshop using these fantastic tools. Let’s get started!
Step 1Create a new document. Make it 600px by 400px. 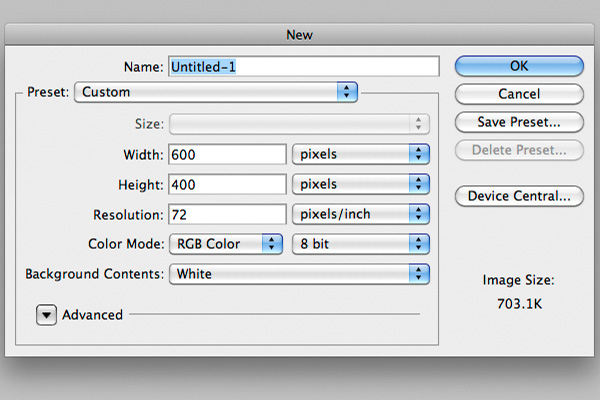 Step 2Fill the background with #282828. Then, place a stone texture onto a new layer and place it above. Set the blending mode to Overlay. You can download "stonetexture5.jpg" from the Stone Texture Pack. Choose File > Place. 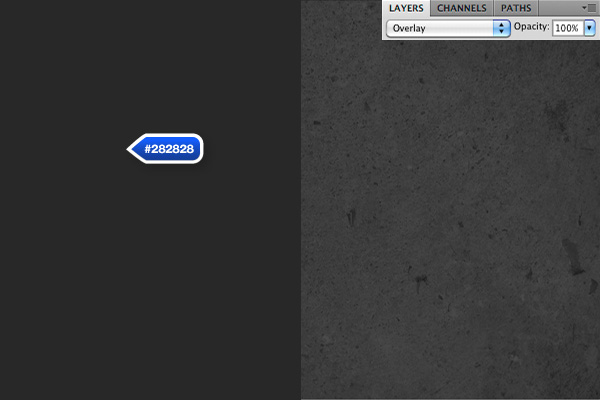 Step 3Now, let’s create the sticker. Create a round edged rectangle using the Rounded Rectangle Tool. Set the corner radius to about 12px and set the color to #ebebeb. 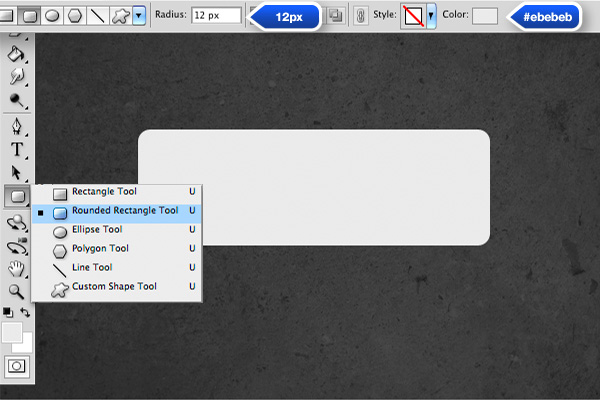 Step 4Next, you need to transform the shape, but you need to rasterize it first. Select Layer > Rasterize > Shape. Once this is done, select a part of the sticker using the marquee tool (M) and rotate it a bit using Cmd/Ctrl + T. You might need to adjust the position a bit using the arrow keys to fill any gaps that may have been created.  Step 5Use the Smudge Tool in various sizes and strengths to create some irregularities in the sticker. Tip: Try to use some hard brushes and high values of strength for best results. Otherwise, it could become too blurry. A similar result can be achieved using the Liquify Filter, but smudge is a bit faster. What we are trying to do here is create a major fold in the center as shown in the example below. 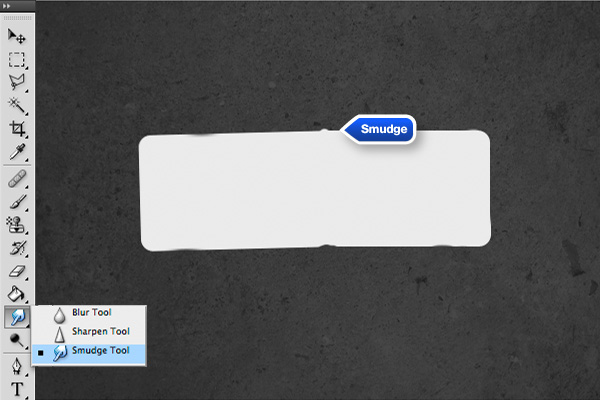 Step 6We are now ready to add some shadows and highlights to add some realism. Using the Burn Tool, draw some lines on the right side of the bump. It doesn’t have to be perfect; imperfections will only make it look more realistic. Feel free to adjust the size of the brush to create varied results. 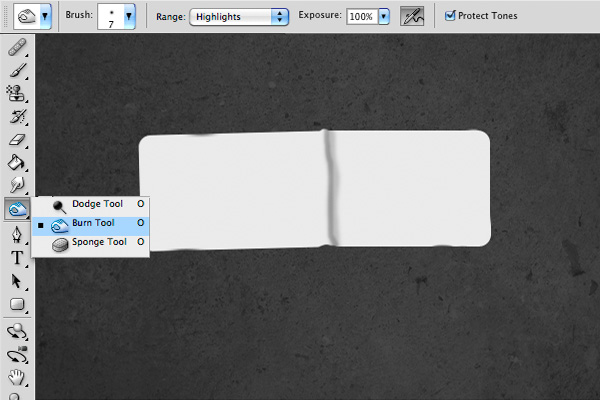 Now, do the same with the Dodge Tool. 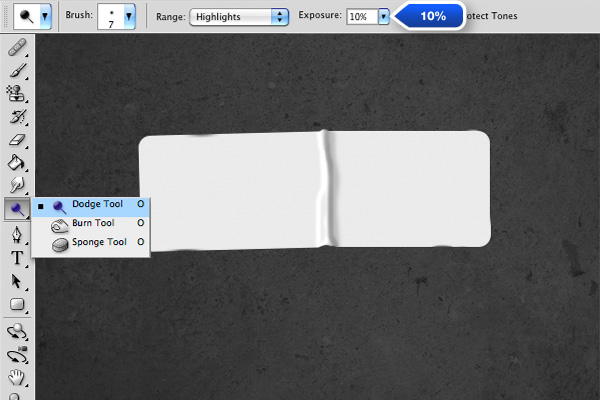 Use the same technique to create some more wrinkles as shown. 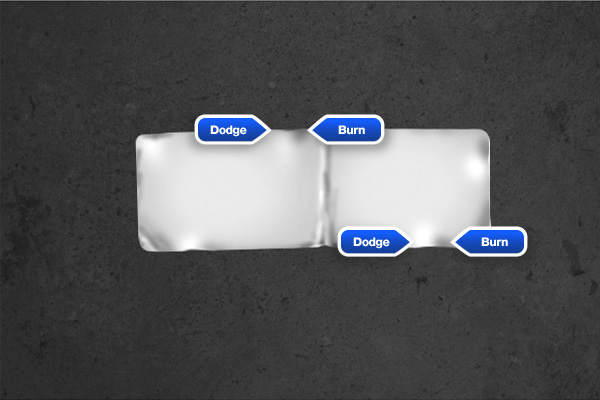 Step 7To add a bit of depth, add a slight Drop Shadow and a subtle Bevel as shown. 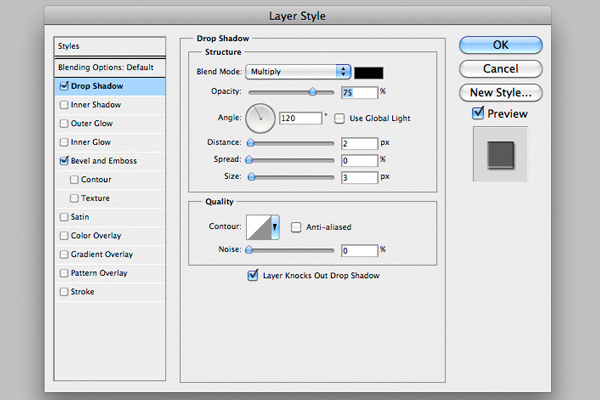 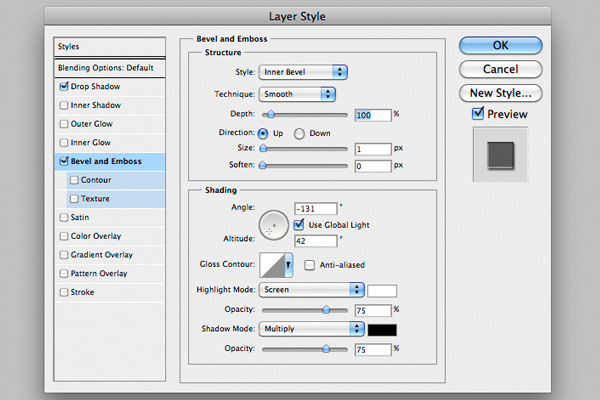 Step 8To make the sticker a bit more crisp, make a copy of it and clear the layer styles. Go to Layer > Layer Style > Clear Layer Style. Then, select Filter > Other > High Pass. For those who don’t know much about High Pass filter, it’s a filter that accentuates the dark/bright edges. 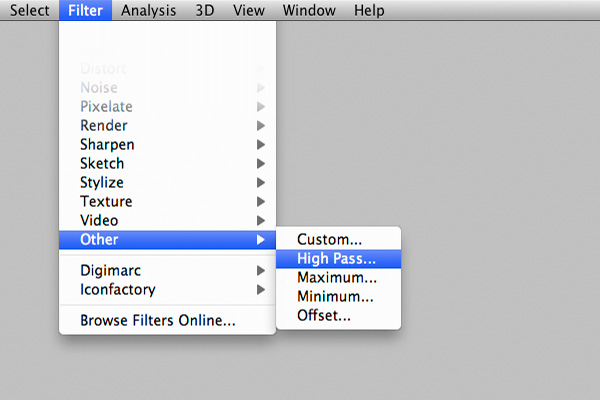 Set it to about 2%. Place the layer above the sticker and set the blending mode to Overlay. 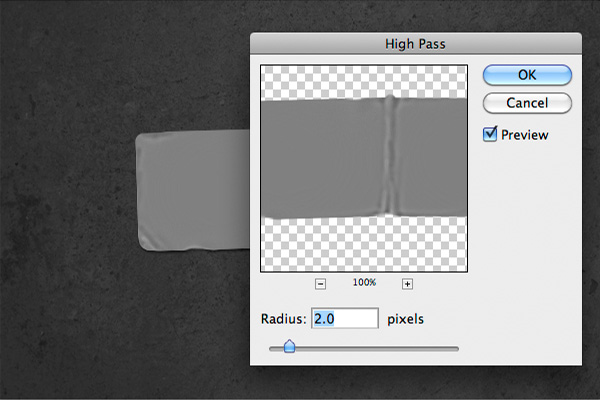 Step 9What’s great about this technique, is that the text is quite easily customizable. For this quick tip, I used Trade Gothic Lt Std Bold, it’s a well proportioned gothic font that’s great for titles. Make it about as big as the sticker, depending on the word you choose, it should be around 75pt. Set the color to #393939. 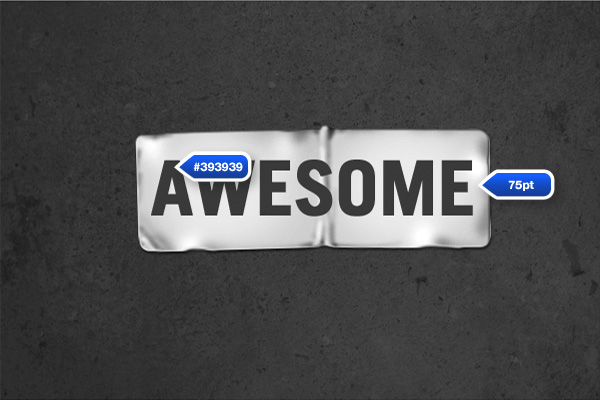 Step 10When placing your text layer, try to place a letter right in the middle so that it will bump with the folded area. You should rasterize your text before transforming. 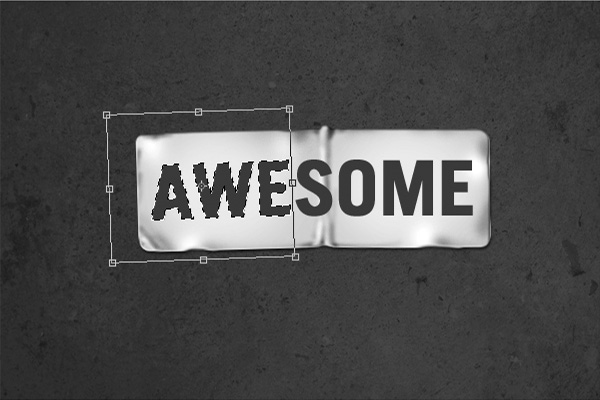 Step 11Using the same method as the sticker, dodge and burn some areas and smudge the letters around the bumps to make them look displaced.  Step 12To add some texture, you can paint on some grunge with a grunge brush. There are plenty available on the web. 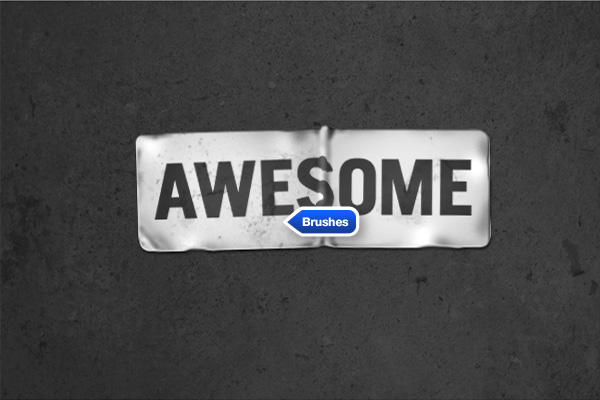 Step 13Now let’s add a vignette effect. To do this, create a new layer, fill it black and draw an elliptical shape with 150 px as feather value. 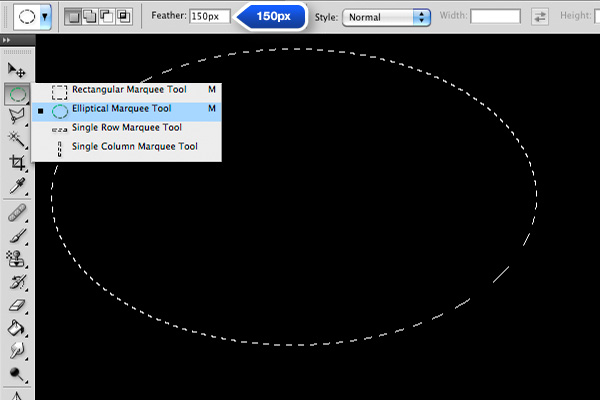 Then, press Delete a few times to get rid of the center, 2-3 times should be enough. 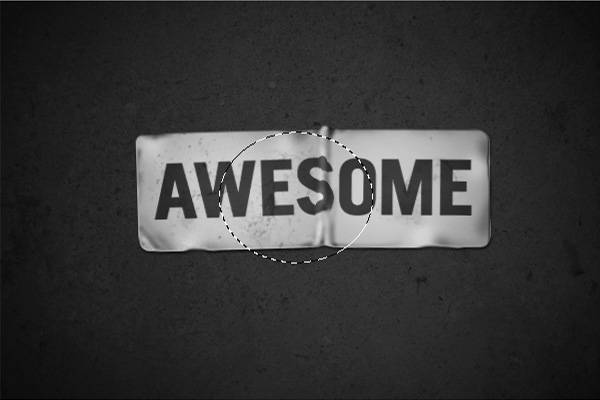 Final ImageThat’s it! We’re finished! I hope you enjoyed it! 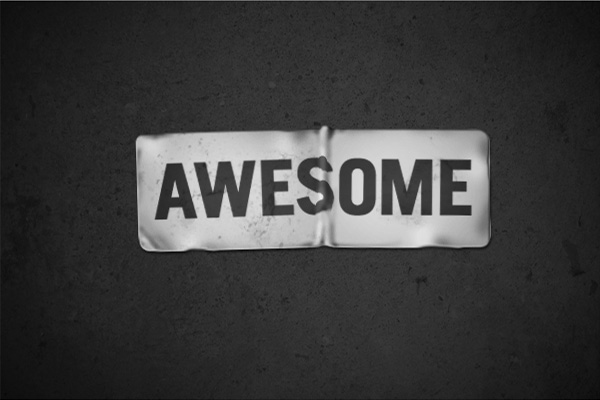 |
| Exclusive Freebie Pack – 25 Grunge Brushes Posted: 18 Jun 2010 09:45 AM PDT
Photoshop brushes are a popular tool that designers use to apply an effect to a graphic. Brushes can be used for digital painting or even to distress text or logos. This set of 25 High Resolution Photoshop Brushes is our little treat to the readers of this website and can be used to grunge up your designs in whatever way you need for free!
Exclusive Freebie Pack – 25 Grunge BrushesThere are 25 High Resolution Photoshop Brushes in this pack. The license allows you to use these brushes in your commercial and personal projects. See the download file for details. Below is an example of what type of brushes are included in this set.  This exclusive set of Photoshop Brushes was created by Stefan Surmabojov. We are very excited to partner up with him on the release of this set of freebies.  |
| You are subscribed to email updates from Psdtuts+ To stop receiving these emails, you may unsubscribe now. | Email delivery powered by Google |
| Google Inc., 20 West Kinzie, Chicago IL USA 60610 | |
0 comments:
Post a Comment