PSDTUTS Updates |  |

- Freebie: 8 High Resolution Screen Print Ready Textures
- The Making of Lost – Part 2
- Design a Macbook Pro Illustration in Photoshop
| Freebie: 8 High Resolution Screen Print Ready Textures Posted: 25 Jun 2010 09:40 AM PDT
A designer can never have too many textures on hand to add dimension, depth, or just to distress their artwork. Today, our friends at CX City were gracious enough to donate 8 high resolution screen print ready textures that you can use in your work. CX City is an apparel and art project based in southern California and they have packaged up some really nice textures contained within a PSD file that you can download and apply to your apparel designs.
8 High Resolution Screen Print Ready Textures IncludedThis pack includes 8 high-resolution textures contained within a PSD file. Each texture is 17 x 14 inches, at 300 dpi, and has been halftoned and extracted from its background, making it super easy to distress your apparel designs. You can view a low resolution example of each texture below.         |
| Posted: 25 Jun 2010 06:12 AM PDT
In this second tutorial of this two part series, we will add a background and enhance the image with Photoshop effects. Keep in mind that a key to succeed in following this tutorial series is to experiment. I will be teaching the basic techniques but in order to create a strong composition and attractive shapes, you will need to alter the settings, and experiment with other effects. Patience and determination are mandatory skills for any artist. So let’s finish this image!
Let’s take a look at the image we’ll be creating for this two part series (above): Part 1 on Cgtuts+ and Part 2 will be covered here on Psdtuts+ in today’s final tutorial. This Post is Day 12 of our Digital Illustration Session. Creative Sessions Step 1Expand the canvas horizontally, place the stock mountain image by Sara Moses in the background.  Step 2Take the stock of the paint splash; adjust the Hue/Saturation to make it yellow and wrap it around the person.  Step 3Repeat the previous step to achieve the following.  Step 4If the background is removed at this point, a nice piece can be formed already.  Step 5Take the stocks of the hands (hand 1 and hand 2 from Duck Dodger) and place them as shown. Merge the two layers of the hands and duplicate that layer two times.  Step 6Desaturate the first layer; using levels, brighten the image . Then set the layer mode to Multiply.  Step 7Desaturate the image second layer; using Levels, darken shadows and brighten the highlights. Then set the layer mode to Screen.  Step 8Duplicate the “background” layer, place it right above the unaltered “hands” layer and use a layer clipping mask between the two layers. Move the background duplication so that mostly green is shown on the hands.  Step 9Using the Liquify Filter, liquify the background duplication that it adheres to the hands' contour.  Step 10Create a new layer and place it above the layer of the base stock (the suit). Select the “suit” layer (Command-click) and fill it with cyan.  Step 11Selection > Modify > Feather 10 px. Slightly nudge the selection to the left, then down, then press delete.  Step 12Repeat steps 10 and 11 for the hands.  Step 13Create a new layer on the very top, set the layer mode to Overlay and loosely paint some parts using a large brush.  Step 14Export the image as a JPG. In C4D, create a background, apply the image to a new material and apply the material to the background. Make sure the proportion/size of the render is the same as the image exported.  Step 15Using the spheres created in Part 1 of this tutorial, duplicate them by creating an array and altering its settings to best show the image and strengthen the focal.  Step 16Render the image. Go back to Photoshop; using the alpha channel, make the spheres into a separate layer and place it in the original file.  Final ImageSlightly adjust the levels of the spheres to achieve the results for this tutorial.  Alternative Final ImageIf the background image is removed, this image can be formed; it has a totally different atmosphere and theme.  ConclusionThis is the essence of how I created my piece “lost.” Most of the techniques used are explained in this tutorial. The only method to achieve better results is time. Due to the abstract nature of this piece, a lot of experimentation must be done. The tutorial explains only the techniques used, using these techniques, you can create a result perhaps better than my original piece with determination and time. This Post is Day 12 of our Digital Illustration Session. Creative Sessions |
| Design a Macbook Pro Illustration in Photoshop Posted: 25 Jun 2010 06:00 AM PDT
Illustrating an electronic device such as a laptop may seem like a difficult task but it’s actually not as hard as you might think. In this tutorial, I will demonstrate how to create a MacBook Pro in Photoshop. Let’s get started!
Step 1First, go to File > New. Then change the Properties as is shown below: 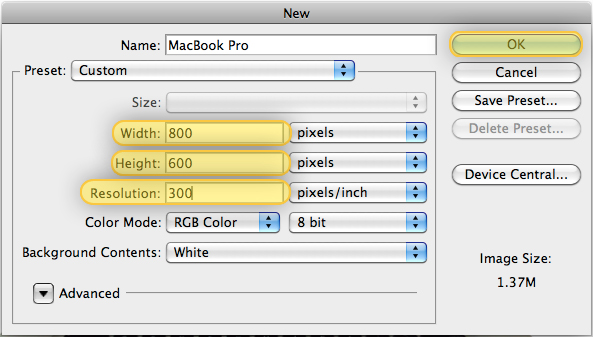 Step 2Now you will need to find a photo to use a reference. To do this, just head over to Google and run an image search. Once you’ve found a photo, place it into your document by going to File > Place, then center it as shown below. 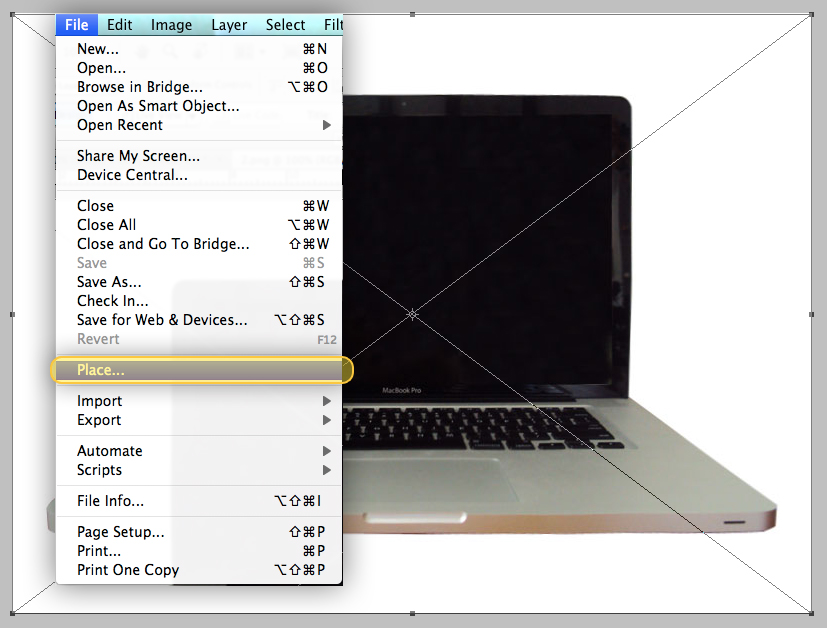 Step 3Make a new Folder, name it "Screen". Then, make a new Layer and name it "Screen_BG." Make sure you insert the "Screen_BG" layer to the "Screen" Folder. 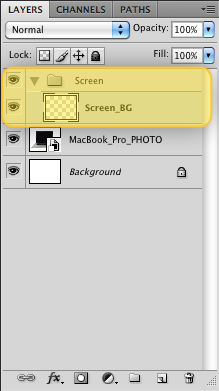 Step 4In the "Screen_BG" layer draw a Rounded Rectangle (Shift + U) on the MacBook’s Screen with a Radius of 15px as shown below. 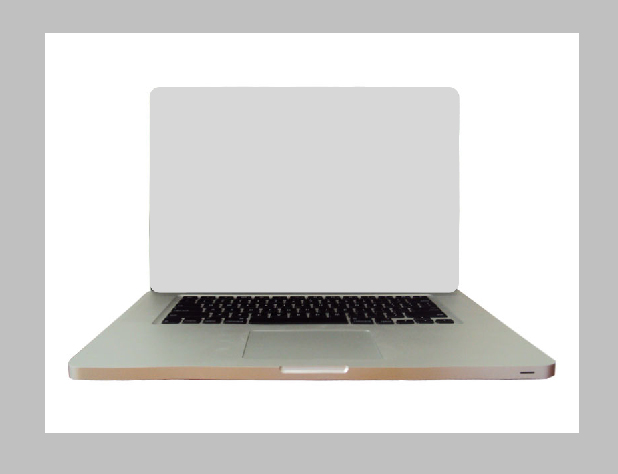 Step 5Now apply the following Layer Styles to our "Screen_BG" layer. 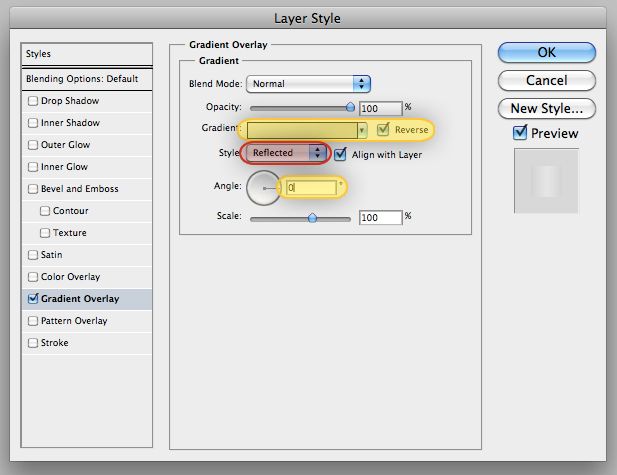 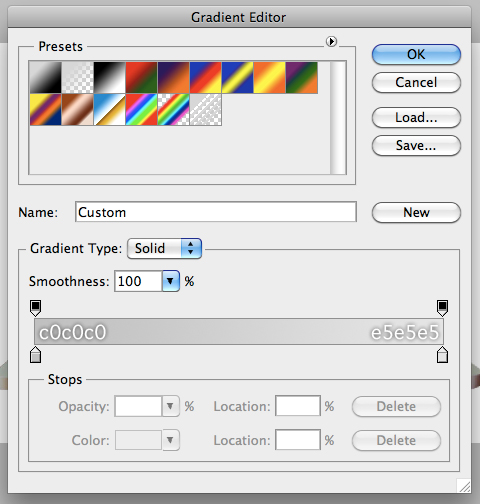 Step 6Draw a Rounded Rectangle (Shift + U) over the edge of the MacBook’s screen with a Radius of 15px and choose a black color. Name this layer "Screen_Middle". 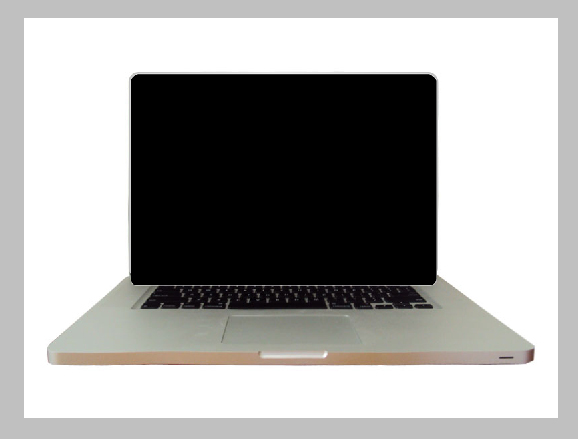 Step 7Apply the following layer styles to Screen_Middle. 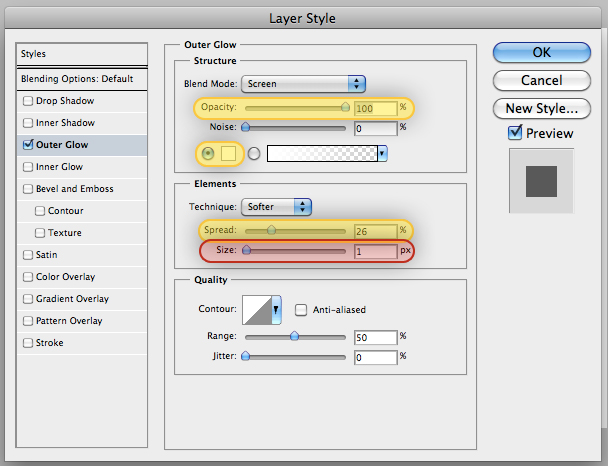 Step 8Create a new layer and name it "Screen_Middle_Light1" and drag it to our "Screen" Folder. With the layer selected use the Rectangle Marquee Tool (Shift + M) and draw a rectangle as shown below. After that, fill this selection with a transparent to white gradient using the Gradient Tool (Shift + G). Then, Cmd + Click the "Screen_BG" layer’s thumbnail and then Cmd + Shift + I and hit delete. Finally, reduce the "Screen_Middle_Light1" layer’s opacity to 65%. 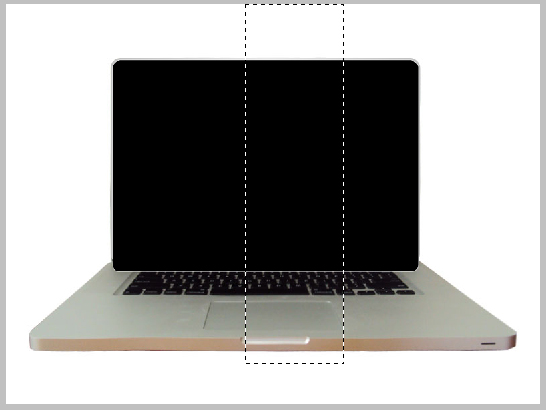 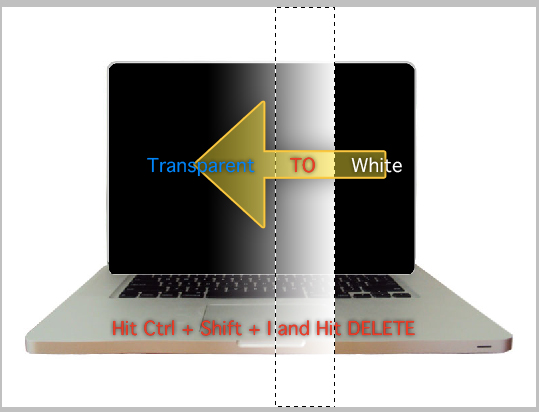 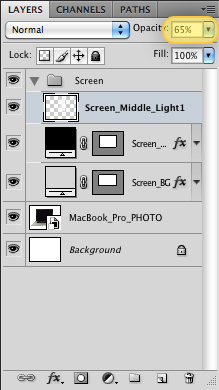 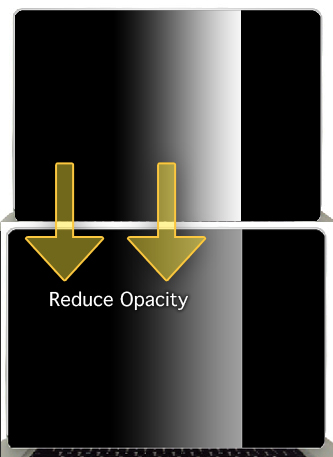 Step 9Now we have to draw the MacBook Pro’s screen. First, draw a Rectangle using the Rectangle Tool (Shift + U). Make sure the rectangle is black, and draw it above the MacBook Pro’s Screen. Name this layer "Screen" and drag it to our "Screen" Folder. Then, apply the layer styles as shown below. 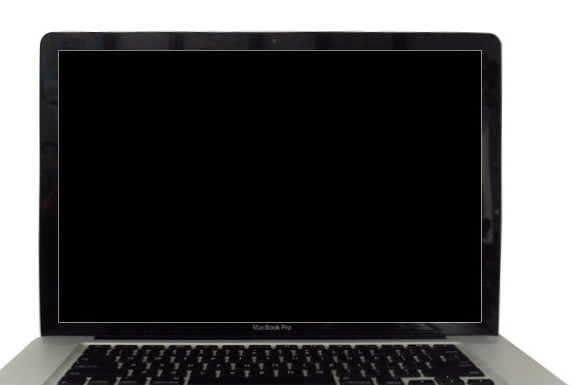 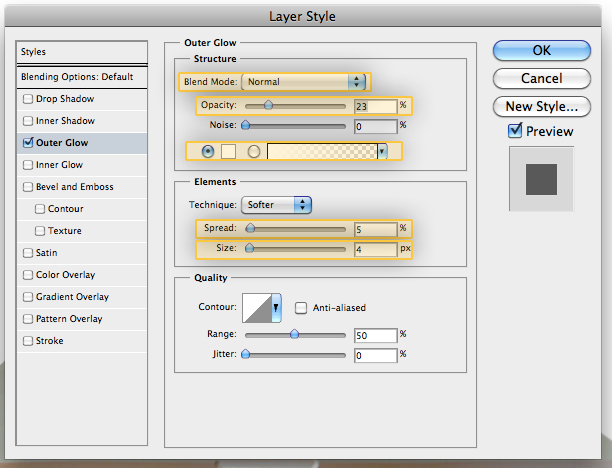 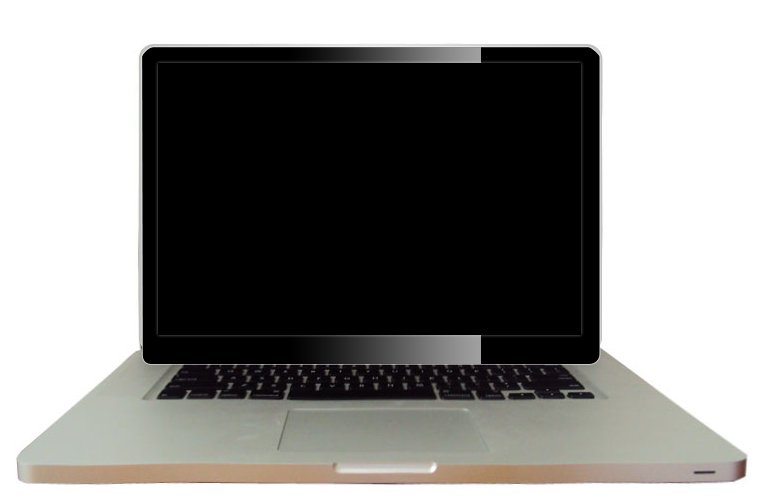 Step 10Now let’s add a reflection to the MacBook’s screen. Create a new layer and name it "Screen_Light1", use the Polygonal Lasso Tool (Shift + L) and draw the following shape. 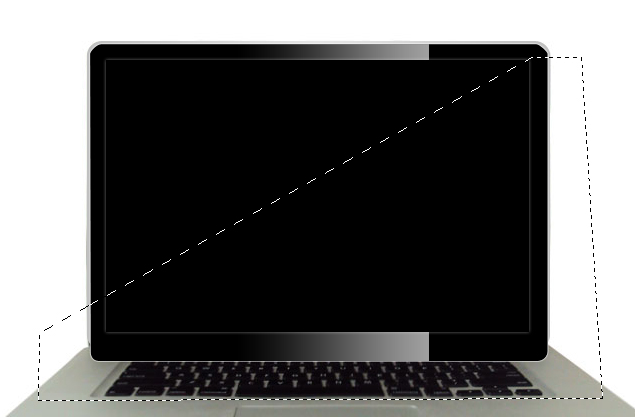 Step 11With the "Screen_Light1" layer selected, use the Gradient Tool (Shift + G) to apply a white to transparent gradient, make sure you select the Linear Option a shown in the following images, when you are done deselect the selection using Cmd + D. 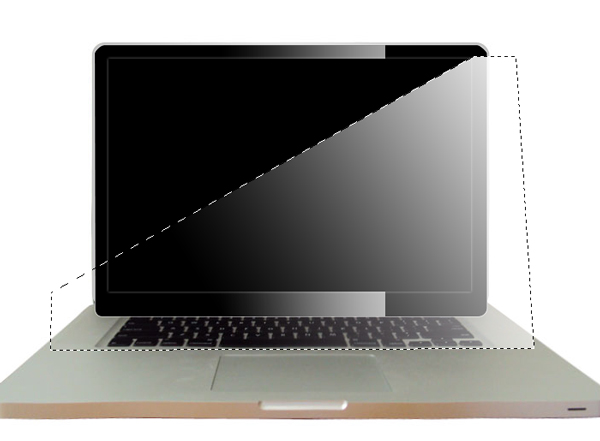 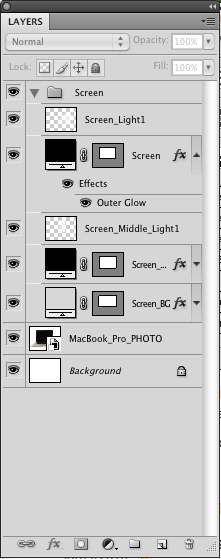 Step 12Cmd + Click the "Screen" layer’s thumbnail and then Cmd + Shift + I and then hit delete (Make sure to be in the "Screen_Light1" layer). After that, reduce the opacity to 62%. 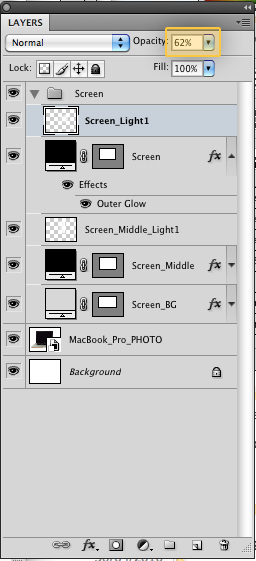 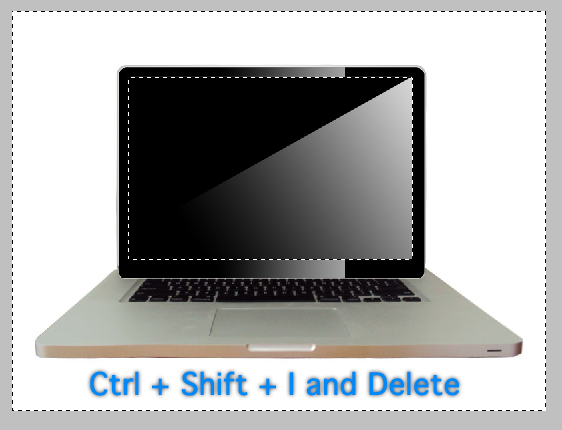 At this point your illustration should look similar to the image below. 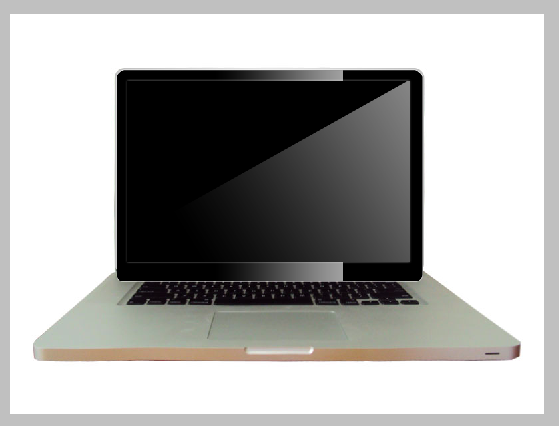 Step 13Our screen is ready! Now we have to create everything else. First, make a new Folder and call it: "Body". Then, make a new layer and use the Pen Tool (Shift + P) to trace the laptop’s body, make sure to have the "Paths" option selected as in the following image. Drag this layer into the "Body" Folder and call it "Top_Body". 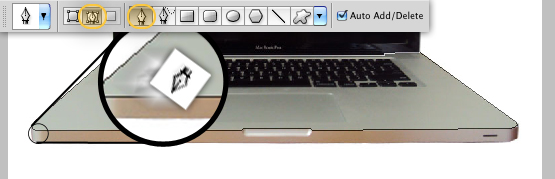 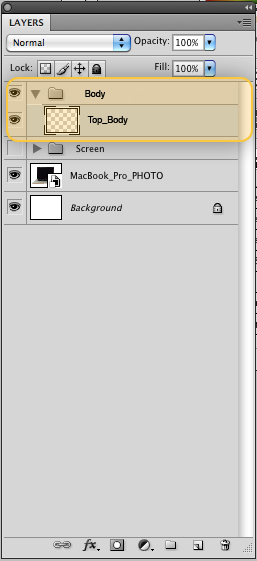 Step 14With the "Top_Body" layer selected hit Cmd + Enter to make a selection. Then fill this selection with a gray color. 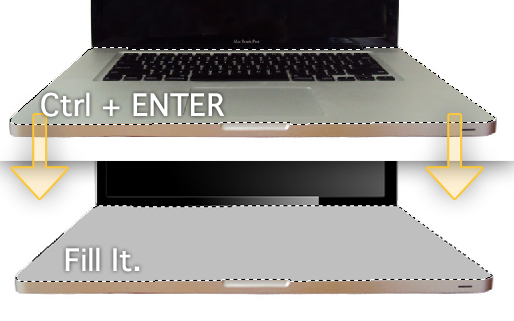 Step 15Apply the following layer styles. 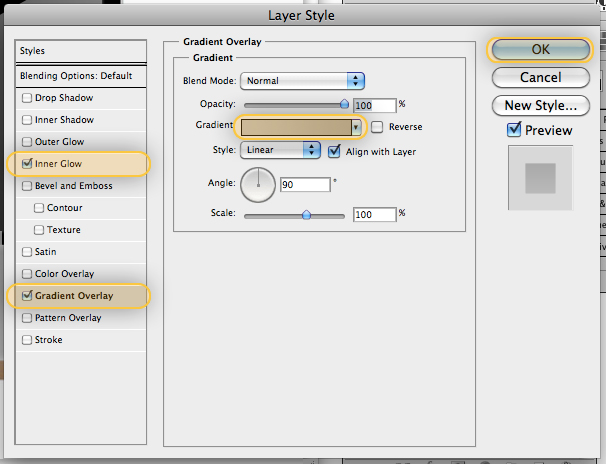 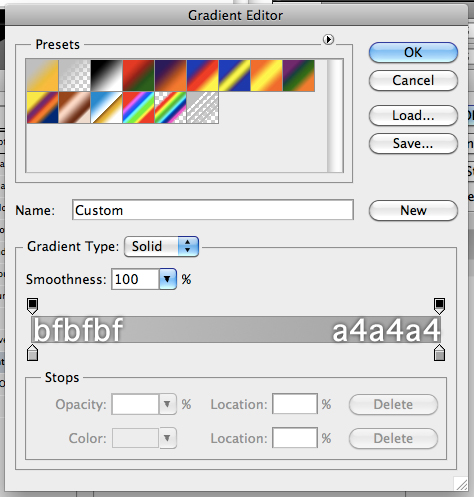 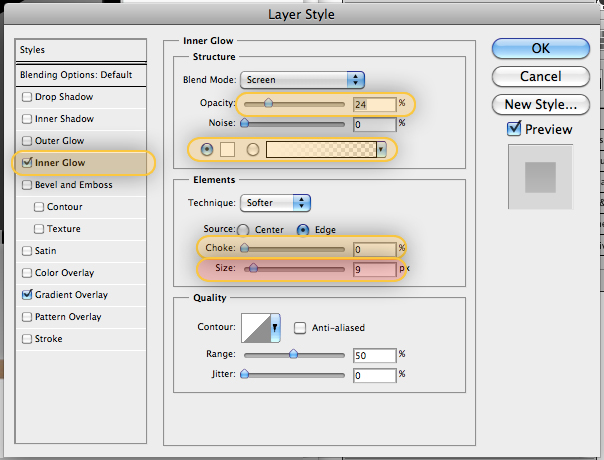 Step 16Now lets create the outer body, this is very similar to Step 14. Create a new layer and name it "Outer_Body" and insert it in the "Body" Folder. With the layer selected use the Pen Tool (Shift+P) and trace the outer part. When you’re done fill it with a different gray tone. 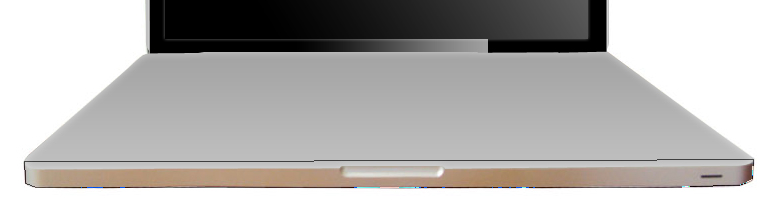  Step 17Apply the following layer styles to the "Outer_Body" layer. 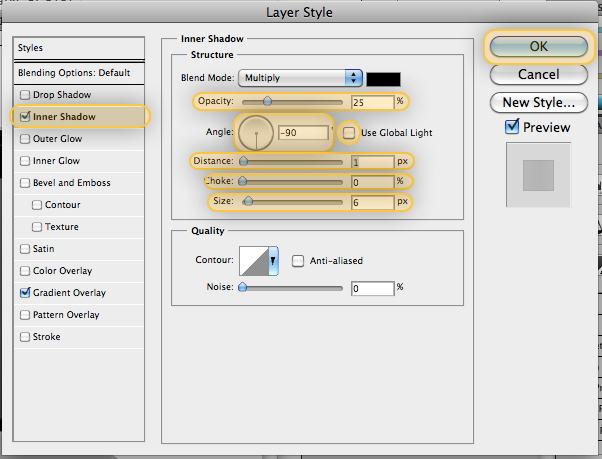 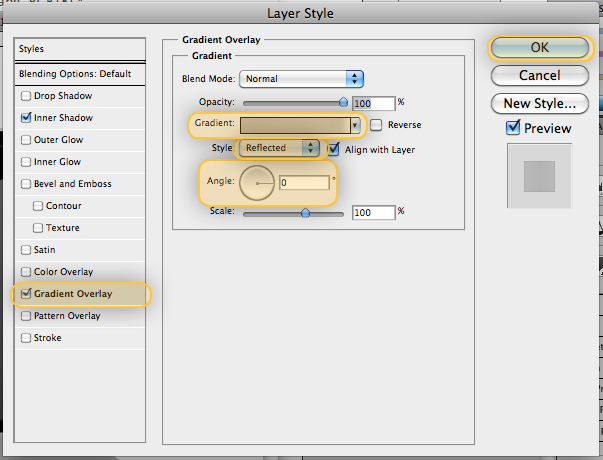 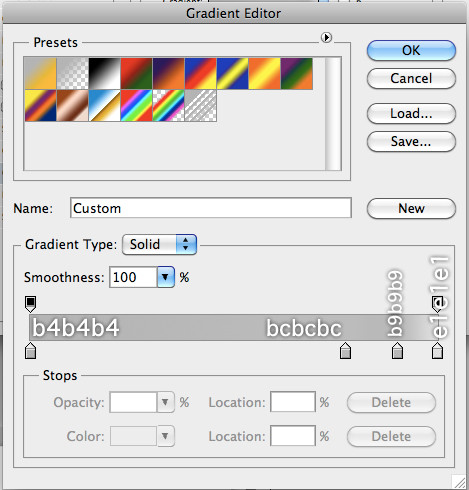 Step 18Now, we will create the laptop’s opening. To do this, make a new layer in the same Folder and call it "Opening_Body". Repeat steps 14 and 16. 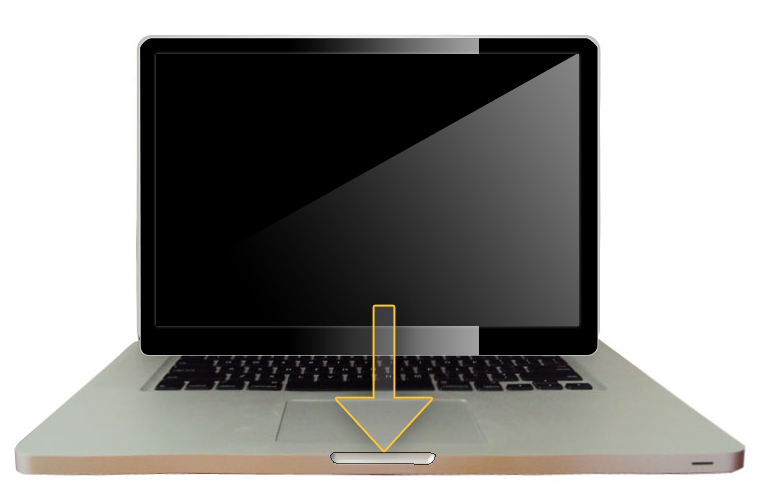  Step 19Apply the following layer styles to the "Opening_Body" layer. 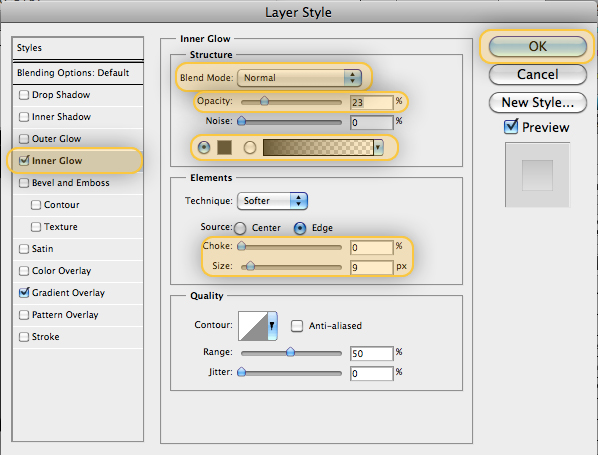 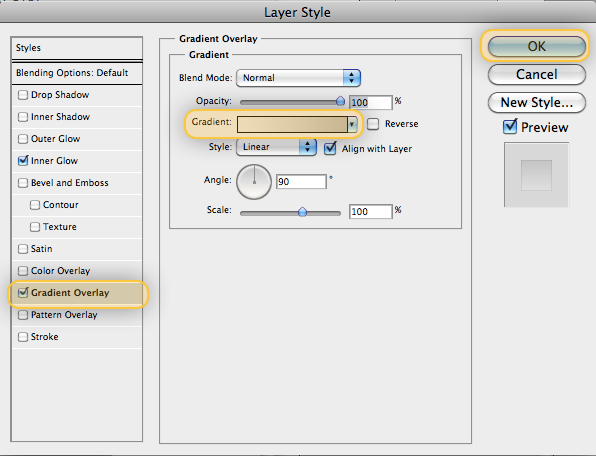  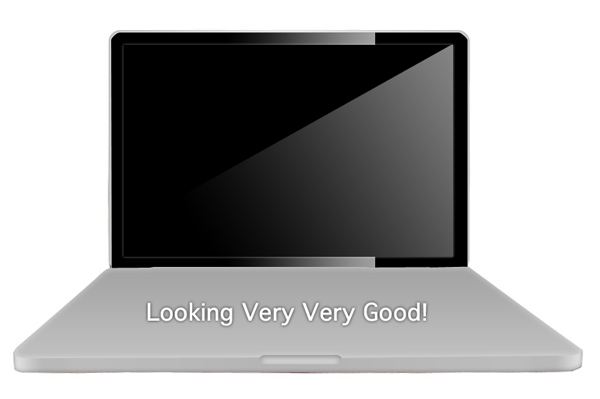 Step 20Now, we have to draw the sunken area where the keyboard goes. Select the Rounded Rectangle Tool (Shift + U) with a radius of 5px and a color that you can distinguish from the body’s gray. Then, draw a rectangle, select Cmd + T to bring up the Transform Tools, right-click the rectangle and then choose Perspective and play with it until it looks similar to the shape below. Name this layer "Keyboard_Sunken".  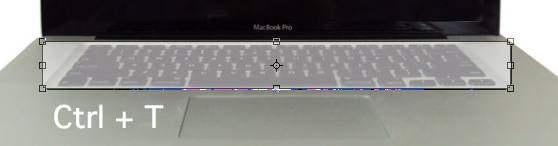  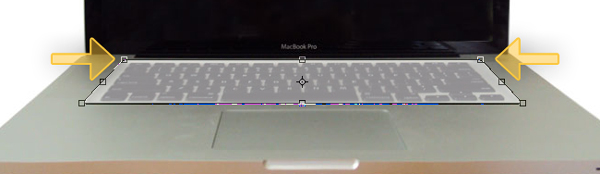 Step 21Apply the following layer styles. 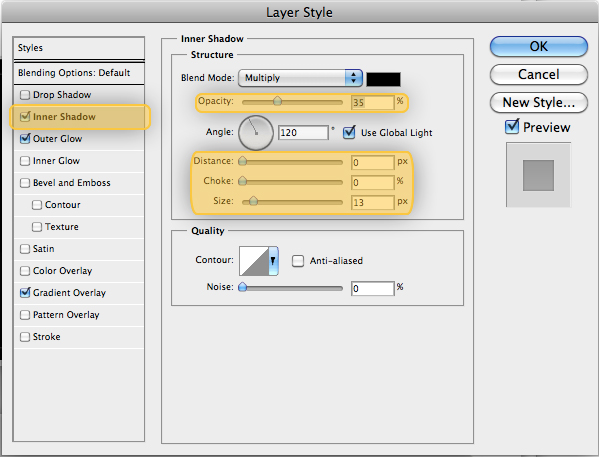 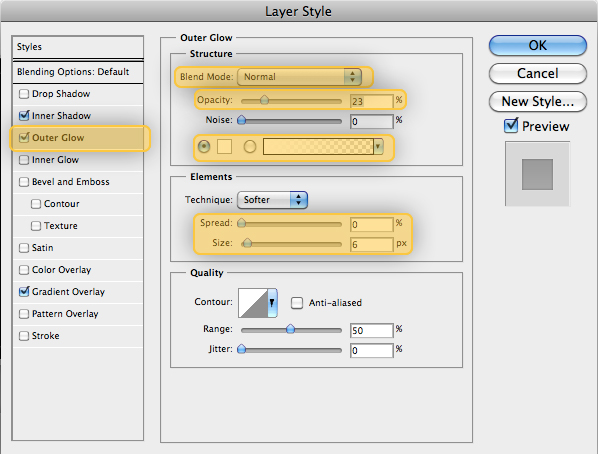 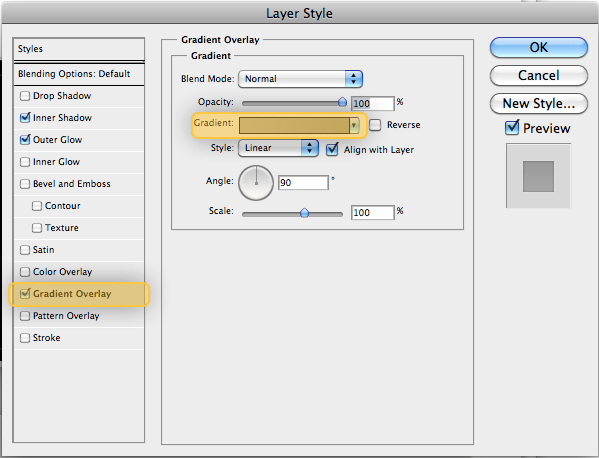 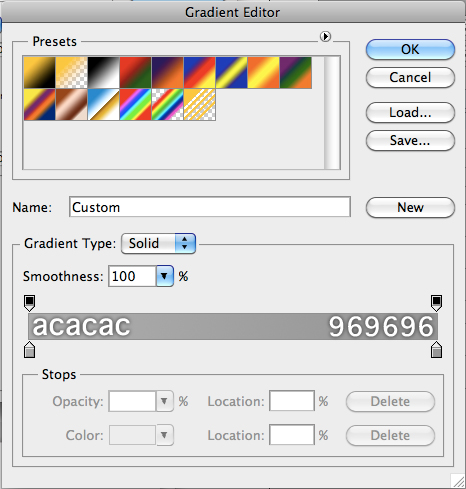 Step 22Now let’s create the TrackPad. We have to make a Rounded Rectangle (Shift+U) with a Radius of 5px, and do the same steps to transform it as we did on Step 20 and of course apply some layer styles. Name this layer "TrackPad" and drag it inside the "Body" Folder.   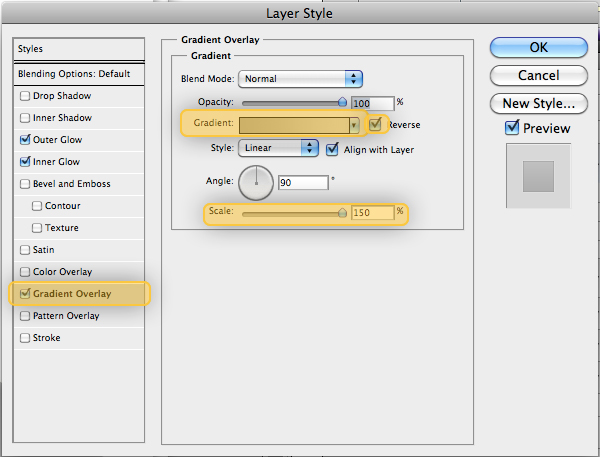 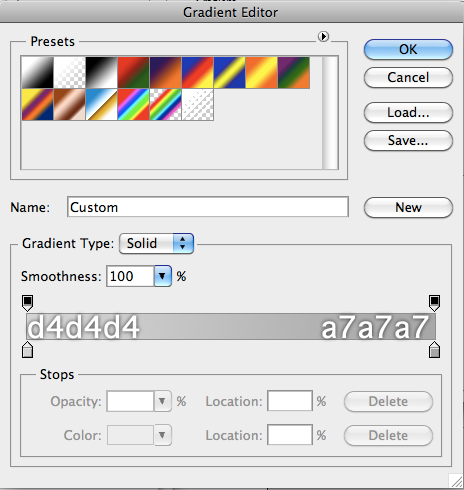 Step 23 (Optional)In case you are building a different kind of laptop you can add a separation on the TrackPad. This step is optional because the new MacBook Pro doesn’t have this line. Anyway, select the Line Tool (Shift + U) and make one black line and one white line, give them a weight of 1px. You will realize that it makes two different separate layers, so you have to merge them. Select the two layers and the press Cmd + E. Then, change the name of the merged layer to "TrackPad_Line" and change the Blending Mode to Soft Light and reduce the Opacity to 26%. Also, erase a little bit the edges using the Eraser Tool (Shift + E). 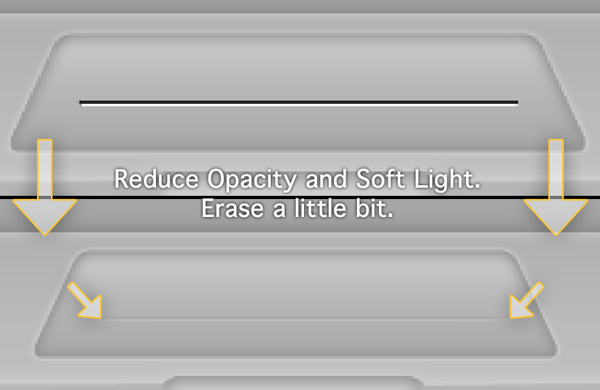 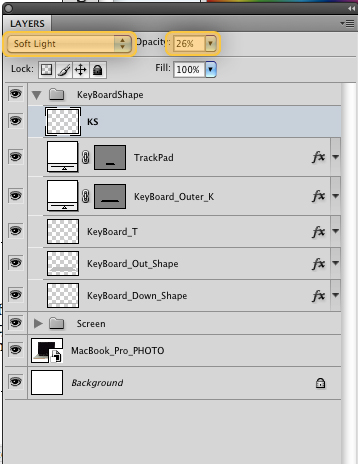 Step 24Before we start work on the Keyboard, we need to add lots of small details, such as the webcam, the power button, etc. So, go to the "Screen" Folder and make a new Folder, Name this Folder "WebCam". Make a new layer and call it "Webcam". Take the Ellipse Tool (Shift + U) and draw a circle as shown. 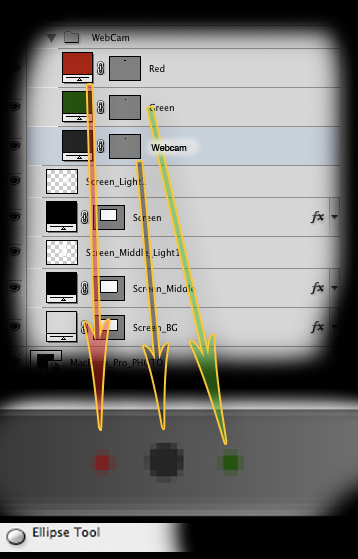 Step 25Also add the MacBook Pro text (use Helvetica or Myriad Pro), the Infrared sensor, and the power button.  Step 26Finally, we will start work on the Keyboard. Make a new Folder and name it "Keyboard". Grab the Pen Tool (Shift + P) and trace as we did it in the Step 14. Make sure to make the keys in three positions. 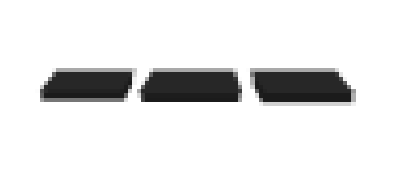  Step 27Now duplicate these layers (Hold Alt and Click and Drag) and complete the KeyBoard, remember to drag these layers on a folder named "KeyBoard". You should also make a new shape for the Space Bar, Delete Button, etc. 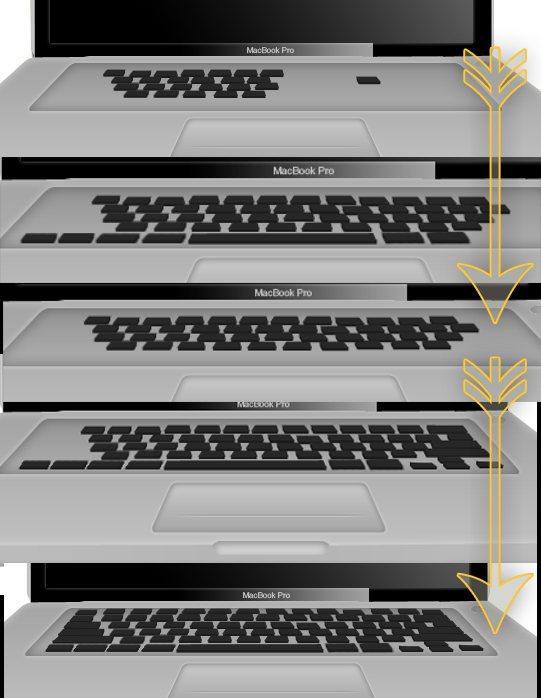 Step 28To finish things off, use the gradient tool to add a background as shown below. You may also choose to add a reflection. To do this, duplicate all your layers, flip them vertically, place as shown below and lower their opacity. In addition, you can add a shadow as well using a blurred black rectangle as shown.  ConclusionTake a look at the final image. I hope you learned something new!  |
| You are subscribed to email updates from Psdtuts+ To stop receiving these emails, you may unsubscribe now. | Email delivery powered by Google |
| Google Inc., 20 West Kinzie, Chicago IL USA 60610 | |
0 comments:
Post a Comment