1stwebdesigner |

| 50 Free Photoshop Brush Set Lines and Shapes + Tutorial Posted: 16 Apr 2010 02:00 PM PDT
At the end, I also wrote a short tutorial on how to create this brush set, you can use these skills to create any brush you want yourself! Want better quality – just open Illustrator and create your own specific brush set now!
Check the picture below to see the brushes in action:
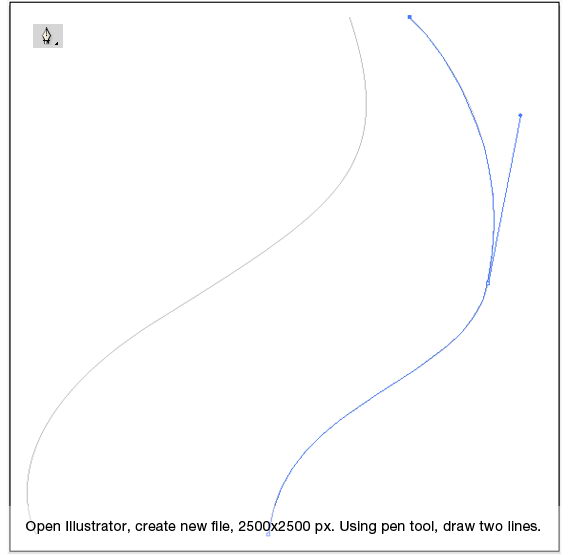
Download LinkClick here to download brush set. Not a Photoshop user? Don’t worry, this brush set is also available in transparent png. Click here to download it right now! TutorialThis brush set is made using Illustrator and Photoshop. Here’s a short tutorial on how I did it. Step 1First, open Illustrator. Create new file with size 2.500 x 2.500 px. This is the size of our brushes. You might asking, why only 2500×2500 px? Why not making it bigger? Because that’s the maximum size for brush, you can’t go bigger than that. Next, using pen tool draw two curve without fill and black stroke.
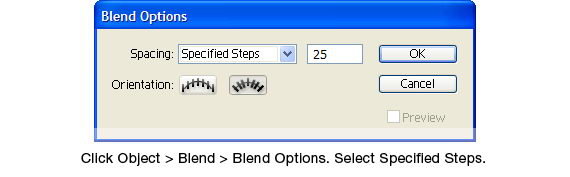
Step 2Click Object > Blend > Blend Options. Select Specified Steps with 25 next to it. Hit OK.
Step 3Select both lines and click Object > Blend > Make or ctrl+alt+B. Illustrator will automatically add 25 transition lines between the two selected lines. Hit ctrl+A then ctrl+C to select all lines and copy them to clipboard.
Step 4Open Photoshop. Create new file, size 2500×2500 px.
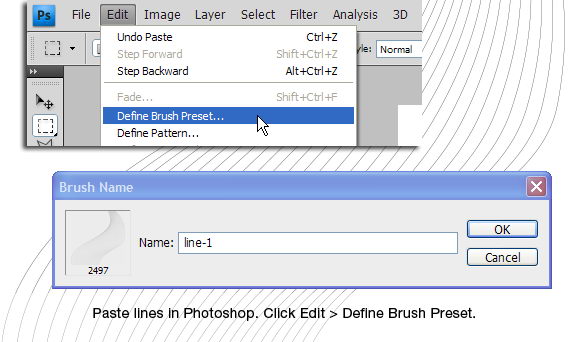
Step 5Paste lines into our new file by pressing ctrl+V. Click Edit > Define Brush Preset. In next dialog box fill brush name and click OK. Our first brush tip is done!
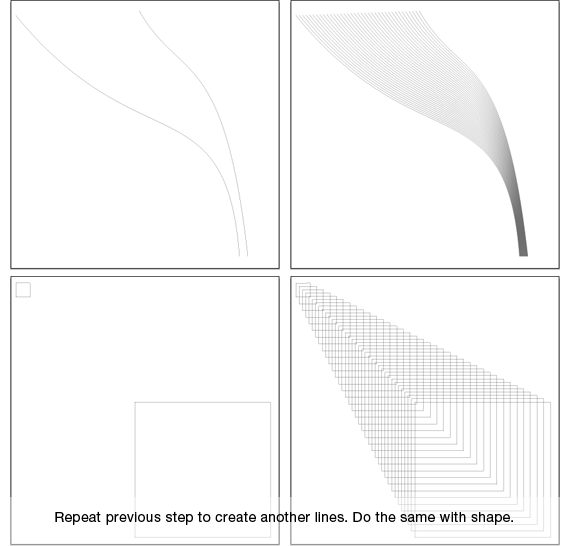
Step 6Repeat all previous steps to create another brush tip. You can go wild and try to experiment with shape like I did here.
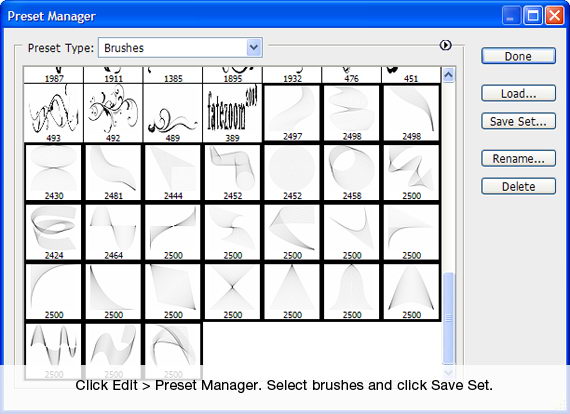
Step 7After you have enough brush tip, click Edit > Preset Manager. Select brush tips you just created and click Save Set. Selected brush tip will be exported as a brush file (*.abr). This file can be distributed to your friends or to a site like what I’m doing right now.
ConclusionsFinally, I hope you like this brush set and also learn how to create your own brush set. Feel free to use it on your next artwork. |
| How to Create a Custom Error 404 page for WordPress Posted: 16 Apr 2010 03:00 AM PDT
An error 404 is when a visitor tries to access a page that does not exist. Sometimes people tend to overlook this feature, and never think about designing for it. Taking the time to make a user-friendly 404 page could mean the difference in a user staying on your website, or leaving. Taking a look at itMost chances are you have created your website and checked multiple times to be sure that every link leads to somewhere. Eventually over time you may forget about a link that leads to a post you removed, or possibly changed the name to. Even if a visitor is searching for a page directly and they don’t get it right, then they will be taken to the error 404 page. These can be made very user-friendly utilizing the WordPress template tags, and little bit of know-how. Understanding The error 404The error 404 is a message that the visitor will receive when a page or post is not located. This is by default included within WordPress, but not with all themes. If you have created a custom theme, then you can increase the chances of a user sticking around even though they didn’t find what they were looking for with a properly designed 404 page. The basic error 404 templateThe basic error 404 template is included with some WordPress themes but not all. WordPress is set to automatically look for the file 404.php when an error 404 is reached. If this file is not present, then it will give a basic error message which is not user-friendly. If you do not already have this file you can create it. Make a new blank file and name it 404.php Here is the basic code we will start with: 404.php File<?php get_header(); ?> <h2>Error 404 - Page Not Found.</h2> <?php get_sidebar(); ?> <?php get_footer(); ?> The above code within the 404.php file would give a simple output wrapped in H2 tags that would read “Error 404 – Page Not Found.” – It would also get the WordPress Header, Sidebar, and Footer. These are all optional and should be modified to fit your WordPress theme. We want to take this a few steps further to achieve our goal. Make a note that I am using the get_header() along with get_sidebar and footer to call our theme template files. Your’s may vary slightly and you will have to adjust your 404.php file accordingly. Starting to work on itFirst, We will add the search form to our basic 404 page to make it a bit more helpful. This way even if a visitor lands on your 404, they then have the option of searching your site. This is the first method to help users stick around instead of leaving. 404.php File – Added Search Form<?php get_header(); ?> <h2>Error 404 - Page Not Found.</h2> <p>Search:</p> <?php include(TEMPLATEPATH . "/searchform.php"); ?> <?php get_sidebar(); ?> <?php get_footer(); ?> Making it more dynamicTo create a more dynamic error 404 page you can use redirects so that the user only sees the error briefly, then gets redirected to your home page. This page can be made to be somewhat SEO friendly as well. For this next example we can start by editing the header.php file of your template. Within the meta tags at the top of your header.php file you can add the following: header.php File <?php if (is_404()) { $redirectHome = get_option('home'); ?> <?php echo $redirectHome; ?> After this is added we will then edit our 404.php file to look like this: 404.php File <?php get_header(); ?> <h1>Error 404 - File Not Found.</h1> <h3>Please <a href="<?php bloginfo('home'); ?>" Click here</a> to return to our home page, or you can wait to be redirected in 15 seconds.</h3> <?php get_footer(); ?> The above example will allow the user to land on the 404 error page but then automatically take them back to the home page. This will also help users stick around instead of them being left confused and leaving your website. This example may not always be the best solution for everyone but can be helpful to someone looking for something specific on your site. Making sure it worksYou can test your 404 error page by typing your URL and following it with a page that you know does not exist. Example: http://www.yourwebsitedomain.com/test404page.php That should bring you to your 404 page for viewing and testing. If it doesn’t workIf by chance your server is not automatically bringing you to your 404.php file we can modify our .htaccess file to make it work. Locate your .htaccess file within your WordPress install and add the following line to it: ErrorDocument 404 /index.php?error=404 If your Wordpress install is not in the root directory you will need to make sure the above code reflects that. If you have installed Wordpress into a sub folder then modify your .htaccess like this: ErrorDocument 404 /YOURSUBFOLDERNAME/index.php?error=404 This will force the use of your 404.php file. A full exampleThe code below is a full demonstration that will show you some ways you can use the 404.php file to help users that have found something that doesn’t exist. Take a look at it and notice the options we are giving them to keep them around, and to help them find content. <?php get_header(); ?> <h1>404 Error</h1> <p>We cannot seem to find what you were looking for.</p> <p>Maybe we can still help you.</p> <ul> <li>You can search our site using the form provided below.</li> <li>You can visit <a href="<?php bloginfo?>"</a></li> <a href="<?php ('url'); ?>" the homepage.</a> <li>Or you can view some of our recent posts.</li> </ul> <p>Search:</p> TEMPLATEPATH . "/searchform.php"); ?> <h3>Recent Posts</h3> <ul> <?php query_posts('posts_per_page=5'); if (have_posts()) : while (have_posts()) : the_post(); ?> <li><a href="<?php the_permalink() ?>" title="Permalink for : <?php the_title(); ?>"><?php the_title(); ?></a> endwhile; endif; ?> </ul> <?php get_footer(); ?> Anything above can be changed and styled to fit your needs. In the above example we are displaying that there was an error, and then following it with a list of options for the user. We are also still giving them the option to search our site, and have now added the ability for them to view our recent posts. The combination of all of these gives the user that reached the page options. These options can be used to ensure a user doesn’t leave right away if they didn’t find exactly what they wanted. Make it More User FriendlyTo make it more user friendly and unique you could consider using the above examples with a different background image of your choice. You can also use html within the 404.php file to make a page all in itself for your error page. Here are some examples of unique error 404 pages for inspiration: 1. Mundofox.com
2. CSSRemix.com
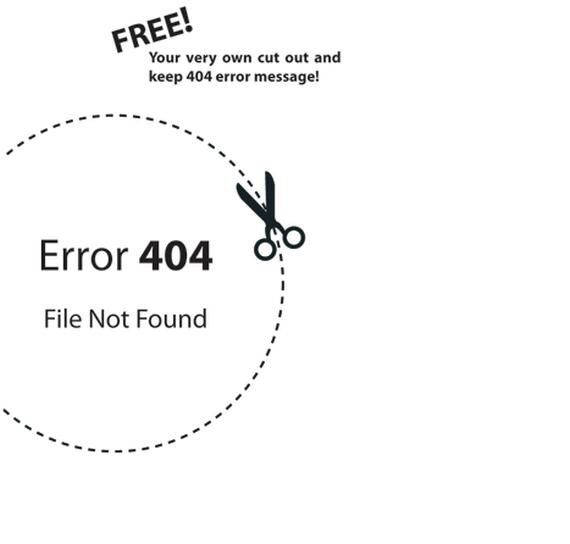
3. CSSRemix.com
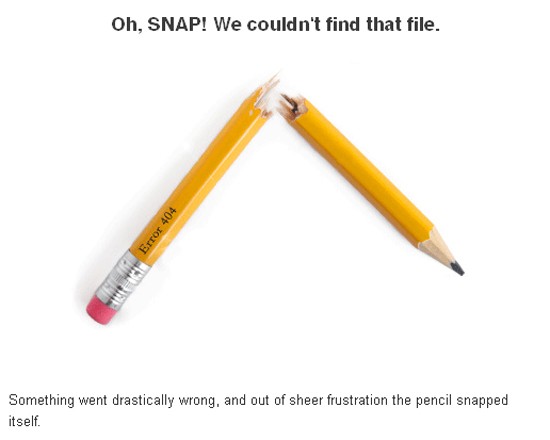
4. ChrisJennings.com
5. ook.co.uk
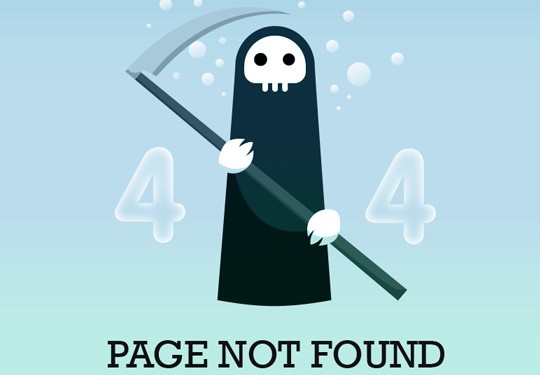
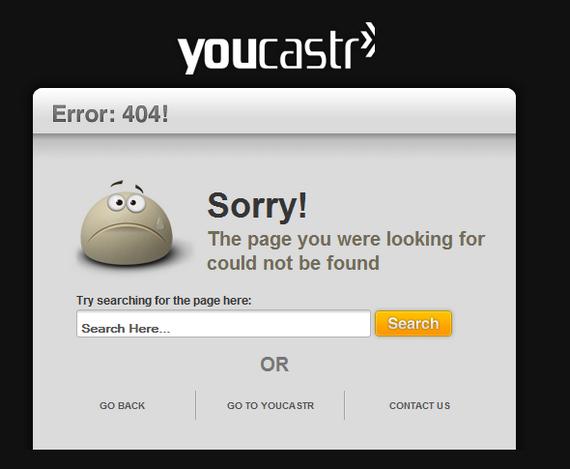
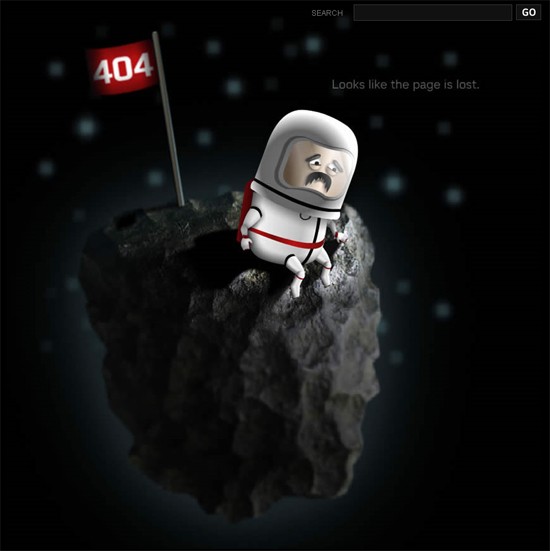
6. Youcastr.com
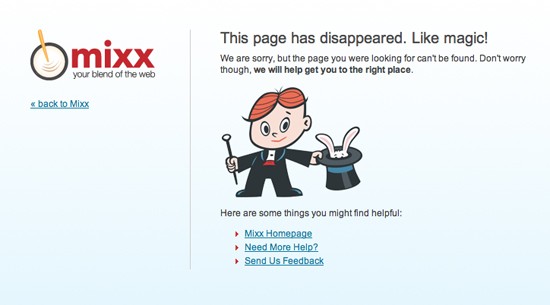
7. Mixx.com
8. JustCreativeDesign.com
9. Agens.no
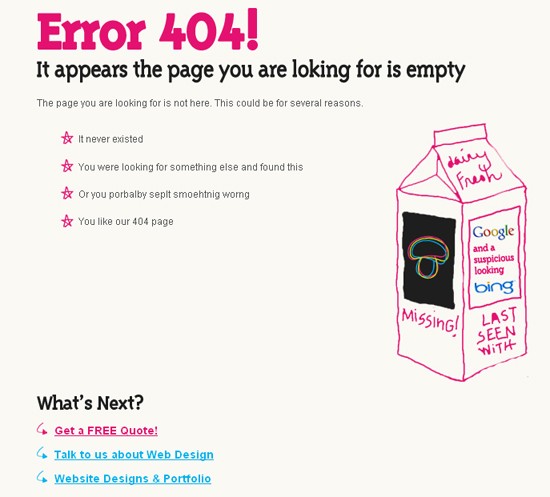
10. Mushroomdigital.co.uk
Using it WiselyIt is always good practice for both WordPress and static HTML sites to make use of the 404 page. Either using ads on it to monetize, or using it to better help your visitors navigate your website. There are many ways to create your own custom 404 error page, and just as many ways to allow it to help website visitors. Use the examples above freely, and experiment with what works best for you. |


| You are subscribed to email updates from Graphic and Web Design Blog To stop receiving these emails, you may unsubscribe now. | Email delivery powered by Google |
| Google Inc., 20 West Kinzie, Chicago IL USA 60610 | |
0 comments:
Post a Comment