Abduzeedo - graphic design | design inspiration | tutorials - |

- Daily Inspiration #493
- Awesome Random Inspirations
- 3D Type with Repoussé in Photoshop CS5 Extended
- Stylish Artworks by Bradley Sharp
- The Perfect Office #34
| Posted: 26 Apr 2010 01:57 PM PDT
This post is part of our daily series of posts showing the most inspiring images selected by some of the Abduzeedo's writers and users. If you want to participate and share your graphic design inspiration, just send us, via email, the image with the link from where you found it, also use "Daily Inspiration" in the subject, and don't forget to send your Abduzeedo username; or via Twitter sending to http://twitter.com/abduzeedoIf possible use the HTML code: <p class="imgC"><a href="Link to the page you found the image"><img src="Link to the Image" /></a></p> Do you want to see all images from all Daily Inspirations? Check out http://daily.abduzeedo.comal b sure
AlexanderSpencer
Cecilio Mendes
Claudinho
Color.
creative
Christoffer Hedberg
Dhyani
drfranken
eDsanca
Eugene Kim
Fabiano
Bear Untitled - D.O. edit from Christen Bach on Vimeo.
Fabio
Florian Nicolle
George
Gisele
jtownboy
Khyzyl Saleem
m.a.Raihan
Patrick
Peter Belko
Robbymilo
Ronissom Lucas
teo27
Via TwitterSend your suggestions via Twitter to http://twitter.com/abduzeedo using #abdz in the end of the tweet. @Rodrok
@allrox
@daniel_nelson
Showreel 2010 from Romain Loubersanes on Vimeo.
GKASTER DEMOREEL AVRIL2010 from gkaster on Vimeo.
@psdfan
@djbennett999
@tayzar44
|
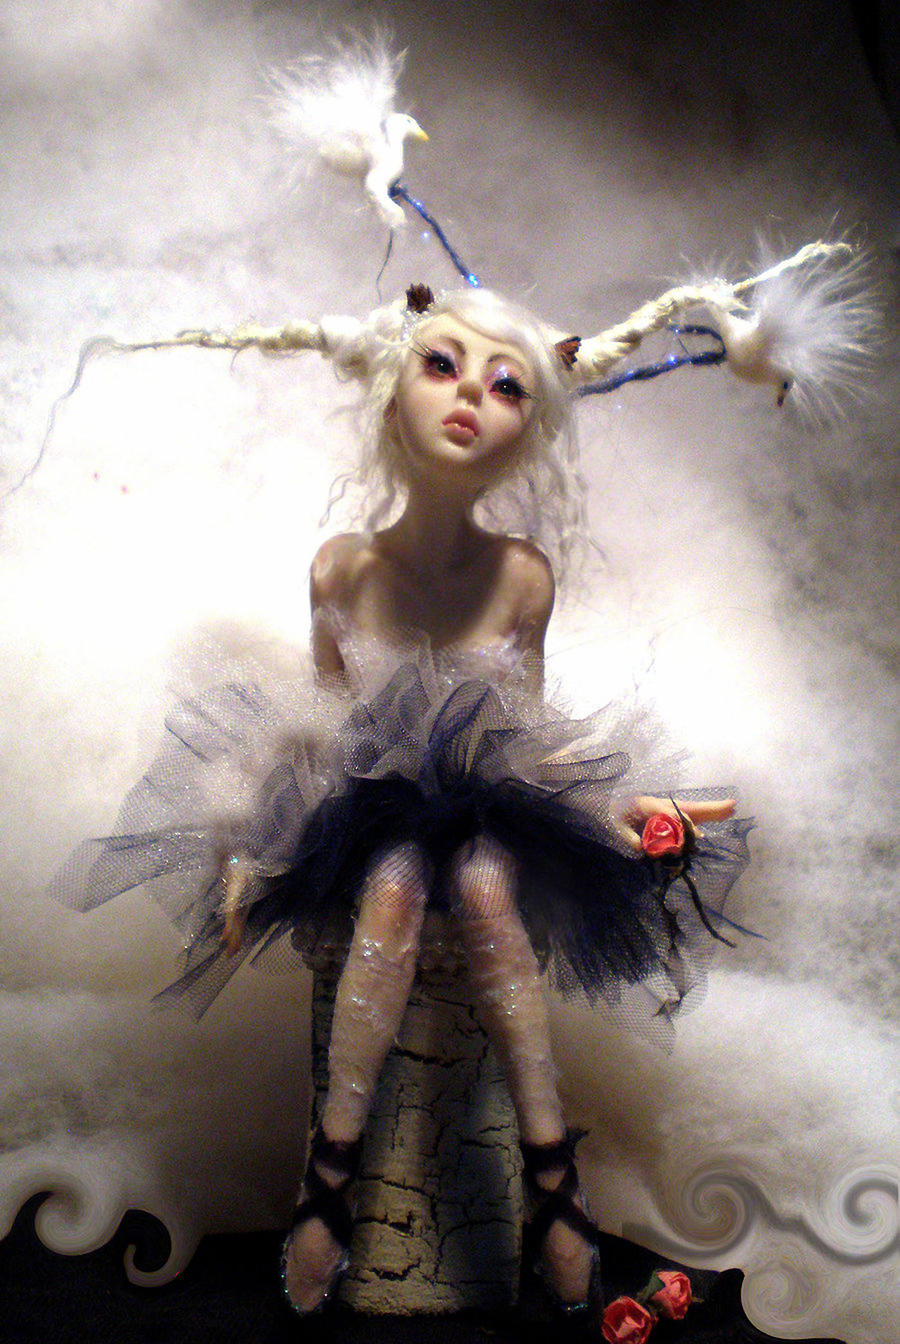
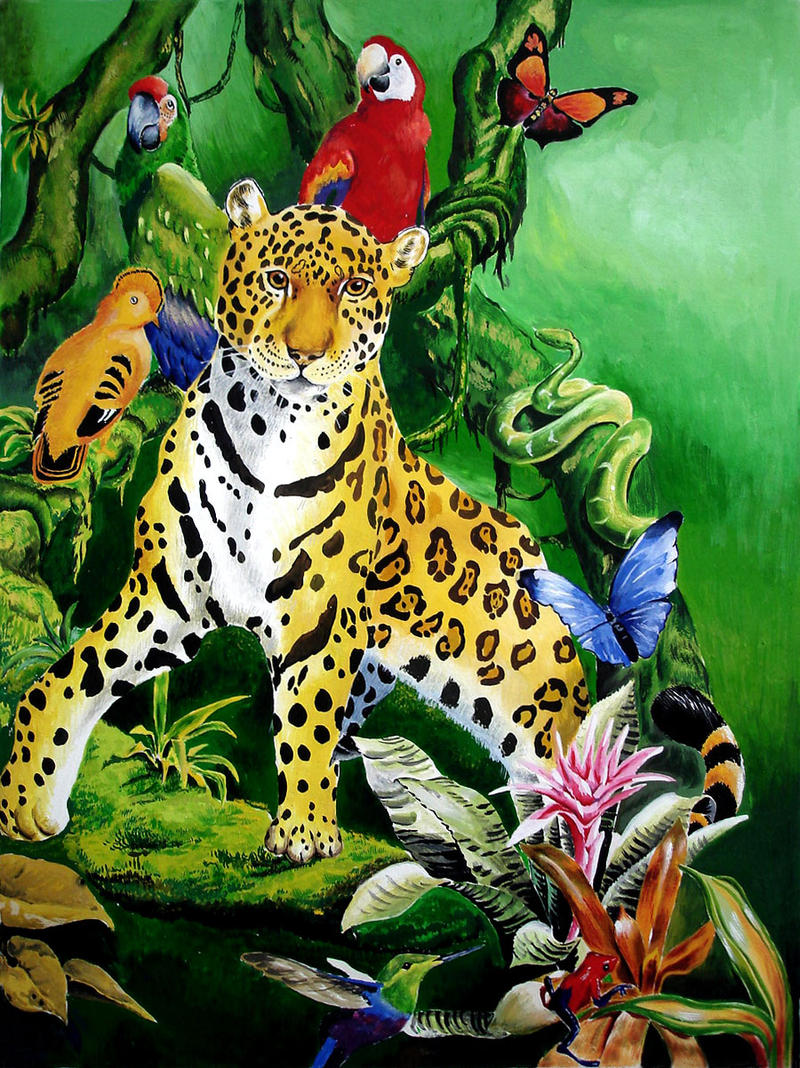
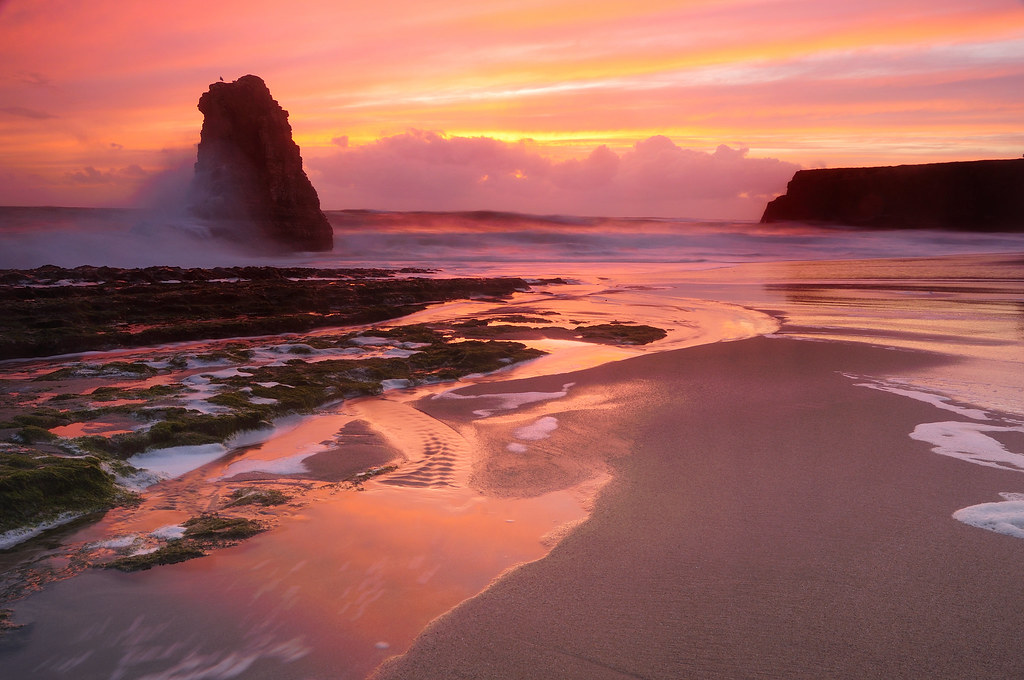
| Posted: 26 Apr 2010 07:54 AM PDT
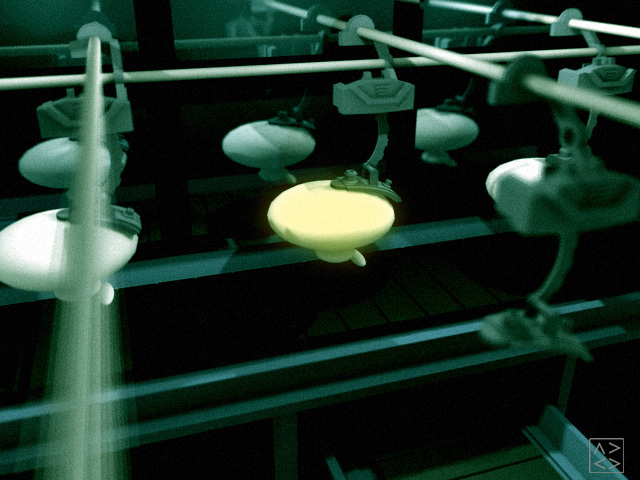
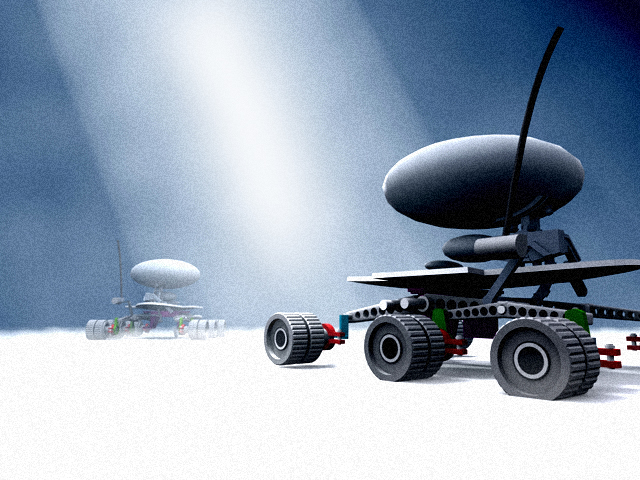
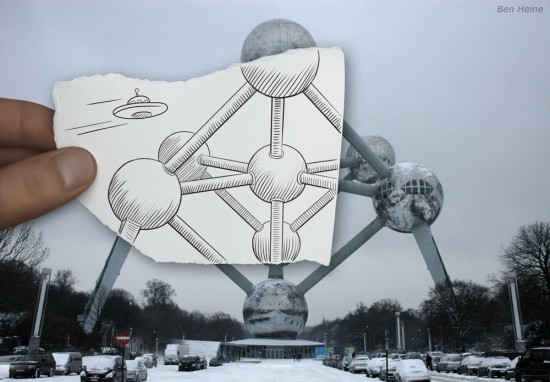
Sometimes we seek an exactly type of inspiration like web inspiration for example but there are times where the unexpected can do some good for your brain. This collection is full of great images that are quite unexpected and pretty awesome at the same time, so what you waiting for? Check them out!<!--break--> About the authorHi! I'm Paulo Canabarro and I'm here to post some really cool stuff for you, if you have any ideas or any requests please get @ me - pvpcanabarro@gmail.com you can also Follow me on twitter! Sponsored Links: |
| 3D Type with Repoussé in Photoshop CS5 Extended Posted: 26 Apr 2010 04:05 AM PDT
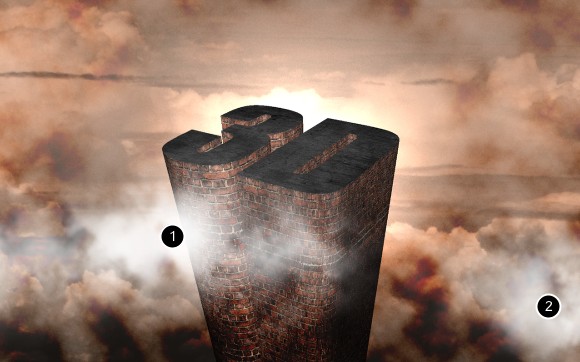
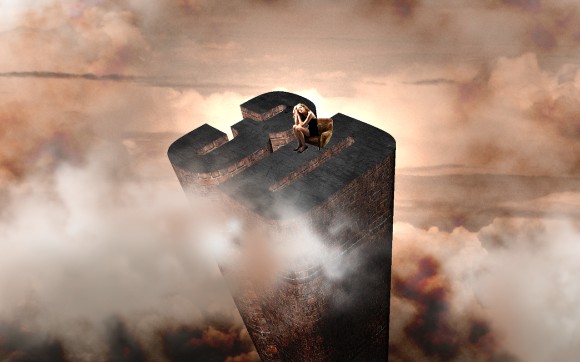
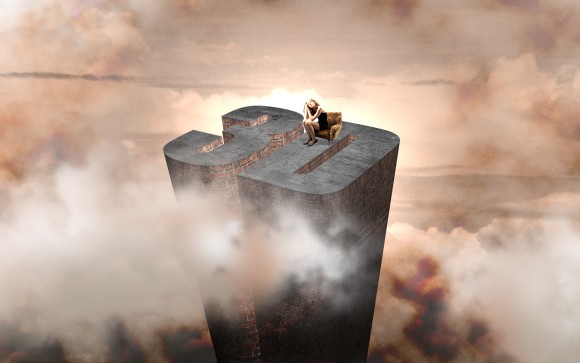
The new Adobe Photoshop CS5 Extended is about to be released, it was announced already and among the new features there is one really special that is the Repoussé. This new feature or tool will allow us to create 3D objects extruding texts, selections, paths and layers masks. It's a really powerful tool and I had the chance to try it and now I will share with you one of my first experiments with it.In this tutorial I will recreate an image of a tutorial I did for Digital Arts Magazine last year which I used Photoshop and Illustrator to create a 3D text with a girl on top of it, the tutorial was the CREATE MILE-HIGH TYPE ART. So this time I will do everything using just Photoshop CS 5 Extended with the Repoussé. I also want to mention that I'm still learning these new features/tools and I will try to share as much as I can with you guys and if you are using the beta of Photoshop feel free to share with us as well.
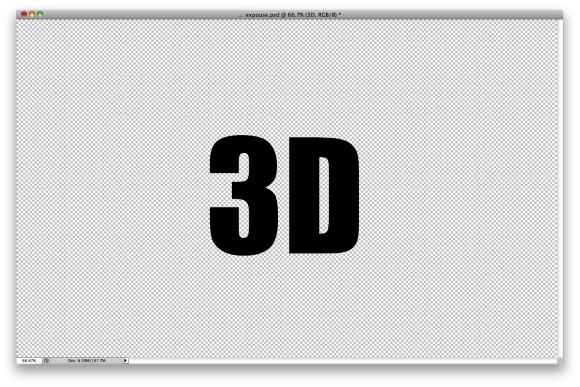
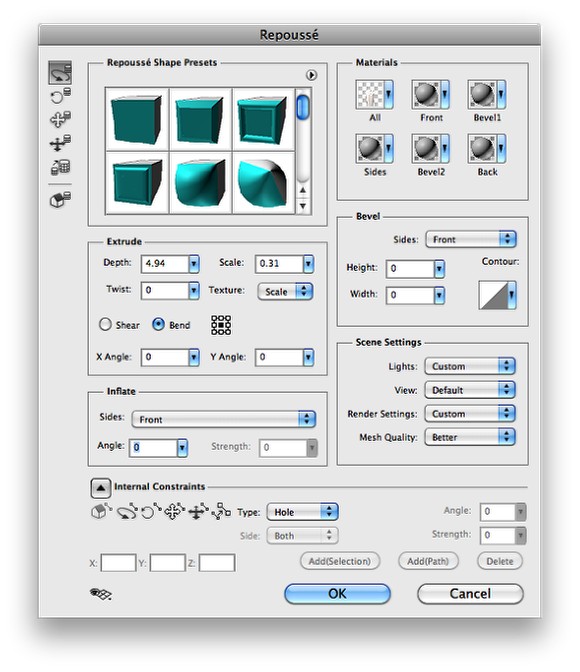
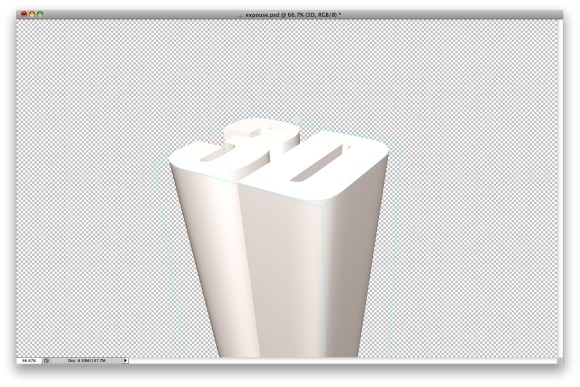
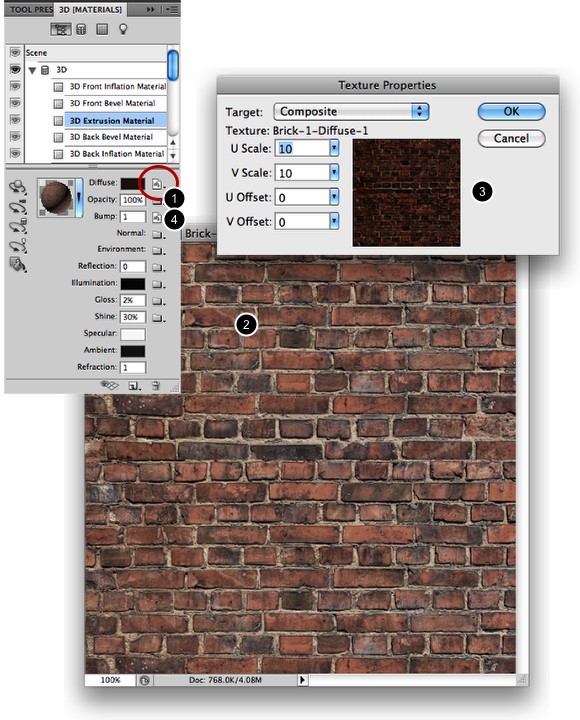
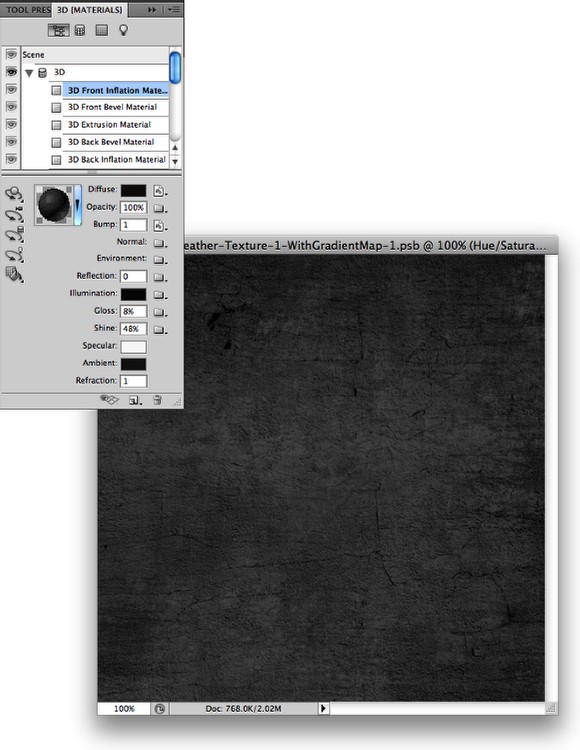
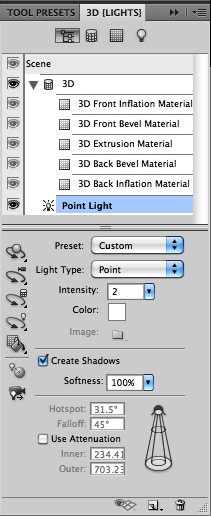
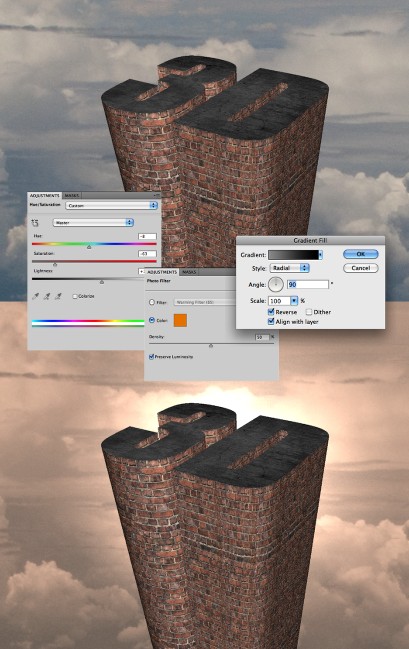
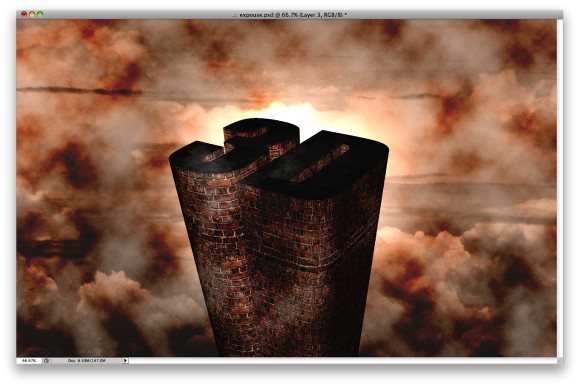
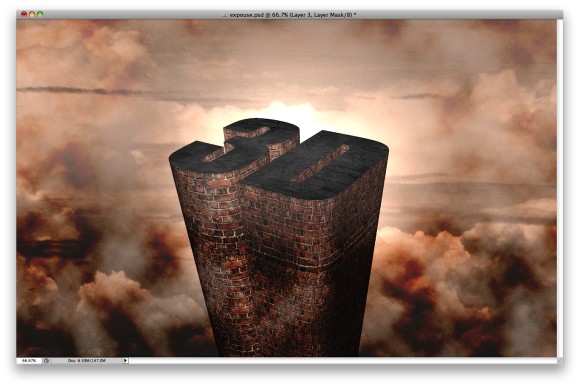
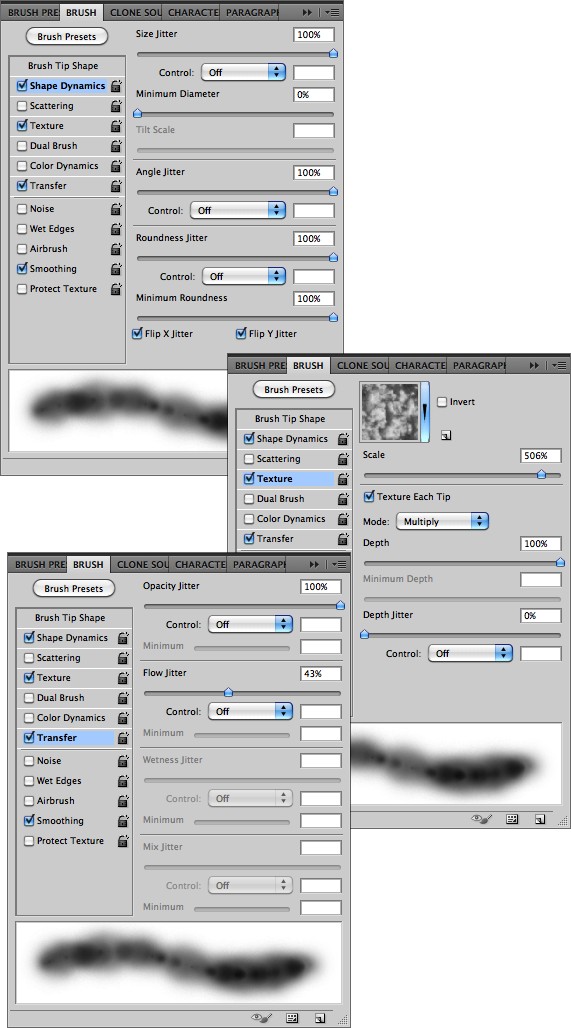
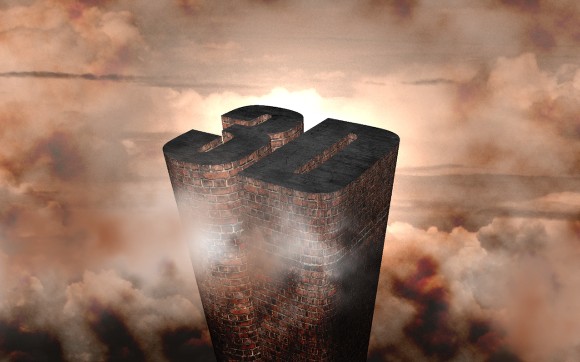
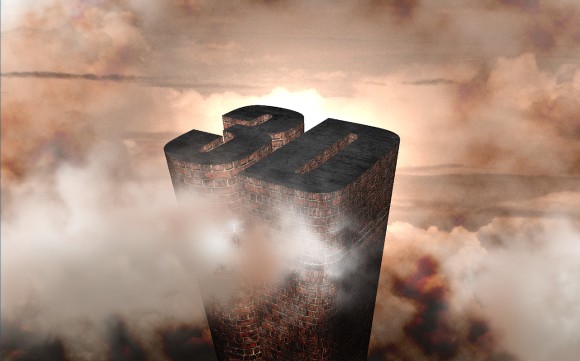
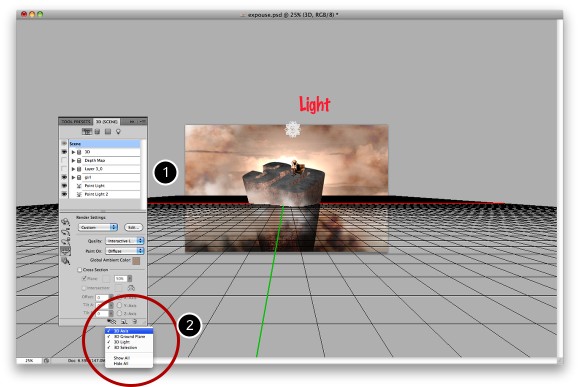
Step 1Open Photoshop CS 5 Extended and type with the Horizontal Type Tool (T) type the word 3D using Impact for the font. Step 2Go to 3D>Repoussé>Text Layer, this is the new 3D tool built-in in Photoshop CS Extended. With Repoussé we will be able to create all sorts of extrusions from text layers, selections and layer masks. In this case we will use a text layer. Once the Repoussé settings window is opened you will have quite a few settings. First you can choose from some Shape Presets, which have a basic extrusion, different kinds of bevels and other presets. For this tutorial I use the basic one but, I've changed the Extrude values to create the effect I wanted. You also have the Materials, Bevel, Scene and Inflate settings but I won't get into these right now because I'm still learning them and preparing new tutorials about them as well. For the Extrude settings I used 4.94 for the Depth and 0.30 for the Scale so the 3D seems to be coming from the ground to up in the sky with a very strong perspective. Another cool thing here is that you can rotate, scale and move the object around until you find the right position. Step 3This is the 3D text I wanted, in the past I would have to use another software like Illustrator or a 3D app such as Cinema 4D, now I can do that in Photoshop. Step 4To add and edit textures is pretty easy as well. As in Photoshop CS 4 we have the 3D palette where we can edit our 3D objects, you can access this palette going to Window>3D. Select the 3D object and then you will have the 3D front Inflation, 3D front Bevel, 3D extrusion... all of these are the areas where you can apply materials. Select the 3D Extrusion Material and the on Diffuse click on the folder next to the color (1) and select Open Texture. The texture will be open in a new window like when you edit a Smart Objects. So in this window you can create your material I'm using a brick texture from Shutterstock, you can find it here. So adjust your texture in terms of colors then save this file. Photoshop will automatically updates the 3D object adding the texture. If you want to make the bricks smaller just click again on the icon next to the color and select Edit Texture. A dialog box with Texture Properties will open where you can adjust the UV Scale and Offset. I used 10 for the U and V Scale. The last thing here is apply the same texture to the Bumpmap (4). Simply repeat the same thing. The bump will add depth to the texture like the displacement map where the light areas go up while the dark areas go down. Step 5Now select the 3D Front Inflation Material and repeat the same thing we did in the previous step, this time however I'm using another texture, a concrete one which was courtesy of Shutterstock and you can find it here. Step 6Once you changed the materials this will be the result you will have. As you can see the whole process was much easier than if you have to do that using different tools and them exporting and importing in Photoshop. Step 7As you can see there is light as well. Yes you can add lights to make your scene more realistic. In this first part I have only one light. It's a Point Light with Intensity of 2. It also creates shadows, where I've changed to 100% of softness to make the shadows really soft. Step 8In this step I started mixing the 3D object with 2D objects, in this case a photo I took from an airplane when I was traveling. I wanted to give a sort of warm feeling to my image so first I went to Image>Adjustments>Hue and Saturation and changed the Hue to -10, the Saturation to -65 and the Lightness to 10. Then I went to Image>Adjustments>Color Filter. I selected orange for the color and 50% density. Then at last, I went to Layer>New Adjustment Layer>Gradient Fill. I used grey and black for the gradient with Radial for the Style, so the grey would be in the center of the radial gradient. After that I changed the Blend Mode of this Gradient Fill to Color Dodge to create the sun behind the 3D text. Step 9Add a new layer on top of the other layers including the 3D object. Then make sure you have black and white for the color and go to Filter>Render>Clouds. Change the Blend Mode to Color Burn. Step 10With the Eraser Tool (E) delete parts of the layer leaving just the bottom part of the layer. Use the image below for reference. Step 11I have already shown you how to create clouds using the Brush Tool (B), so let's do it again. Add a new layer on top of the others and go to Window>Brushes. For the brush settings use the image below for reference. The most important part is the Texture where you will selec the clouds pattern. It's also important to notice that if you increase the size of your brush you will have to increase the scale of the brush texture. Step 12Select the Brush Tool (B) and white for the color, then with the brush we created start painting some clouds. First paint just a few clouds like the image below (1-2) Step 13Select a light brown now for the color and paint more clouds, especially over the white clouds we created in the previous step. Step 14Now select white again for the colors and paint more clouds. The idea of this 3 steps was to add depth to our clouds by adding some dark areas using the light brown. Step 15Import a photo of a person to add to our scene, I'm using a photo of a girl sitting on a chair which was courtesy of Shutterstock, you can find it here. After that extract the background of the image and copy it and paste it in our design. Select just the girl and the chair and then go to 3D>Repoussé>Current Selection. Step 16The idea here is to create a 3D object from a 2d photo so we can position it and create some shadows, but also to play and learn with the Repoussé tool. Change the Depth to 0.1 and the scale to 1. Remove the materials leaving only the front one. Now a very important detail, over the Internal Constraints, change the Type to Hole, that will create wholes in the areas that were transparent, otherwise Photoshop would render a big solid and it would ignore those transparent areas. Once again rotate, move and scale your object until you find the right position. You can do that later on as well. Step 17In order to create a 3D scene with the 3D text and the girl we will have to merge them in one 3D layer. To do that is simple, select the 3D layers and go to 3D>Merge 3D Layers. By doing that you will create one 3D layer only with both objects. So over the 3D Palette you will see the 3D text and the Girl objects where you will be able to edit them like scale, rotate, move and change the extrude options as well. Step 18Now the most important thing to do is to adjust your objects in your 3D scene (1). Move the lights so you can illuminate the scene properly and play around with other objects. As I mentioned before I'm still learning so the best thing to do is try different things, render a preview to see how it looks and try again. To see all the 3D objects click on the little icon at the bottom of the 3D palette, the one with the eye and select Show All. (2) Step 19The best thing with the Repoussé tool is that you can edit the 3D object anytime during your design process, so if you think a different position might look better you can do it or try a different illumination everything is possible. ConclusionOnce you position all your 3D elements there's one extra step to do that is different from the Photoshop workflow which is render the 3D object using the Raytrace Final mode. Photoshop then will render the object and create the shadows and details, it usually takes a few minutes to do that, but it's a necessary process. If you are used to other 3D softwares you already know that. So basically in this tutorial/making-of I showed you a little bit of this incredible new tool that comes with the new Photoshop CS5 Extended. There are lots of things to learn and practice but I'm sure the Repoussé will be very useful for those, like me, that are trying to mix 3D objects with photos and other 2D objects that we are used to do in Photoshop. Download the Photoshop FileClick here to download the Photoshop file used for this tutorial |
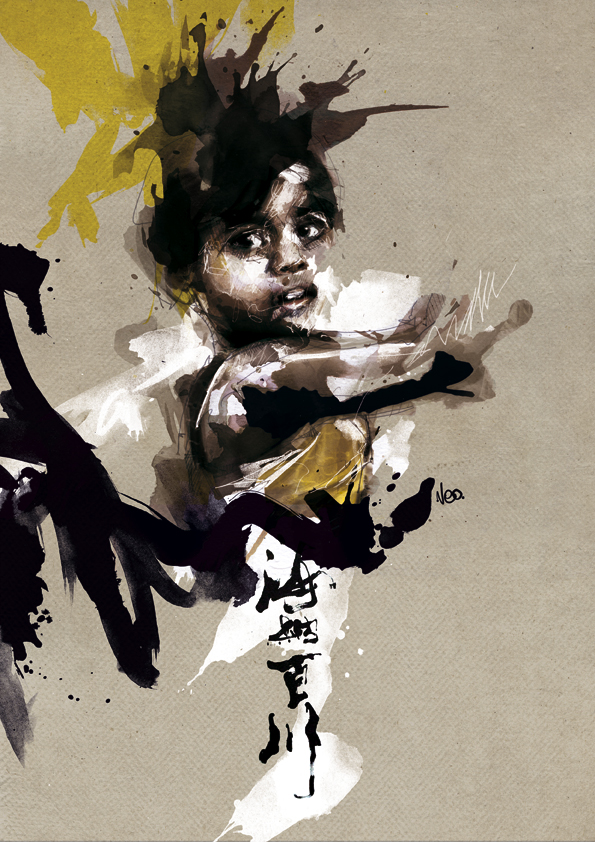
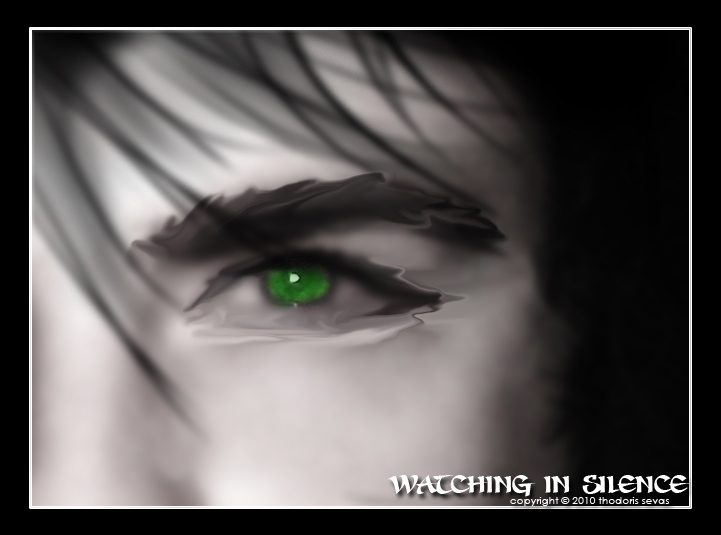
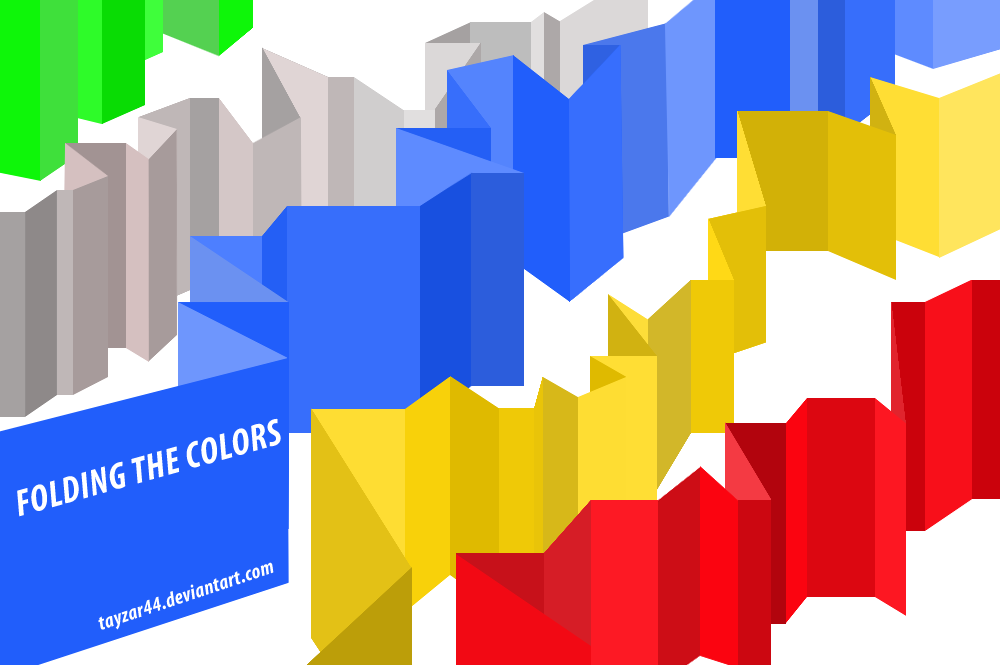
| Stylish Artworks by Bradley Sharp Posted: 26 Apr 2010 03:36 AM PDT
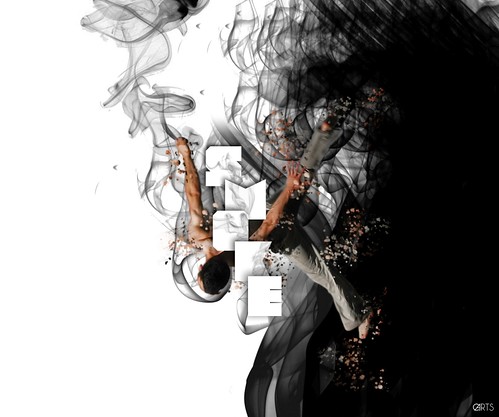
I was browsing around the web searching for my daily inspiration images, something that I do everyday, when I bumped into Bradley Sharp's work and really liked it. The image that got my attention was the first one from this selection, which by the way is already my new desktop wallpaper. Since I liked the style and the idea from that one image I decided to check out his portfolio for more stuff and noticed that it was pretty cool to show here to you. His illustrations/vectors are really stylish. His lines, characters, E.T.s alike elements, colors and shapes are pretty cool and eye catching.Hello all.. I'm Brad Sharp, a Graphic Designer from the UK. I spend a good amount of time on personal work and with my illustrations - beginning with sketchbooks from as early as I can remember. In the past 5 years I've been playing more and more with vectors, which I'm always learning. I often get inspiration from nature or technology and sometimes look at the interplay between the two. Check out the selection we put together and don't forget to visit his website for more. Hope you like it! Enjoy. =)
T-shirts
WallpapersTo get the wallpapers go to his website and download the desktop wallpapers file at the bottom of the page. He also has some iPhone wallpapers at his page, so check it out.
|
| Posted: 25 Apr 2010 09:45 PM PDT
We've seen some great gadgets and equipment for designers. So many cool stuff, that we could actually assemble infinite perfect office spaces! Every week we'll assemble a perfect office, and we'd like you to help us. What equipment would the perfect office have?<!--break--> Not only gadgets and equipment, but also furniture, sound system, gaming stuff (for lunch time!). A designer is totally allowed to dream with the perfect office, and that's what we're gonna do here! Comment telling us your suggestions, or even better, you may tell us via twitter (mine and fabio's), using #abdz_ofc so we can check it. Alright? I hope you guys enjoy this brief selection. Cheers! ;) Lovely Rita Bookshelf Lovely Rita bookshelf by Kartell can be used as a single shelf or repeated by adding additional units to create the length you need. (at Holycool.net) iTable These COol iPod-shaped tables designed by Italian artist Mirko Ginepro for Milan Design Week. Called iTables. The iTables are all custom made to order, if you are interested, you can contact them via mail. (at Likecool.com) Reflectius Clock A concept clock that "brilliantly uses tiny mirrors to reflect a single red laser beam, rotating to alter it into different numbers". (at Moco Loco) Mypressi Handheld Espresso Machine Portability and mobility. The Mypressi Twist is only 10.5? in length and 3.5? in height, making it perfect for your travel bag. (at 7Gadgets.com) Transparent OLED Headphones Tired of the same old opaque single tone band on your headphones, an OLED panel might just be the thing to spruce up boring monitors. The Transparent OLED Headphones by designers Min-guk Ji & Hong-joo Kim & In-oh Yoo might be onto the coolest headphone invention yet. A headphone band is usually a piece of black or white plastic, but by using a transparent OLED panel for a headphone band, colors and patterns could be changed on a whim. (at Gizmodo) EeeTop PC ET2010 series The EeeTop PC ET2010PNT and ET2010AGT models come with a multi-touch screen allowing you to easily pinch zoom or rotate images with just two fingers. The is also a pre-installed @Vibe repository which gives EeeTop users access to a wide variety of content including music, videos, games, magazines, e-books, e-learning material, and Live TV. (at Geeky Gadgets) |


| You are subscribed to email updates from Abduzeedo | Graphic Design Inspiration and Photoshop Tutorials To stop receiving these emails, you may unsubscribe now. | Email delivery powered by Google |
| Google Inc., 20 West Kinzie, Chicago IL USA 60610 | |
0 comments:
Post a Comment