1stwebdesigner |

| 17 Free Content Management Systems For Better Content Handling Posted: 20 May 2010 02:00 PM PDT
1. WordPressWordPress started as just a blogging system, but has evolved to be used as full content management system and so much more through the thousands of plugins, widgets, and themes available to suit your needs. Wordpress is also free and open source CMS and it is considered one of the most used content management systems out there and I might dare to say it is ruling out there. It uses PHP as a server side language and MySQL as a database.
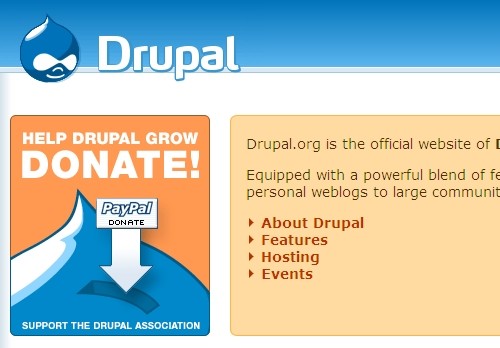
2. mojoPortalmojoPortal is a free and open source content management system built using the Microsoft ASP.NET and supports various databases like MySQL, MS SQL and PostgreSQL. It comes with a lot of built in features such as: Image Gallery, Event Calendar, Polls, Blogs, Forums and many more. 3. DrupalDrupal is a free and open source content management system that allows an individual, a community of users, or an enterprise to easily publish, manage and organize a wide variety of content on a website.
4. JoomlaJoomla is a free content management system, which enables you to build web sites and online applications. Many aspects, including its ease-of-use and extensibility, have made Joomla one of the most popular content management systems available. Best of all, Joomla is an open source solution that is freely available to everyone. It has many built in features but if that’s not enough you can take a look at the 4000+ extensions from the community.
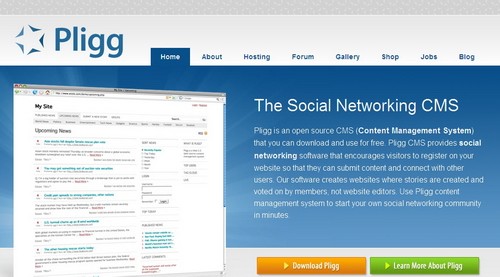
5. PliggPligg is a free and open source content management system. Pligg CMS provides social networking software that encourages visitors to register on your website so that they can submit content and connect with other users. You can create websites where stories are created and voted on by members, not website editors. Use Pligg content management system to start your own social networking community in minutes.
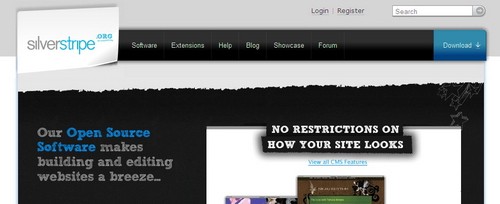
6. SilverStripeSilverStripe is an open source and free content management system. Besides their feature rich CMS they developed Sapphire which is an object-oriented PHP5 web framework designed to let you either build standalone applications or extend your SilverStripe CMS-powered site.
7. PlonePlone is a powerful, flexible Content Management solution that is easy to install, use and extend. Plone is created for non-technical users to create and maintain information using only a web browser. Perfect for web sites or intranets, Plone offers superior security without sacrificing extensibility or ease of use for non-technical users.
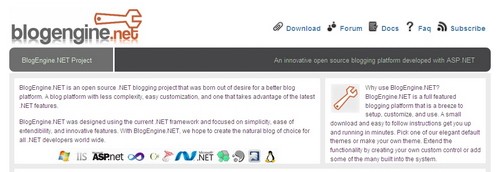
8. BlogEngine.NETBlogEngine.NET is an open source and free .NET blogging engine that was created to offer a better blog platform. A blog platform with less complexity, easy customization, and one that takes advantage of the latest .NET features. BlogEngine.NET was designed using the current .NET framework and focused on simplicity, ease of extendability, and innovative features. despite it packs a lot of built in features along with extensions available by the community it still lacks attention for the little details that is found in other content management system.
9. SymphonySymphony is XSLT-powered open source content management system. Symphony leverages open standards like XML and XSLT, and good old XHTML and CSS. Even the admin interface employs the widely-used jQuery library, so extension developers don't have to learn a whole new framework when extending the back end. Symphony is comprised of discrete, fully configurable components. Its data, logic, and templating layers are all independent, meaning that whatever you implement can be modified, added, or removed with minimum effort.
10. sNewssNews is a completely free, standards compliant, PHP and MySQL driven Content Management System. sNews is extremely lightweight, simple and customizable. It’s easy to install, and use via a simple web interface. sNews consists of only one core engine file, one independent template file and its accompanying CSS stylesheet file, plus an .htaccess file that makes all URLs search engine friendly.
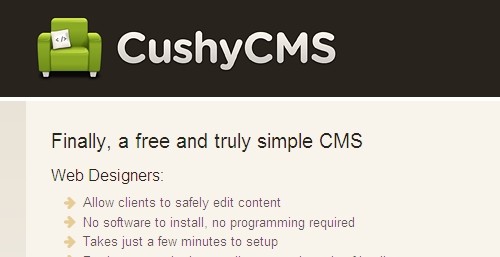
11. CushyCMSCushyCMS is a Content Management Systems that is truly simple. It’s free for unlimited users, unlimited changes, unlimited pages and unlimited sites. It’s built from the ground up with ease of use in mind – for both content editors and designers. It’s such a simple CMS that it takes less than 3 minutes for a web designer to implement. No PHP or ASP required for this CMS. If you can add CSS classes to HTML tags then you can implement CushyCMS. It’s also a hosted CMS, so no installation or maintenance is needed either.
12. Frog CMSFrog CMS simplifies content management by offering an elegant user interface, flexible templating per page, simple user management and permissions, as well as the tools necessary for file management. Born as phpRadiant in January 2007, Frog CMS is a PHP version of Radiant CMS. Frog CMS requires PHP, a MySQL database or SQLite.
13. RadiantRadiant is an open source content management system designed for small teams. It is built using Ruby on Rails and using the SQLite as a database. 14. MediaCoreMediaCore is a free open source video cms and podcast platform. MediaCore can pull video or audio from any source, track statistics, enable commenting, and provide a high degree of control over the presentation and administration. The CMS was built for individuals and organizations who wish to distribute video or podcasts on their website without kicking users to other social media sites. MediaCore is built using the TurboGears Python Framework and MooTools Javascript Framework.
15. CMS from ScratchCMS from Scratch is a quick, easy, open source and FREE solution that lets web designers give their customers a web site they can edit themselves. It is now also an open source project, so you can use the source PHP scripts for FREE. 16. MODxMODx helps even regular individuals manage content on their websites simply, quickly and intuitively. For the geek-elite, MODx is an Open Source PHP web application framework with a capable built-in Content Management System.
17. TYPO3TYPO3 is a free Open Source content management system for enterprise purposes on the web and in intranets. It offers full flexibility and extensibility while featuring an accomplished set of ready-made interfaces, functions and modules.
| ||||||||||
| How to Update Twitter using PHP and Twitter API Posted: 20 May 2010 03:22 AM PDT
Today, we’ll be making a PHP Application that helps you update your Twitter status. So let’s get started without wasting anymore time!
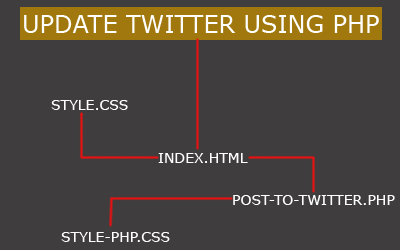
The PHP script we’ll be making will consist of four files:
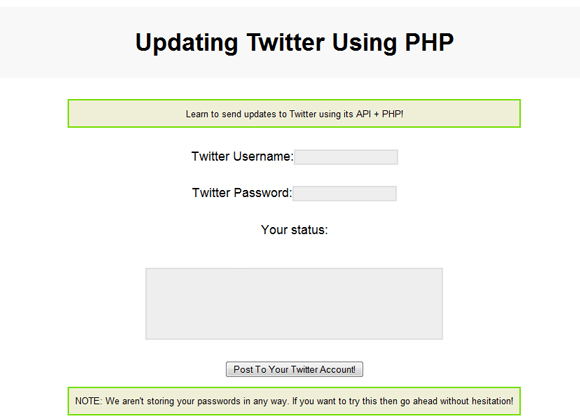
MAKING THE FORM & STYLING IT WITH CSSFirst, lets make a form in HTML with three input boxes for username, password & the new status message respectively and one command button which would submit the values to the PHP file “Post-to-Twitter.php”. <html> <head> <title>Updating Twitter status using PHP</title> <link href="css/style.css" rel="stylesheet" type="text/css" /> </head> <body> <h1><span id="header">Updating Twitter Using PHP</span></h1></p> <div id="quote1"><!--Start Quote1--> <center><p> Learn to send updates to Twitter using its API + PHP! </p></center> </div><!--End Quote1--> <div id="form" align="center"><!--Start Form--> <form name="form1" method="post" action="post-to-twitter.php"> <p><br /> <label> Twitter Username: <input name="t_user" type="text" id="t_user"> </label> </p> <p><br /> <label>Twitter Password: <input name="t_pass" type="password" id="t_pass"> </label> </p> <p><br /> <label>Your status:</label> </p> <br /> <p> <textarea name="t_update" cols="50" rows="5" id="t_update" ></textarea> </p> <p><br /> <label> <input type="submit" name="Submit" value="Post To Your Twitter Account!"> </label> </p> </form> </div><!--End Form--> <div id="quote2"><!--Start Quote2--> <center><p>NOTE: We aren't storing your passwords in any way. If you want to try this then go ahead without hesitation!</p></center> </div><!--End Quote2--> </body> </html> You might have noticed that I have already attached the form action attribute to the post-to-twitter.php file. The CSS styling for this form goes below: body { background-color:#fff; font-size:0.825em; font-family:Arial, Helvetica, sans-serif; } #quote1 { margin-left:300px; margin-right:300px; border-style:solid; border-width:2px; border-color:#74DF00; background-color:#EFEFD7; line-height: 10px; } #quote2 { margin-left:300px; margin-right:300px; border-style:solid; border-width:2px; border-color:#74DF00; background-color:#EFEFD7; line-height: 10px; } h1{ padding:30px 0; text-align:center; text-shadow:0 1px 1px white; margin-bottom:30px; background-color:#f8f8f8; font-size:35px; } label{ text-shadow:0 1px 1px white; font-size:18px; } This is what we have made till now:
SPICING THE FORM USING JQUERYIn the screenshot above, you may have seen that textboxes have a different style (when they are inactive) and this style can be brought using JQuery. The textboxes will have a different style or will be highlighted when they are active or when someone clicks on them. Just punch in the code below into the index.html file’s head and you are good to go! <script type="text/javascript" src="http://jqueryjs.googlecode.com/files/jquery-1.3.js"></script> <script type="text/javascript"> $(document).ready(function() { $('input[type="text"]').addClass("idleField"); $('input[type="text"]').focus(function(){ $(this).removeClass("idleField").addClass("focusField"); if (this.value == this.defaultValue){ this.value = ''; } if(this.value != this.defaultValue){ this.select(); } }); $('input[type="password"]').addClass("idleField"); $('input[type="password"]').focus(function(){ $(this).removeClass("idleField").addClass("focusField"); if (this.value == this.defaultValue){ this.value = ''; } if(this.value != this.defaultValue){ this.select(); } }); $('textarea').addClass("idleField"); $('textarea').focus(function(){ $(this).removeClass("idleField").addClass("focusField"); if (this.value == this.defaultValue){ this.value = ''; } if(this.value != this.defaultValue){ this.select(); } }); $('input[type="text"]').blur(function(){ $(this).removeClass("focusField").addClass("idleField"); if ($.trim(this.value == '')){ this.value = (this.defaultValue ? this.defaultValue : ''); } }); $('input[type="password"]').blur(function(){ $(this).removeClass("focusField").addClass("idleField"); if ($.trim(this.value == '')){ this.value = (this.defaultValue ? this.defaultValue : ''); } }); $('textarea').blur(function(){ $(this).removeClass("focusField").addClass("idleField"); if ($.trim(this.value == '')){ this.value = (this.defaultValue ? this.defaultValue : ''); } }); }); </script> And add the following code to style.css: .focusField { border:solid 2px #73A6FF; background:#EFF5FF; color:#000; } .idleField { background:#EEE; color: #6F6F6F; border: solid 2px #DFDFDF; } Now you’ll have styled text-boxes on the form. The .focusfield describes the style of an active text field & .idlefield describes the style of an inactive field. ADDING THE CHARACTER COUNT & LIMITWe all know that Twitter has a character limit of 140. Personally, I don’t like the limit but we have to accept the reality! So to make our PHP Application a little realistic we need to add the character count & then limit it to 140. This can easily be done using Javascript. To do so, add the following code snippet to the head of your Index (Index.html) file: <script type="text/javascript" src="http://ajax.googleapis.com/ ajax/libs/jquery/1.4.2/jquery.min.js"></script> <script type="text/javascript"> $(document).ready(function() { $("#t_update").keyup(function() { var box=$(this).val(); var main = box.length *100; var value= (main / 140); var count= 140 - box.length; if(box.length <= 140) { $('#count').html(count); $('#bar').animate( { "width": value+'%', }, 1); } else { alert('Character Limit Exceeded!'); ; } return false; }); }); </script> You might have noticed in the code above that whenever the character limit of 140 is exceeded, you’ll see a message box saying “Character Limit Exceeded!”: <pre>{ alert('Character Limit Exceeded!'); ; } Now add the code below right after “Your Status” and before the status text-box on the HTML form in the Index.html file: <div align="left" id="character-count"><!--Start Character Count--> <div id="count">140</div> <div id="barbox"><div id="bar"></div></div> </div><!--End Character Count--> To avoid any confusions on the placement of the above code-snippet in the body of the index.html page, I have pasted the whole code inside the body tag below: <body> <h1><span id="header">Updating Twitter Using PHP</span></h1> <div id="quote1"><!--Start Quote1--> <center><p> Learn to send updates to Twitter using its API + PHP! </p></center> </div><!--End Quote1--> <div id="form" align="center"><!--Start Form--> <form name="form1" method="post" action="post-to-twitter.php"> <p><br /> <label> Twitter Username: <input name="t_user" type="text" id="t_user"> </label> </p> <p><br /> <label>Twitter Password: <input name="t_pass" type="password" id="t_pass"> </label> </p> <p><br /> <label>Your status:</label> </p> <p> <div align="left" id="character-count"> <div id="count">140</div> <div id="barbox"><div id="bar"></div></div> </div> </p> <br /> <p> <textarea name="t_update" cols="50" rows="5" id="t_update" ></textarea> </p> <p><br /> <label> <input type="submit" name="Submit" value="Post To Your Twitter Account!"> </label> </p> </form> </div><!--End Form--> <div id="quote2"><!--Start Quote2--> <center><p>NOTE: We aren't storing your passwords in any way. If you want to try this then go ahead without hesitation!</p></center> </div><!--End Quote2--> </body> Now we’ll style the character-count so add the following code to the style.css file: #bar { background-color:#5fbbde; width:0px; height:16px; } #barbox { float:right; height:16px; background-color:#FFFFFF; width:100px; border:solid 2px #000; margin-right:3px; -webkit-border-radius:5px;-moz-border-radius:5px; } #count { float:right; margin-right:8px; font-family:'Georgia', Times New Roman, Times, serif; font-size:16px; font-weight:bold; color:#666666 } #contentbox { width:450px; height:50px; border:solid 2px #006699; font-family:Arial, Helvetica, sans-serif; font-size:14px; } #character-count { margin-right:540px; } So now we have something like this:
BRINGING LIFE TO OUR APPLICATION WITH PHPWe have almost completed making the script now. All we have to do is to add some code to the post-to-twitter.php file and that’s it! Add the following code to the post-to-twitter.php file: <?php $username = ($_POST['t_user']); $password = ($_POST['t_pass']); $message = ($_POST['t_update']); $url = 'http://twitter.com/statuses/update.xml'; $curl_handle = curl_init(); curl_setopt($curl_handle, CURLOPT_URL, "$url"); curl_setopt($curl_handle, CURLOPT_CONNECTTIMEOUT, 2); curl_setopt($curl_handle, CURLOPT_RETURNTRANSFER, 1); curl_setopt($curl_handle, CURLOPT_POST, 1); curl_setopt($curl_handle, CURLOPT_POSTFIELDS, "status=$message"); curl_setopt($curl_handle, CURLOPT_USERPWD, "$username:$password"); $buffer = curl_exec($curl_handle); curl_close($curl_handle); if (empty($buffer)) { echo "<p align=\"center\" >".'Sorry, due to an error your Twitter status could not be updated! Please check your username/password!'."</p>"; } else { echo "<p align=\"center\">".'Your Twitter status has successfully been updated!'."</p>"; } ?> You might have noticed the way we are passing the values entered in the text boxes to this PHP script. We had assigned id’s to the textboxes in our HTML script. We are now just importing the values entered in the text boxes with those id’s and assigning them a variable: $username = ($_POST['t_user']); $password = ($_POST['t_pass']); $message = ($_POST['t_update']); And then we just contact Twitter through the following code: $url = 'http://twitter.com/statuses/update.xml'; $curl_handle = curl_init(); curl_setopt($curl_handle, CURLOPT_URL, "$url"); Now we firstly login the user with the username & password provided and then update the user’s status time-line with the status message entered in the Status box. Finally we display the confirmation message: if (empty($buffer)) { <pre> echo "<p align=\"center\" >".'Sorry, due to an error your Twitter status could not be updated! Please check your username/password!'."</p>"; } else { echo "<p align=\"center\">".'Your Twitter status has successfully been updated!'."</p>"; } Now to style our output a little bit we just attach a stylesheet to the script and add a Back button to it. So here is our final code in the post-to-twitter.php file: <html> <head> <title>Twitter-Post Confirmation</title> <link href="css/style-php.css" rel="stylesheet" type="text/css"> </head> <body> <?php $username = ($_POST['t_user']); $password = ($_POST['t_pass']); $message = ($_POST['t_update']); $url = 'http://twitter.com/statuses/update.xml'; $curl_handle = curl_init(); curl_setopt($curl_handle, CURLOPT_URL, "$url"); curl_setopt($curl_handle, CURLOPT_CONNECTTIMEOUT, 2); curl_setopt($curl_handle, CURLOPT_RETURNTRANSFER, 1); curl_setopt($curl_handle, CURLOPT_POST, 1); curl_setopt($curl_handle, CURLOPT_POSTFIELDS, "status=$message"); curl_setopt($curl_handle, CURLOPT_USERPWD, "$username:$password"); $buffer = curl_exec($curl_handle); curl_close($curl_handle); if (empty($buffer)) { echo "<p align=\"center\" >".'Sorry, due to an error your Twitter status could not be updated! Please check your username/password!'."</p>"; } else { echo "<p align=\"center\">".'Your Twitter status has successfully been updated!'."</p>"; } ?> <div id="history"><!--Start History--> <a href="javascript:history.back()">Back to the previous page</a> </div><!--End History--> </body> </html> The stylesheet for this php file is named “style-php.css” and includes the following code: @charset "utf-8"; /* CSS Document */ body { font-size:24px; vertical-align:middle; text-align:center; text-decoration:underline; margin-top: 150px; } That’s it! We have successfully made our PHP script using which we can update our Twitter account’s remotely. There are numerous things you can do with the above application. You may use it onto your next project related to twitter or integrate this to your blog to directly post updates of new posts to Twitter without even using external services like Twitterfeed or FeedBurner or any other plugins! If you have any questions, comments or concerns then feel free to leave a comment :)
|


| You are subscribed to email updates from Graphic and Web Design Blog To stop receiving these emails, you may unsubscribe now. | Email delivery powered by Google |
| Google Inc., 20 West Kinzie, Chicago IL USA 60610 | |
0 comments:
Post a Comment